Drill Chuck Arbor |
| Collet Adapters |
|
|
|
|
|
|
Your machine includes an
Tip: For a permanent installation, chill the arbor in the freezer for 15 minutes before performing the following procedure. The taper will expand as it returns to room temperature, permanently locking the chuck.
To install the drill chuck onto the arbor:
1.Clean the grease off the drill chuck and all taper mating surfaces. Pay particular atten- tion to the MT#3 bore in the drill
2.Retract the drill chuck jaws fully by turning the body of the drill chuck counterclockwise.
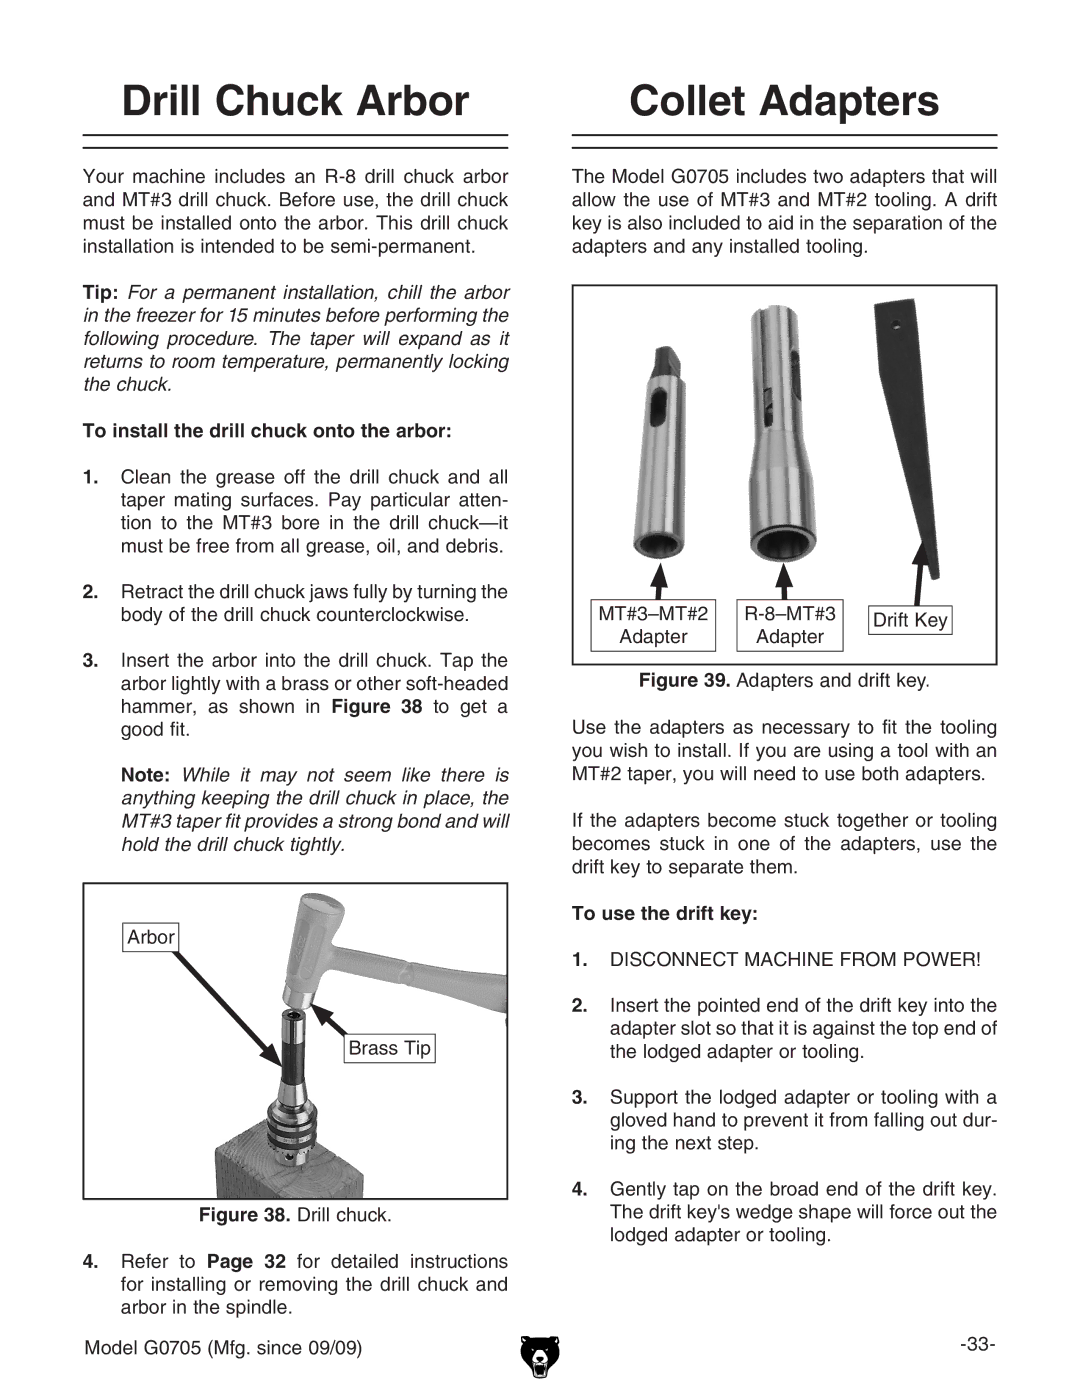
3.Insert the arbor into the drill chuck. Tap the arbor lightly with a brass or other
Note: While it may not seem like there is anything keeping the drill chuck in place, the MT#3 taper fit provides a strong bond and will hold the drill chuck tightly.
Arbor
Brass Tip
Figure 38. Drill chuck.
4.Refer to Page 32 for detailed instructions for installing or removing the drill chuck and arbor in the spindle.
Model G0705 (Mfg. since 09/09)
The Model G0705 includes two adapters that will allow the use of MT#3 and MT#2 tooling. A drift key is also included to aid in the separation of the adapters and any installed tooling.
|
|
|
| |
|
| Drift Key | ||
Adapter |
| Adapter |
| |
|
|
| ||
|
|
| ||
|
|
|
|
|
Figure 39. Adapters and drift key.
Use the adapters as necessary to fit the tooling you wish to install. If you are using a tool with an MT#2 taper, you will need to use both adapters.
If the adapters become stuck together or tooling becomes stuck in one of the adapters, use the drift key to separate them.
To use the drift key:
1.DISCONNECT MACHINE FROM POWER!
2.Insert the pointed end of the drift key into the adapter slot so that it is against the top end of the lodged adapter or tooling.
3.Support the lodged adapter or tooling with a gloved hand to prevent it from falling out dur- ing the next step.
4.Gently tap on the broad end of the drift key. The drift key's wedge shape will force out the lodged adapter or tooling.
