2.DISCONNECT LATHE FROM POWER!
3.Remove the chuck or faceplate and the change gear door.
4.Engage a feed direction gear with the out- bound spindle gear to keep the spindle from turning.
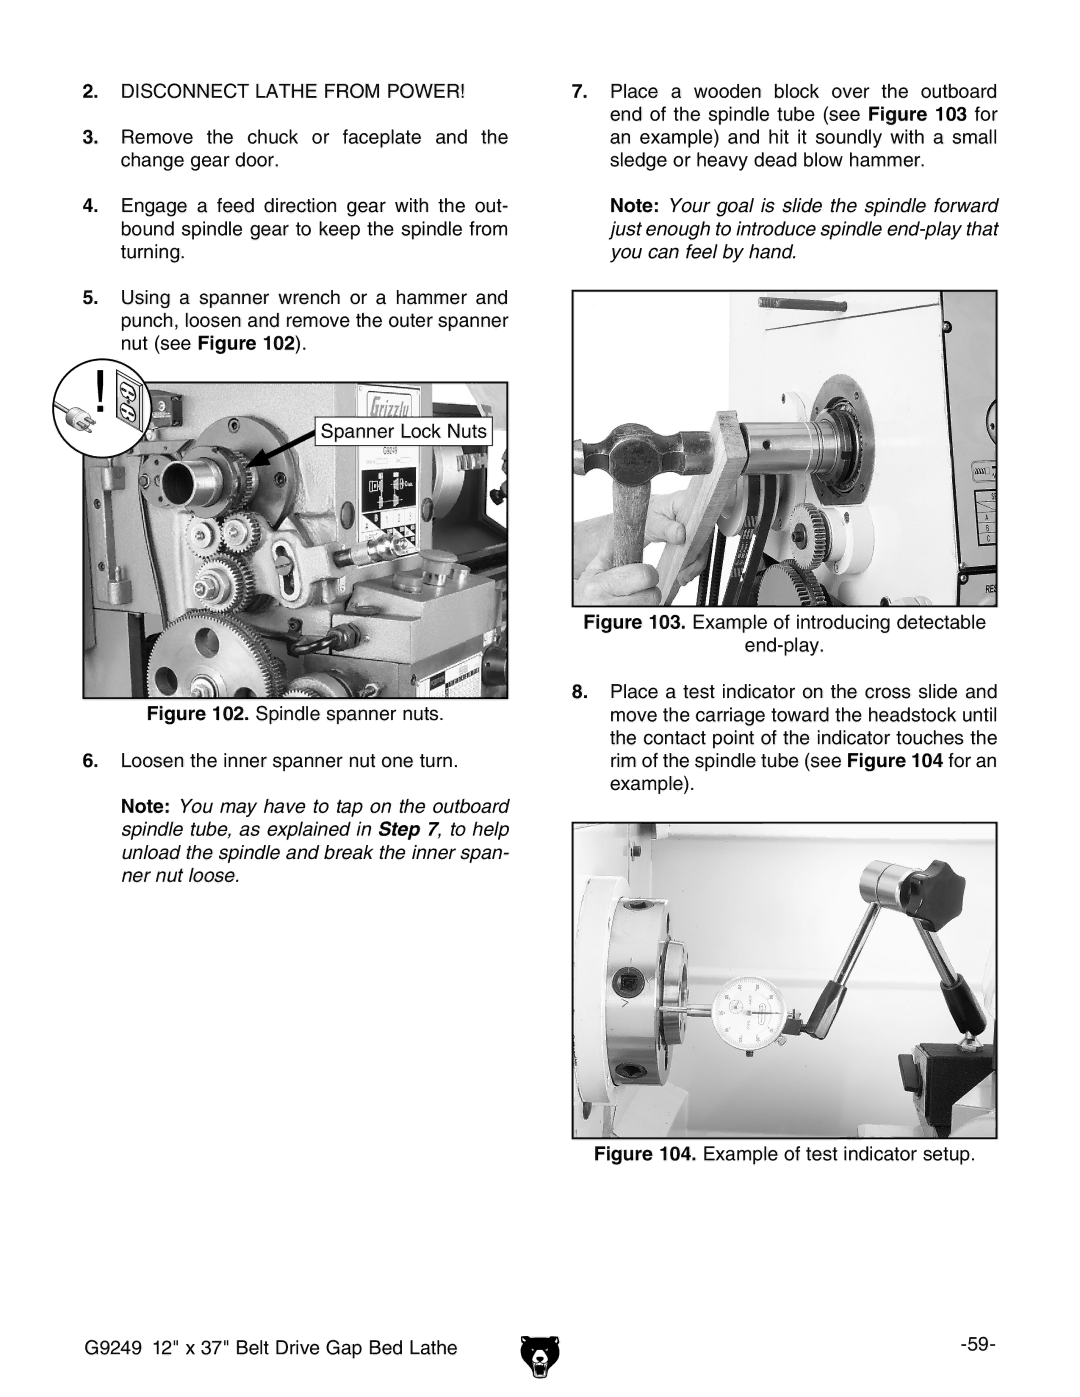
5.Using a spanner wrench or a hammer and punch, loosen and remove the outer spanner nut (see Figure 102).
Spanner Lock Nuts
Figure 102. Spindle spanner nuts.
6.Loosen the inner spanner nut one turn.
Note: You may have to tap on the outboard spindle tube, as explained in Step 7, to help unload the spindle and break the inner span- ner nut loose.
7.Place a wooden block over the outboard end of the spindle tube (see Figure 103 for an example) and hit it soundly with a small sledge or heavy dead blow hammer.
Note: Your goal is slide the spindle forward just enough to introduce spindle
Figure 103. Example of introducing detectable
end-play.
8.Place a test indicator on the cross slide and move the carriage toward the headstock until the contact point of the indicator touches the rim of the spindle tube (see Figure 104 for an example).
Figure 104. Example of test indicator setup.
G9249 12" x 37" Belt Drive Gap Bed Lathe |
