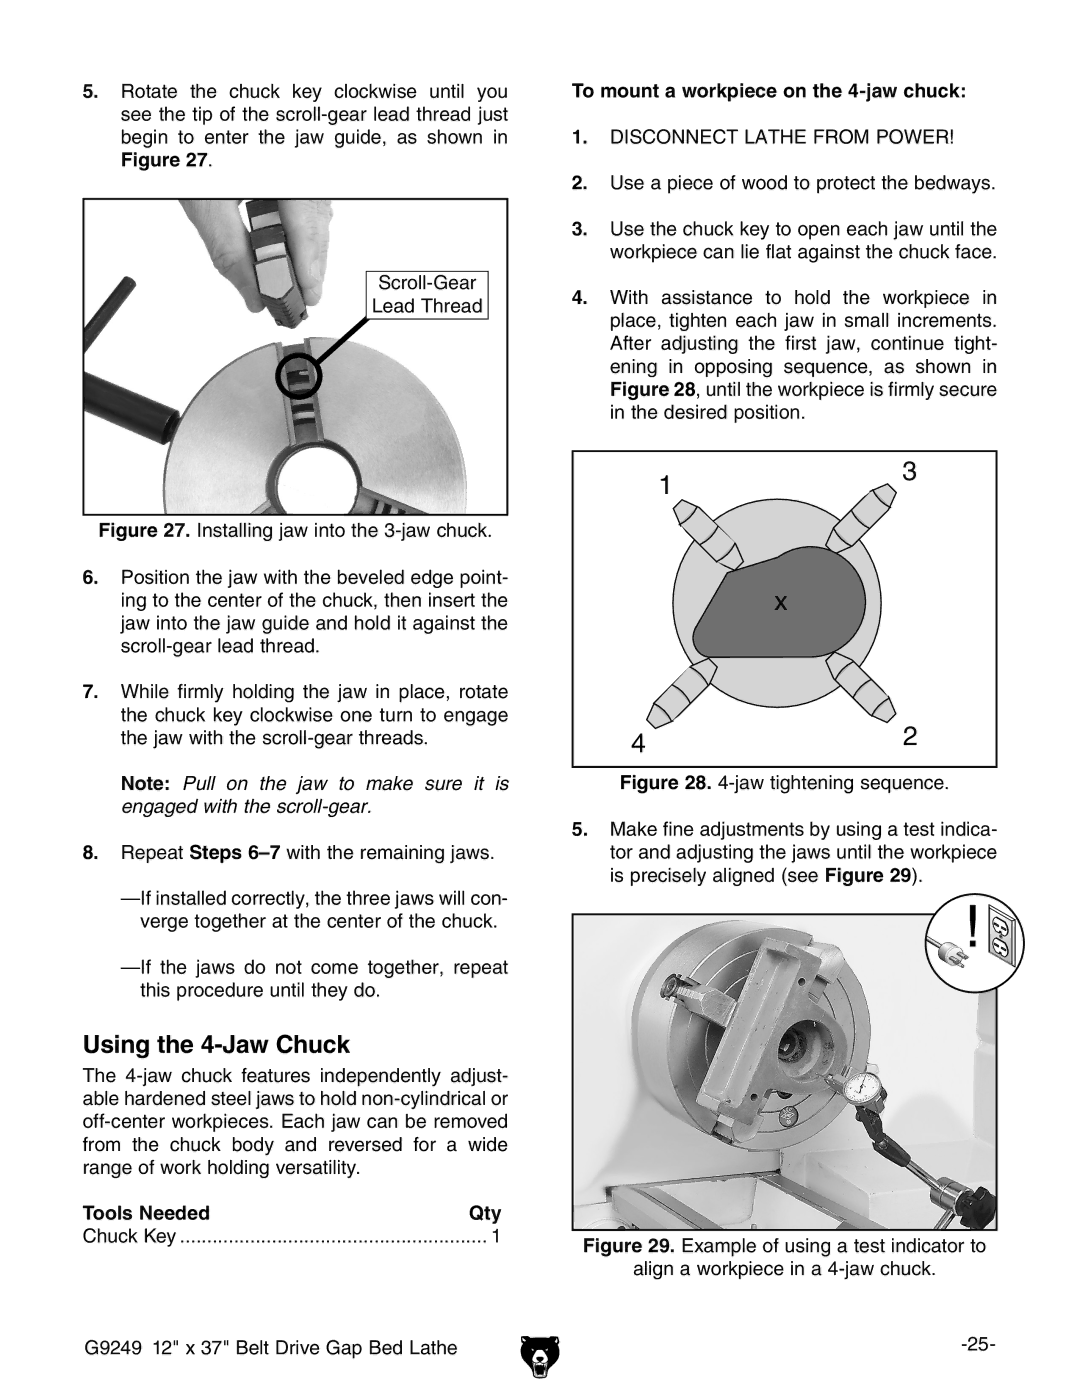
5.Rotate the chuck key clockwise until you see the tip of the
Figure 27.
Lead Thread
Figure 27. Installing jaw into the 3-jaw chuck.
6.Position the jaw with the beveled edge point- ing to the center of the chuck, then insert the jaw into the jaw guide and hold it against the scroll-gear lead thread.
7.While firmly holding the jaw in place, rotate the chuck key clockwise one turn to engage the jaw with the scroll-gear threads.
Note: Pull on the jaw to make sure it is engaged with the
8.Repeat Steps 6–7 with the remaining jaws.
—If installed correctly, the three jaws will con- verge together at the center of the chuck.
—If the jaws do not come together, repeat this procedure until they do.
Using the 4-Jaw Chuck
The
Tools Needed | Qty |
Chuck Key | 1 |
G9249 12" x 37" Belt Drive Gap Bed Lathe
To mount a workpiece on the 4-jaw chuck:
1.DISCONNECT LATHE FROM POWER!
2.Use a piece of wood to protect the bedways.
3.Use the chuck key to open each jaw until the workpiece can lie flat against the chuck face.
4.With assistance to hold the workpiece in place, tighten each jaw in small increments. After adjusting the first jaw, continue tight- ening in opposing sequence, as shown in Figure 28, until the workpiece is firmly secure in the desired position.
&(
m
)'