Grizzly w1702 instruction manual Hold-Downs, Handwheel, To install the hold-downs, do these steps

Models: w1702

1 56
Download 56 pages 27.24 Kb
Page 15
Image 15

Hold-down

Bracket

Figure 15. Assembling hold-down mechanism.

Figure 16. Assembled hold-down mechanism.

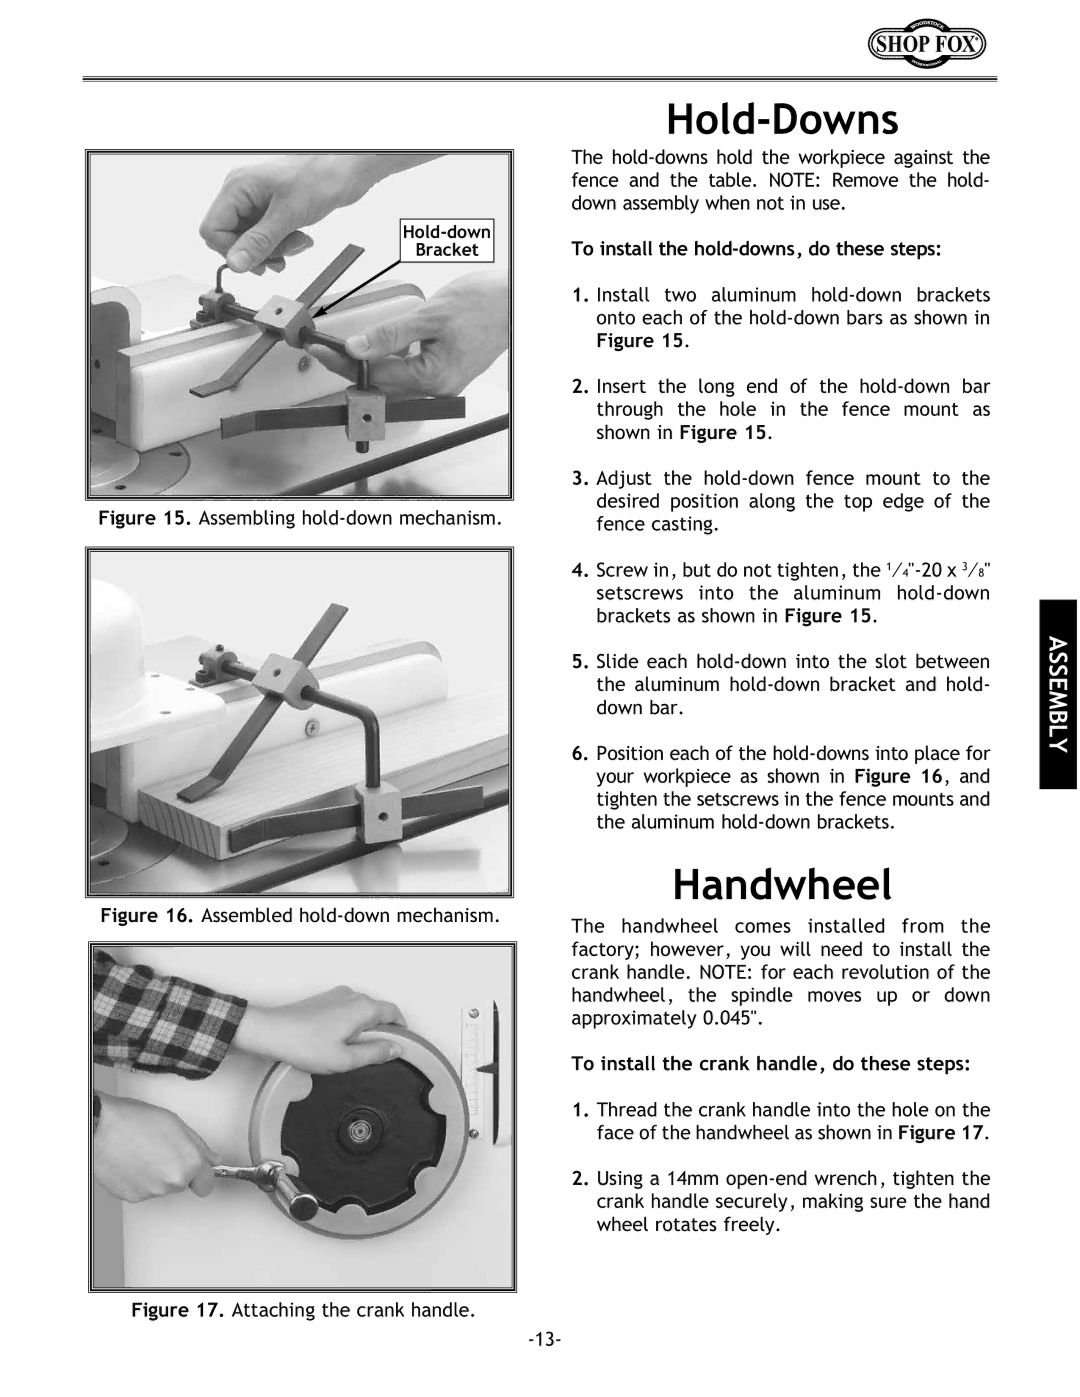
Figure 17. Attaching the crank handle.

Hold-Downs

The hold-downs hold the workpiece against the fence and the table. NOTE: Remove the hold- down assembly when not in use.

To install the hold-downs, do these steps:

1.Install two aluminum hold-down brackets onto each of the hold-down bars as shown in

Figure 15.

2.Insert the long end of the hold-down bar through the hole in the fence mount as shown in Figure 15.

3.Adjust the hold-down fence mount to the desired position along the top edge of the fence casting.

4.Screw in, but do not tighten, the 14"-20 x 38" setscrews into the aluminum hold-down brackets as shown in Figure 15.

5.Slide each hold-down into the slot between the aluminum hold-down bracket and hold- down bar.

6.Position each of the hold-downs into place for your workpiece as shown in Figure 16, and tighten the setscrews in the fence mounts and the aluminum hold-down brackets.

Handwheel

The handwheel comes installed from the factory; however, you will need to install the crank handle. NOTE: for each revolution of the handwheel, the spindle moves up or down approximately 0.045".

To install the crank handle, do these steps:

1.Thread the crank handle into the hole on the face of the handwheel as shown in Figure 17.

2.Using a 14mm open-end wrench, tighten the crank handle securely, making sure the hand wheel rotates freely.

-13-

ASSEMBLY

Page 15
Image 15
Grizzly w1702 instruction manual Hold-Downs, Handwheel, To install the hold-downs, do these steps