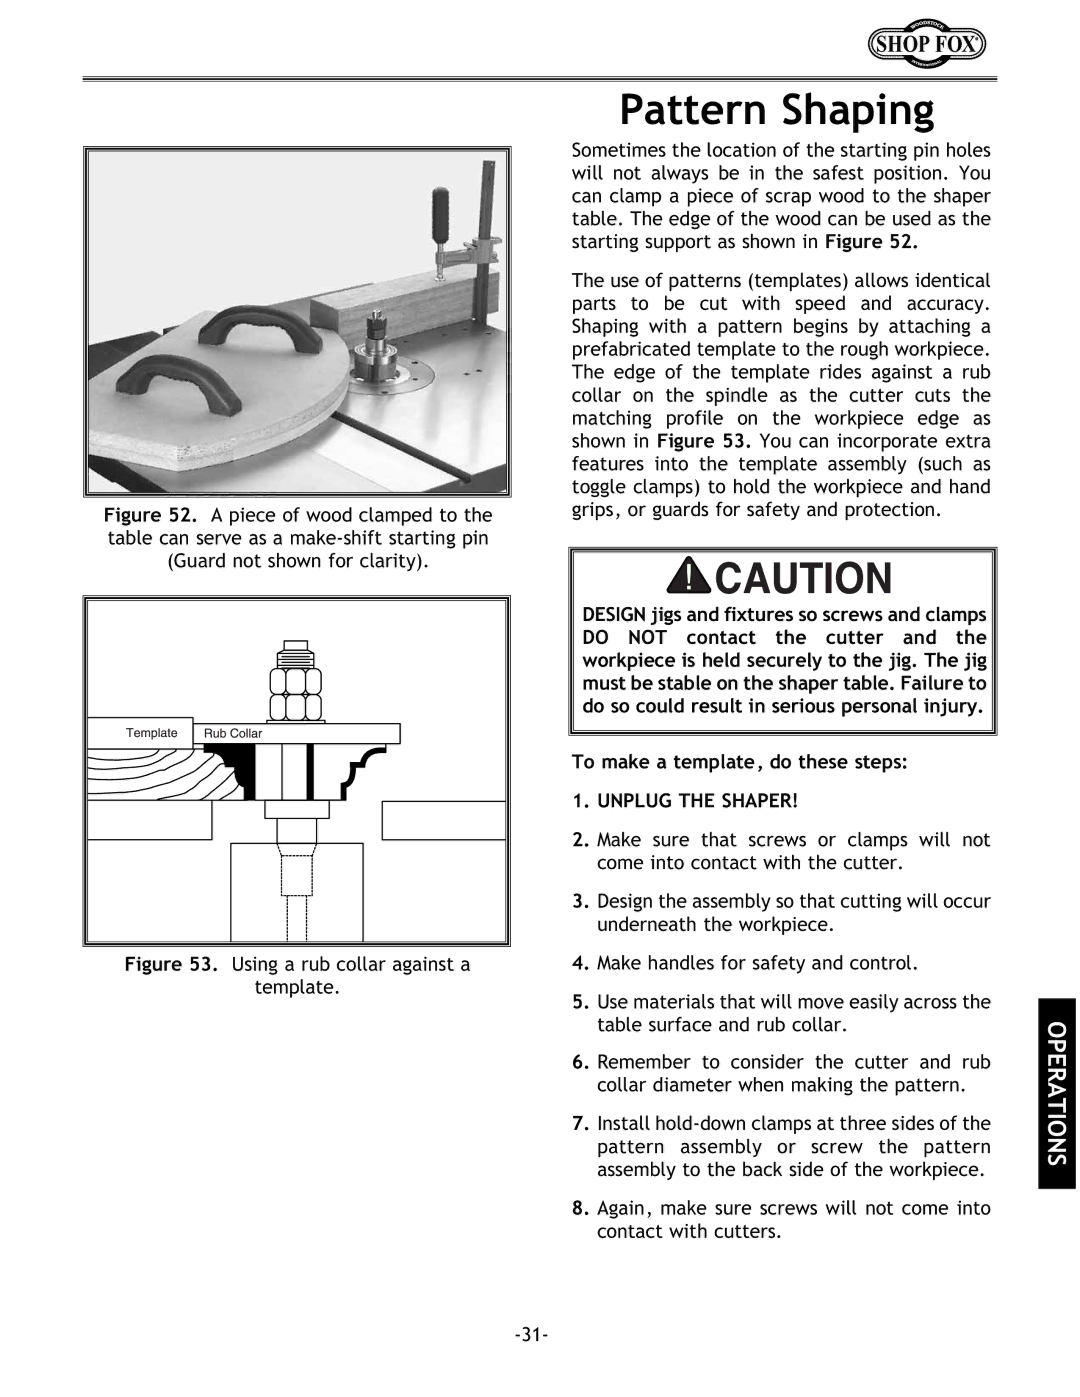
Figure 52. A piece of wood clamped to the table can serve as a make-shift starting pin (Guard not shown for clarity).
Figure 53. Using a rub collar against a
template.
Pattern Shaping
Sometimes the location of the starting pin holes will not always be in the safest position. You can clamp a piece of scrap wood to the shaper table. The edge of the wood can be used as the starting support as shown in Figure 52.
The use of patterns (templates) allows identical parts to be cut with speed and accuracy. Shaping with a pattern begins by attaching a prefabricated template to the rough workpiece. The edge of the template rides against a rub collar on the spindle as the cutter cuts the matching profile on the workpiece edge as shown in Figure 53. You can incorporate extra features into the template assembly (such as toggle clamps) to hold the workpiece and hand grips, or guards for safety and protection.
DESIGN jigs and fixtures so screws and clamps DO NOT contact the cutter and the workpiece is held securely to the jig. The jig must be stable on the shaper table. Failure to do so could result in serious personal injury.
To make a template, do these steps:
1.UNPLUG THE SHAPER!
2.Make sure that screws or clamps will not come into contact with the cutter.
3.Design the assembly so that cutting will occur underneath the workpiece.
4.Make handles for safety and control.
5.Use materials that will move easily across the table surface and rub collar.
6.Remember to consider the cutter and rub collar diameter when making the pattern.
7.Install
8.Again, make sure screws will not come into contact with cutters.
