OPERATIONS
Freehand Shaping
Freehand shaping is shaping without the aid of the miter slot or fence. The most dangerous part of shaping freehand is beginning the cut, where the cutter first contacts the workpiece. Often the workpiece will tend to jerk or kickback, catching the operator off guard.
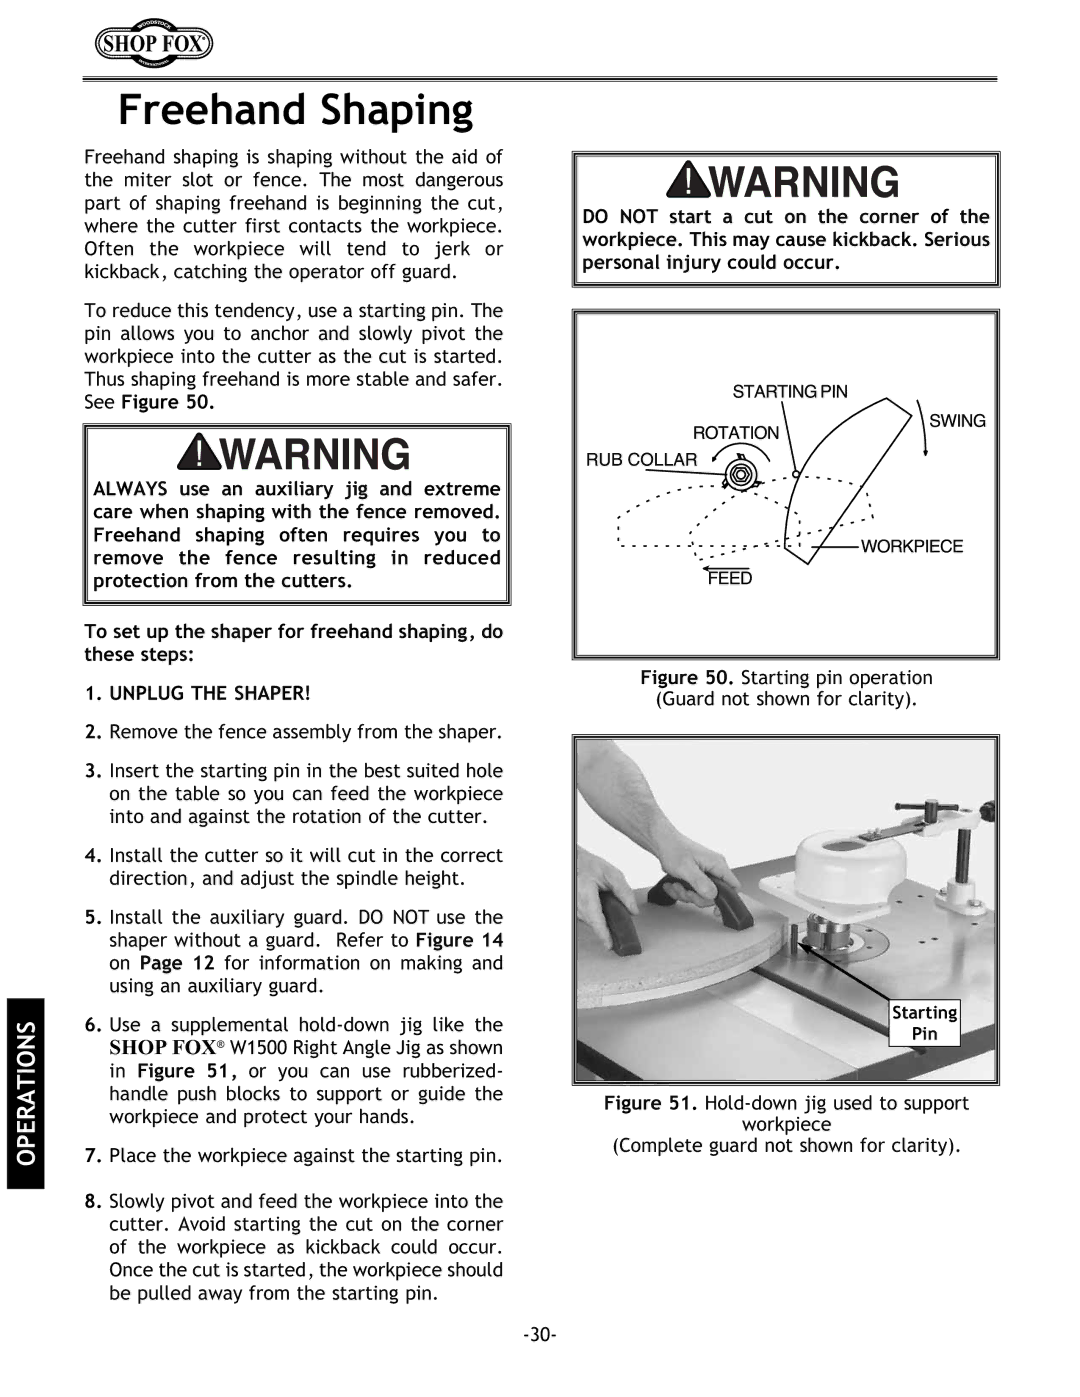
To reduce this tendency, use a starting pin. The pin allows you to anchor and slowly pivot the workpiece into the cutter as the cut is started. Thus shaping freehand is more stable and safer. See Figure 50.
ALWAYS use an auxiliary jig and extreme care when shaping with the fence removed. Freehand shaping often requires you to remove the fence resulting in reduced protection from the cutters.
To set up the shaper for freehand shaping, do these steps:
1.UNPLUG THE SHAPER!
2.Remove the fence assembly from the shaper.
3.Insert the starting pin in the best suited hole on the table so you can feed the workpiece into and against the rotation of the cutter.
4.Install the cutter so it will cut in the correct direction, and adjust the spindle height.
5.Install the auxiliary guard. DO NOT use the shaper without a guard. Refer to Figure 14 on Page 12 for information on making and using an auxiliary guard.
6.Use a supplemental
7.Place the workpiece against the starting pin.
8.Slowly pivot and feed the workpiece into the cutter. Avoid starting the cut on the corner of the workpiece as kickback could occur. Once the cut is started, the workpiece should be pulled away from the starting pin.
DO NOT start a cut on the corner of the workpiece. This may cause kickback. Serious personal injury could occur.
Figure 50. Starting pin operation
(Guard not shown for clarity).
Starting
Pin
