SUPREME-P-I30AU, SUPREME-N-I30AU specifications
The Heat & Glo LifeStyle SUPREME-P-I30AU and SUPREME-N-I30AU are premium gas fireplaces designed to create a cozy, inviting atmosphere while offering modern technological features and exceptional performance. These units are perfect additions to any home, blending elegance with practicality.One of the standout features of the SUPREME series is its versatile design. The fireplaces are available in both linear and traditional styles, allowing homeowners to choose the configuration that best complements their living space. With a sleek, modern aesthetic, the SUPREME-P-I30AU offers a panoramic view of the flames, making it a captivating focal point in any room.
These models are equipped with advanced heating capabilities. The powerful heat output ensures that the fireplace can effectively warm spaces ranging from medium to large. Homeowners can enjoy optimal comfort during the colder months, knowing they have a reliable source of heat at their disposal.
Another key characteristic is the innovative IntelliFire technology, which automates the ignition system and monitors the flame to ensure safe and efficient operation. This feature not only enhances the user experience but also minimizes energy consumption by allowing the unit to alternate between different flame settings based on the home's heating needs.
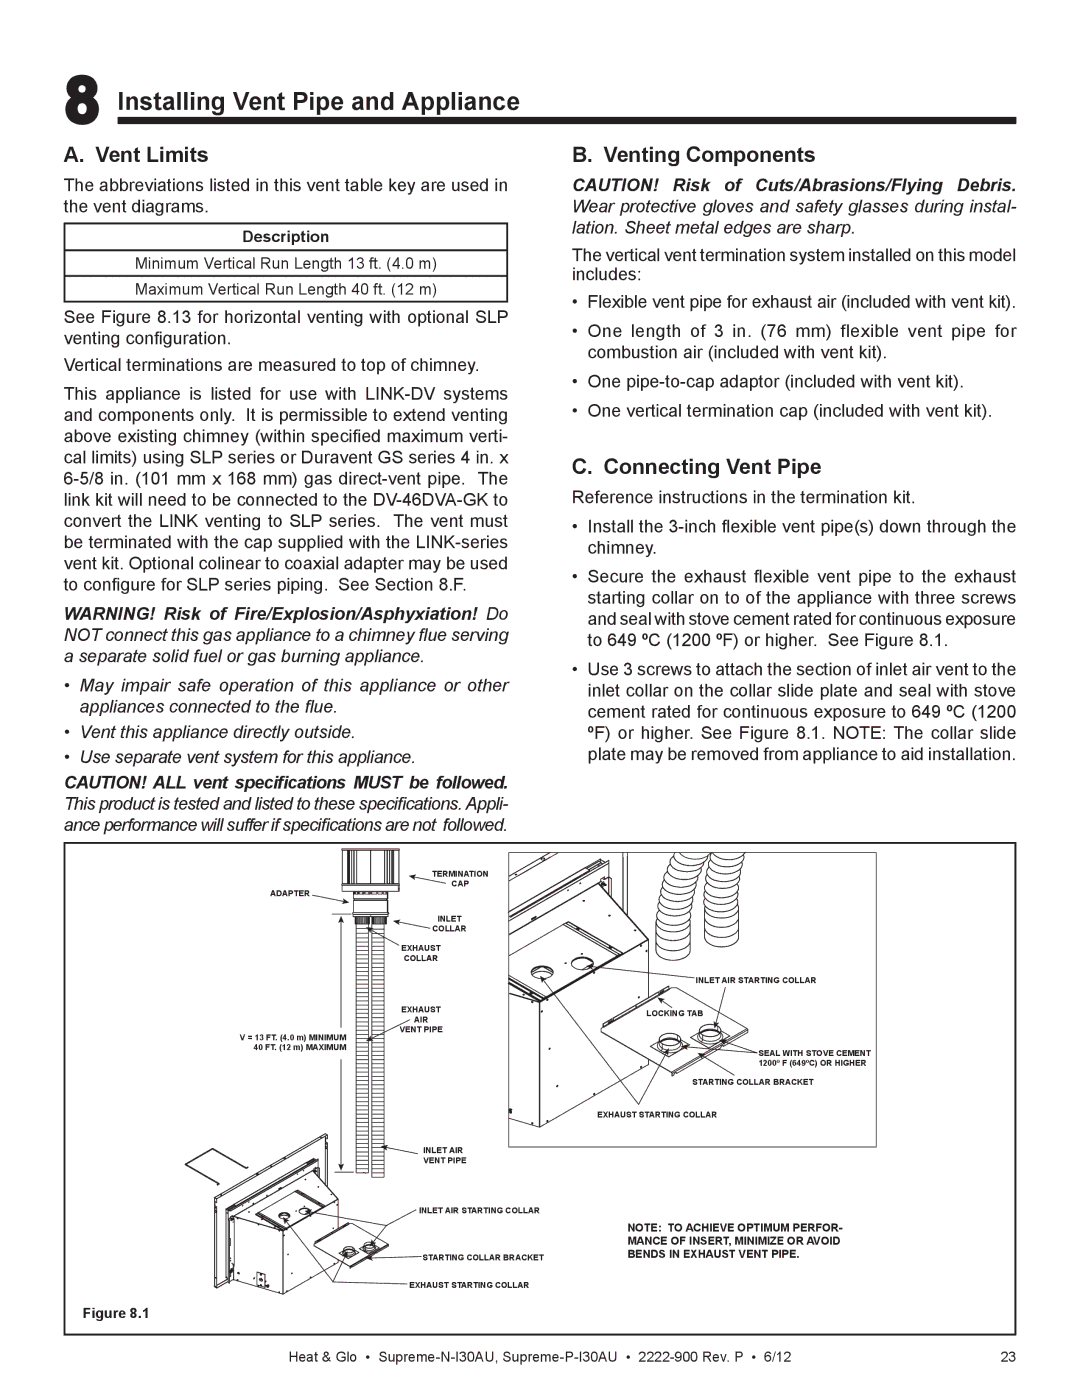
Installation is made easy with the SUPREME series, thanks to its flexible venting options. The fireplaces can be vented either vertically or horizontally, making them suitable for various home layouts. Additionally, the units are designed for easy access to components, simplifying maintenance and ensuring longevity.
Both the SUPREME-P-I30AU and SUPREME-N-I30AU come with a range of aesthetic options for customization, including different media choices such as logs, glass, and stones. This allows users to tailor the appearance of their fireplace to match their personal style and home décor.
Safety features are paramount in the design of the SUPREME series. The fireplaces include advanced safety controls and thermal sensors to prevent overheating and ensure peace of mind for users.
In summary, the Heat & Glo LifeStyle SUPREME-P-I30AU and SUPREME-N-I30AU stand out due to their stylish designs, powerful heating capabilities, innovative technologies, and customizable options, making them ideal choices for anyone looking to enhance their home with a functional and aesthetically pleasing gas fireplace.

