E. Tube Channel Assembly Replacement
Removing Tube Channel Assembly
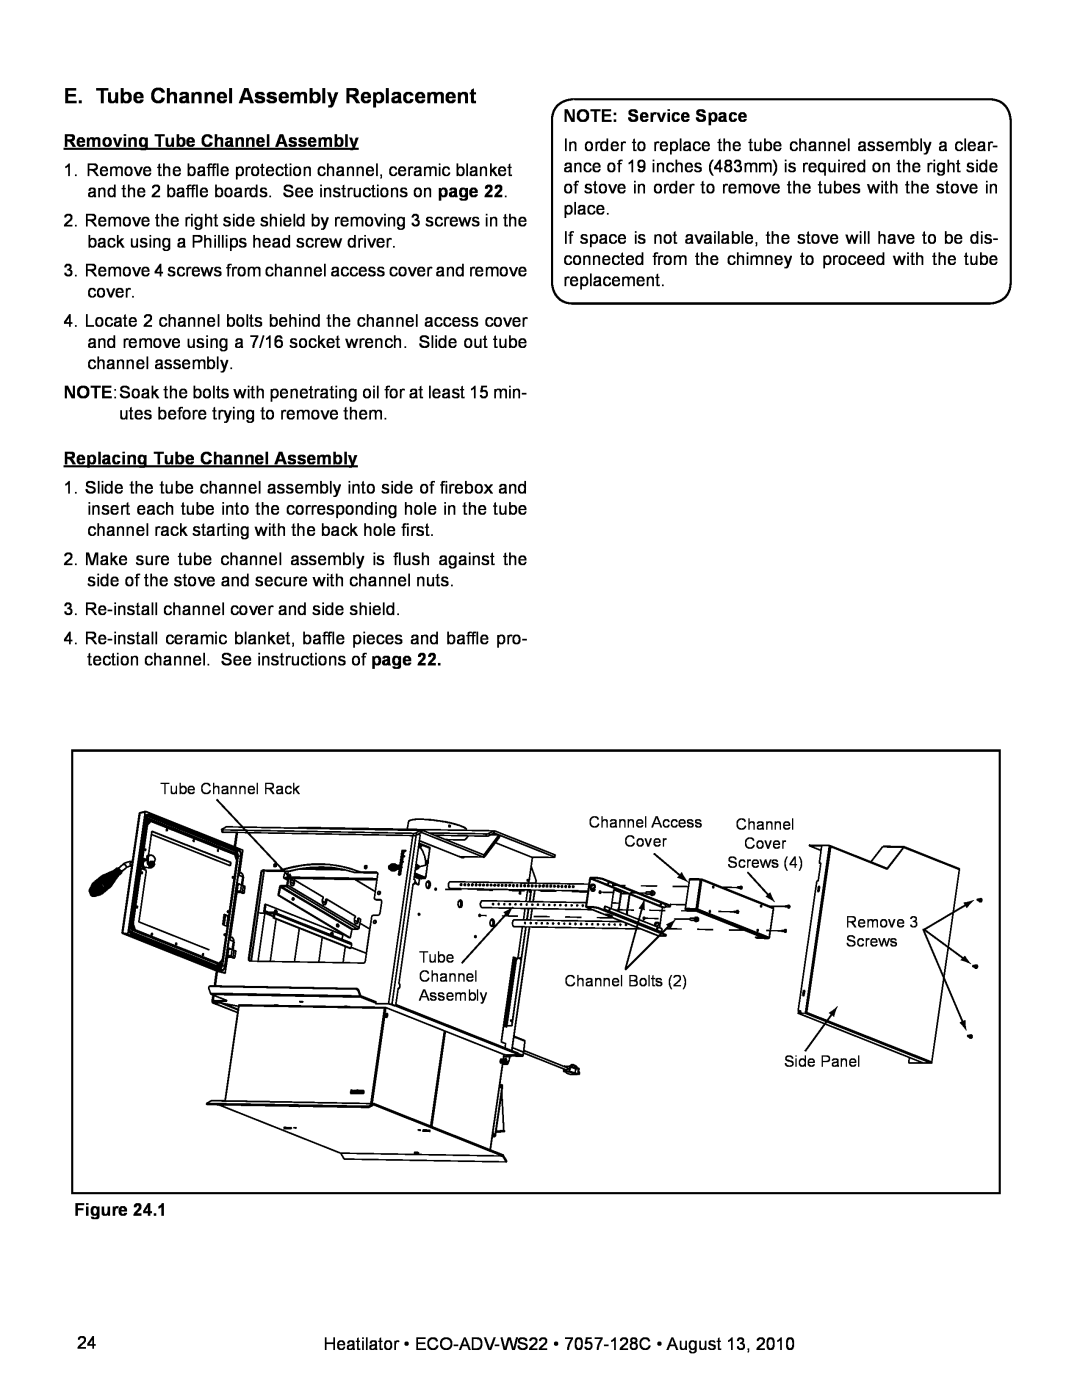
1.Remove the baffle protection channel, ceramic blanket and the 2 baffle boards. See instructions on page 22.
2.Remove the right side shield by removing 3 screws in the back using a Phillips head screw driver.
3.Remove 4 screws from channel access cover and remove cover.
4.Locate 2 channel bolts behind the channel access cover and remove using a 7/16 socket wrench. Slide out tube channel assembly.
NOTE:Soak the bolts with penetrating oil for at least 15 min- utes before trying to remove them.
Replacing Tube Channel Assembly
1.Slide the tube channel assembly into side of firebox and insert each tube into the corresponding hole in the tube channel rack starting with the back hole first.
2.Make sure tube channel assembly is flush against the side of the stove and secure with channel nuts.
3.
4.
NOTE: Service Space
In order to replace the tube channel assembly a clear- ance of 19 inches (483mm) is required on the right side of stove in order to remove the tubes with the stove in place.
If space is not available, the stove will have to be dis- connected from the chimney to proceed with the tube replacement.
Tube Channel Rack |
|
|
| Channel Access | Channel |
| Cover | Cover |
|
| Screws (4) |
|
| Remove 3 |
Tube |
| Screws |
|
| |
Channel | Channel Bolts (2) |
|
Assembly |
|
|
|
| Side Panel |
Figure 24.1
24 | Heatilator • |