CONNECTION (continued)
Connecting Procedure (continued)
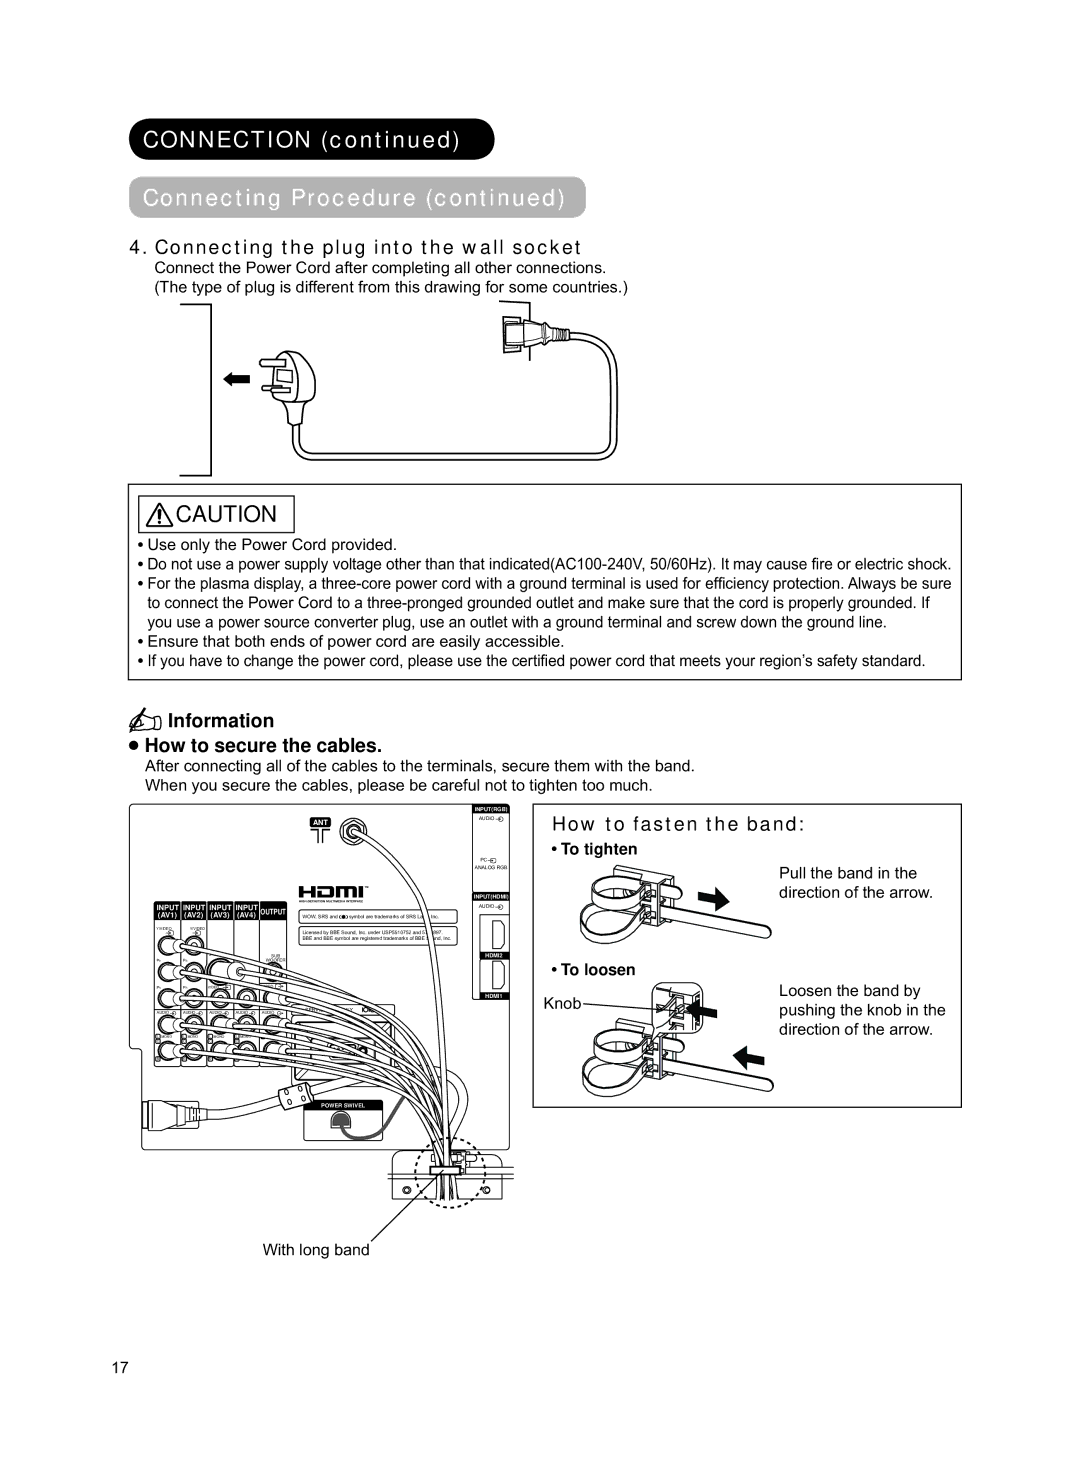
4. Connecting the plug into the wall socket
Connect the Power Cord after completing all other connections. (The type of plug is different from this drawing for some countries.)
![]()
![]() CAUTION
CAUTION
![]() Use only the Power Cord provided.
Use only the Power Cord provided.
![]() Do not use a power supply voltage other than that
Do not use a power supply voltage other than that
![]() For the plasma display, a
For the plasma display, a
![]() Ensure that both ends of power cord are easily accessible.
Ensure that both ends of power cord are easily accessible.
![]() If you have to change the power cord, please use the certifi ed power cord that meets your region’s safety standard.
If you have to change the power cord, please use the certifi ed power cord that meets your region’s safety standard.
 Information
 How to secure the cables.
After connecting all of the cables to the terminals, secure them with the band.
When you secure the cables, please be careful not to tighten too much.
INPUT(RGB)
ANT
AUDIO
PC![]()
How to fasten the band:
 To tighten
INPUT INPUT INPUT INPUT
(AV1) (AV2) (AV3) (AV4) OUTPUT
Y/VIDEO Y/VIDEO
|
|
| SUB | |
PB | PB |
|
| WOOFER |
PR | PR | VIDEO | VIDEO | VIDEO |
AUDIO | AUDIO | AUDIO | AUDIO | AUDIO |
L MONO | L MONO | L MONO | L MONO | L |
C | C | C | C |
|
ANALOG RGB
INPUT(HDMI)
AUDIO![]()
WOW, SRS and![]()
![]() symbol are trademarks of SRS Labs, Inc.
symbol are trademarks of SRS Labs, Inc.
Licensed by BBE Sound, Inc. under USP5510752 and 5736897.
BBE and BBE symbol are registered trademarks of BBE Sound, Inc.
HDMI2
HDMI1
SERVICE USE ONLY
 To loosen
Knob![]()
![]()
Pull the band in the direction of the arrow.
Loosen the band by pushing the knob in the direction of the arrow.
R R R R R
POWER SWIVEL
C
With long band
17
