General Maintenance
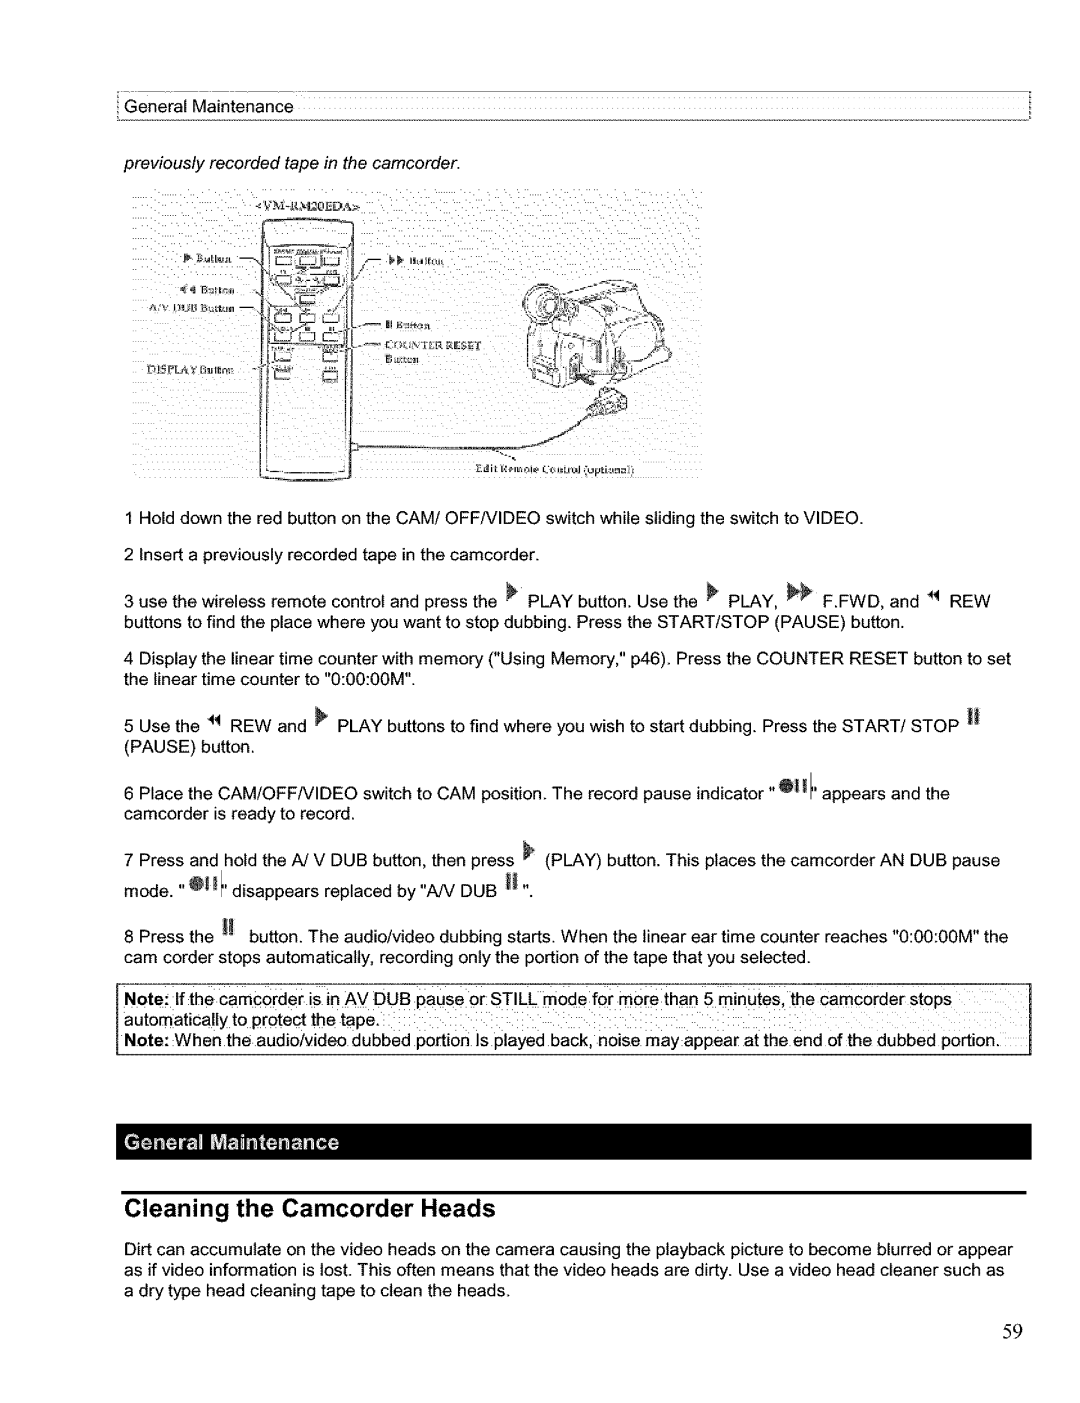
previously recorded tape in the camcorder.
%}.,
f.%;
f
S
1 Hold down the red button on the CAM! OFF/VIDEO switch while sliding the switch to VIDEO.
2 Insert a previously recorded tape in the camcorder.
3 use the wireless remote control and press the _ PLAY button. Use the _ PLAY, _ F.FWD, and _ REW buttons to find the place where you want to stop dubbing. Press the START/STOP (PAUSE) button.
4 Display the linear time counter with memory ("Using Memory," p46). Press the COUNTER RESET button to set the linear time counter to "0:00:00M".
5 Use the _ REW and _ PLAY buttons to find where you wish to start dubbing. Press the START/STOP _ (PAUSE) button.
6 Place the CAM!OFFNIDEO switch to CAM position. The record pause indicator "@ I'/appears and the camcorder is ready to record.
7 Press and hold the A/V DUB button, then press _ (PLAY) button. This places the camcorder AN DUB pause
mode. "@I' disappears replaced by "A/V DUB H ,,
8 Press | the _ button. The audio/video dubbing starts. When | the linear ear time counter reaches "0:00:00M" the |
|
cam corder stops automatically, recording only the portion of the tape that you selected. |
| ||
Notoi If | the CamC0rder is in Av DUE} PaUse or STILL mode for | mote than 5 minutes, the Camc0rder stops | 1 |
automatica!ly to protect the tape. |
|
| |
Note: When the aud o/v deo dubbed port on s payed back, no se may appear at the end of the dubbed port on. | l | ||
Cleaning the Camcorder Heads
Dirt can accumulate on the video heads on the camera causing the playback picture to become blurred or appear as if video information is lost. This often means that the video heads are dirty. Use a video head cleaner such as a dry type head cleaning tape to clean the heads.
59