5-10. Serial Number And Rating Label Location
The serial number and rating information for this product is located on back. Use rating label to determine input power requirements and/or rated output. For future reference, write serial number in space provided on back cover of this manual.
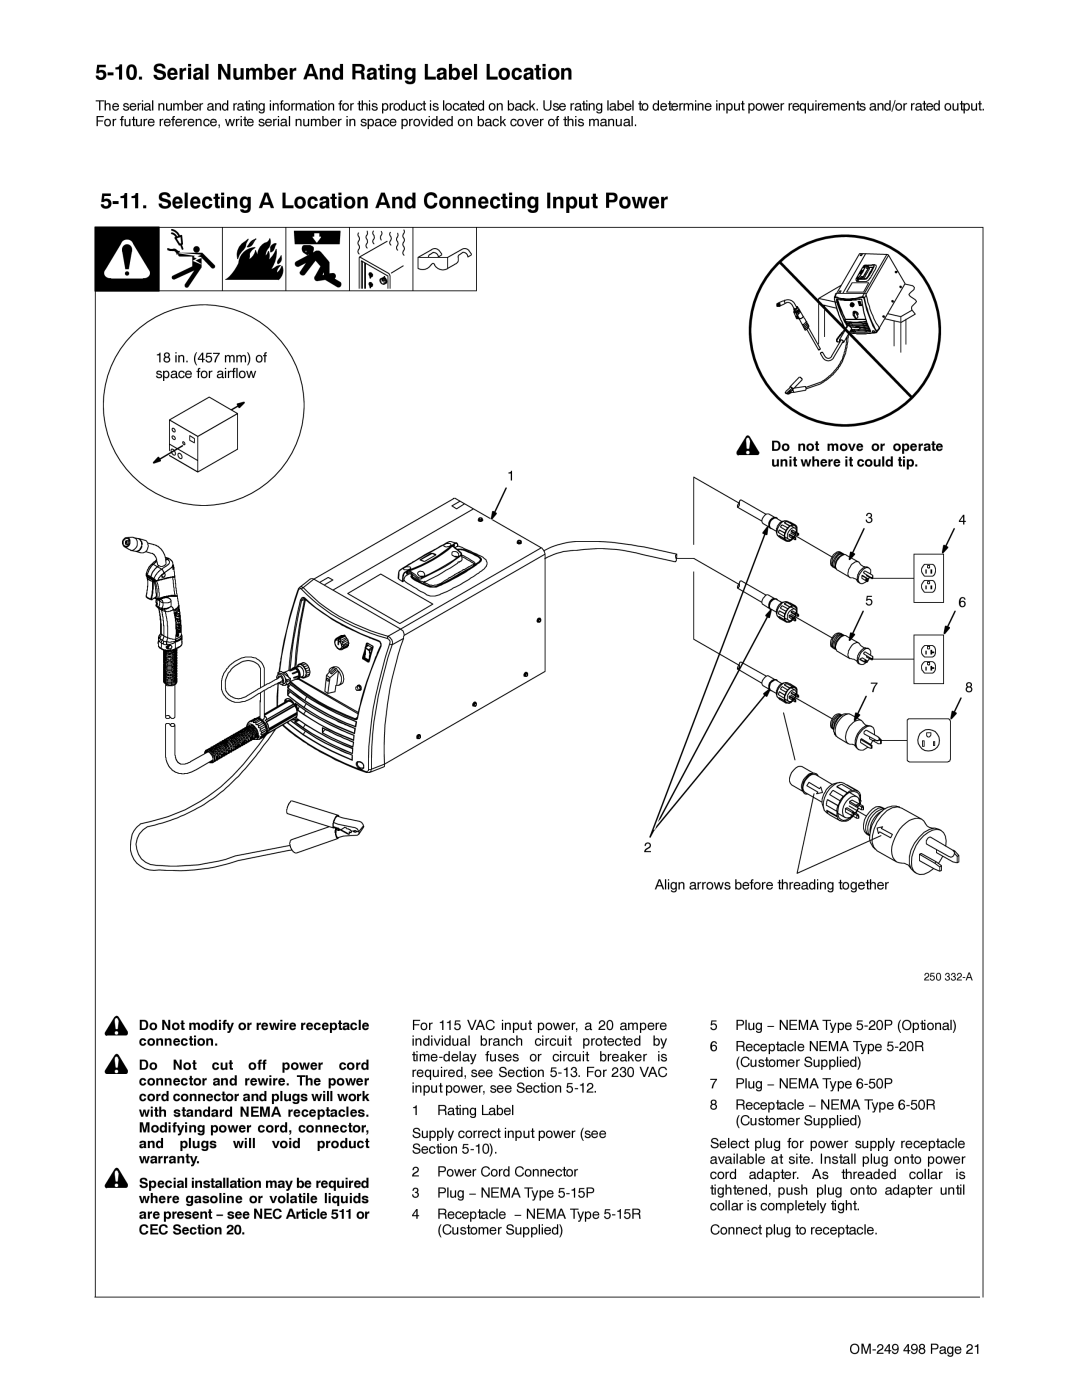
5-11. Selecting A Location And Connecting Input Power
18 in. (457 mm) of space for airflow
1
! Do not move or operate
unit where it could tip.
34
5 | 6 |
78
2
Align arrows before threading together
250
! Do Not modify or rewire receptacle
connection.
! Do Not cut off power cord connector and rewire. The power cord connector and plugs will work with standard NEMA receptacles. Modifying power cord, connector, and plugs will void product warranty.
! Special installation may be required where gasoline or volatile liquids are present − see NEC Article 511 or CEC Section 20.
For 115 VAC input power, a 20 ampere individual branch circuit protected by
1 Rating Label
Supply correct input power (see Section
2Power Cord Connector
3Plug − NEMA Type
4Receptacle − NEMA Type
5Plug − NEMA Type
6Receptacle NEMA Type
7Plug − NEMA Type
8Receptacle − NEMA Type
Select plug for power supply receptacle available at site. Install plug onto power cord adapter. As threaded collar is tightened, push plug onto adapter until collar is completely tight.
Connect plug to receptacle.