Performance Series DVR User Guide
Action
CHT ALARM | DELAY | DURATION | PRESET | ||
1 | OFF | OFF | OFF |
| OFF |
2 | OFF | OFF | OFF |
| OFF |
3 | OFF | OFF | OFF |
| OFF |
4 | OFF | OFF | OFF |
| OFF |
5 | OFF | OFF | OFF |
| OFF |
6 | OFF | OFF | OFF |
| OFF |
7 | OFF | OFF | OFF |
| OFF |
8 | OFF | OFF | OFF |
| OFF |
|
|
|
| ||
EVENT POPUP | OFF |
|
|
| |
INPUT | SENSOR | ACTION | ALARM MONITOR | ||
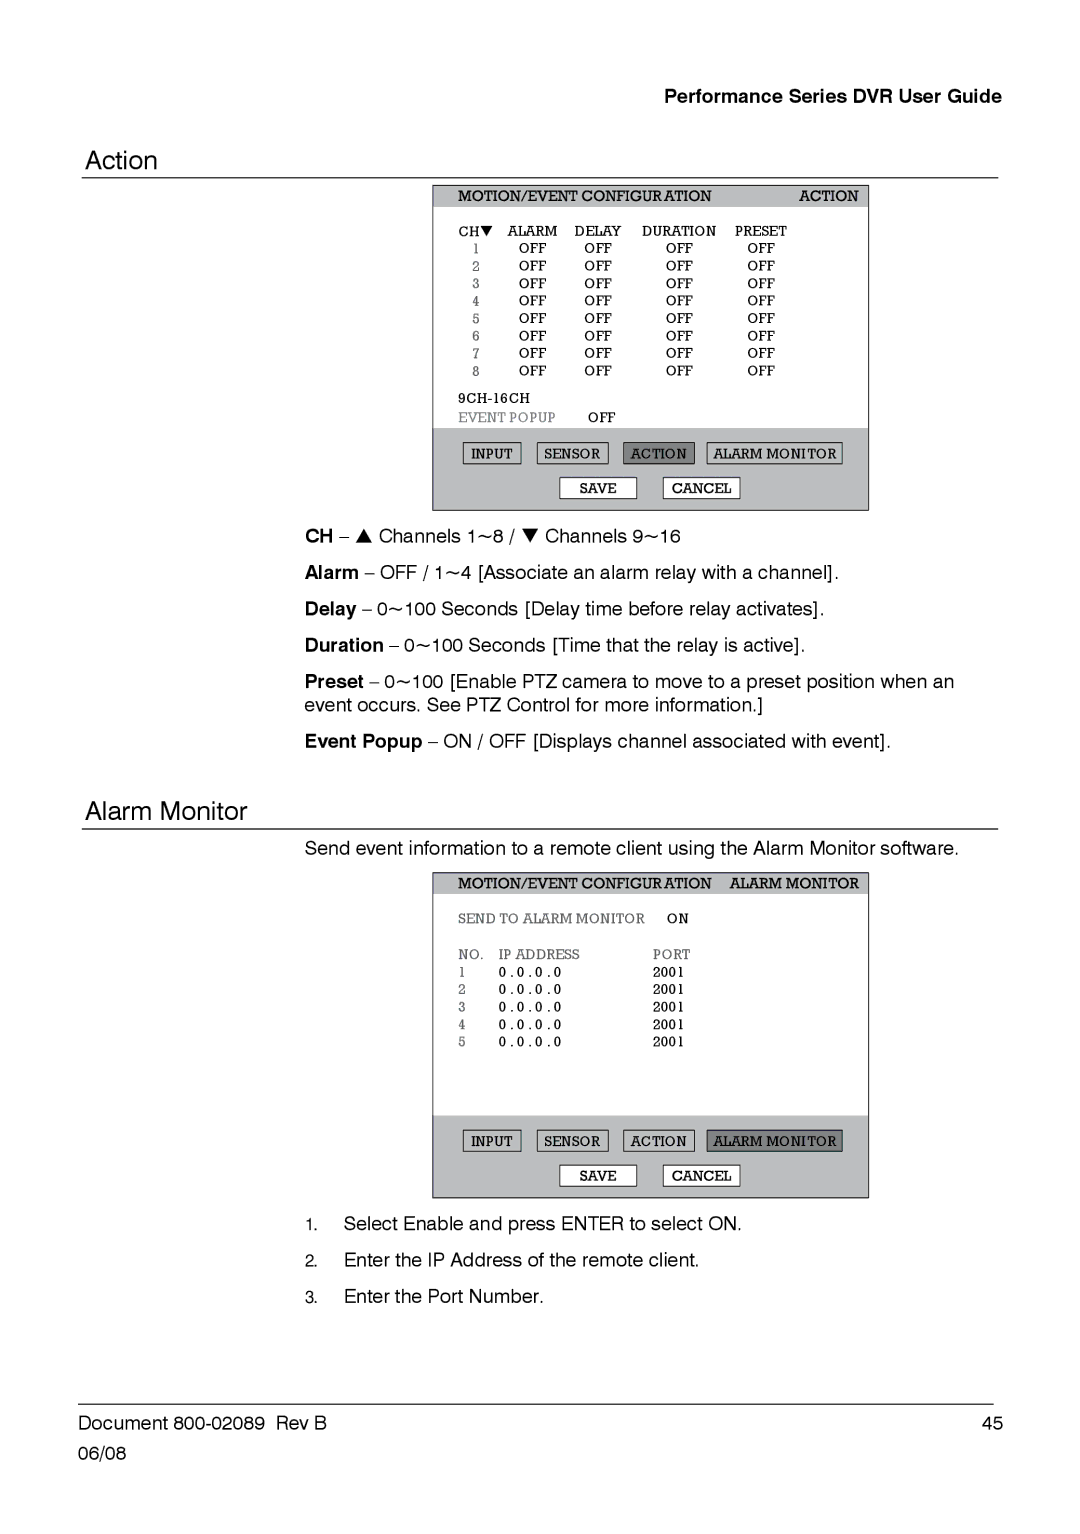
CH – S Channels 1~8 / T Channels 9~16
Alarm – OFF / 1~4 [Associate an alarm relay with a channel]. Delay – 0~100 Seconds [Delay time before relay activates]. Duration – 0~100 Seconds [Time that the relay is active].
Preset – 0~100 [Enable PTZ camera to move to a preset position when an event occurs. See PTZ Control for more information.]
Event Popup – ON / OFF [Displays channel associated with event].
Alarm Monitor
Send event information to a remote client using the Alarm Monitor software.
SEND TO ALARM MONITOR | ON |
| |||
NO. | IP ADDRESS |
| PORT |
| |
1 | 0 . 0 . 0 . 0 |
| 2001 |
| |
2 | 0 . 0 . 0 . 0 |
| 2001 |
| |
3 | 0 . 0 . 0 . 0 |
| 2001 |
| |
4 | 0 . 0 . 0 . 0 |
| 2001 |
| |
5 | 0 . 0 . 0 . 0 |
| 2001 |
| |
INPUT | SENSOR | ACTION | ALARM MONITOR | ||
1.Select Enable and press ENTER to select ON.
2.Enter the IP Address of the remote client.
3.Enter the Port Number.
______________________________________________________________________________________________
Document | 45 |
06/08
