7
8
9
10
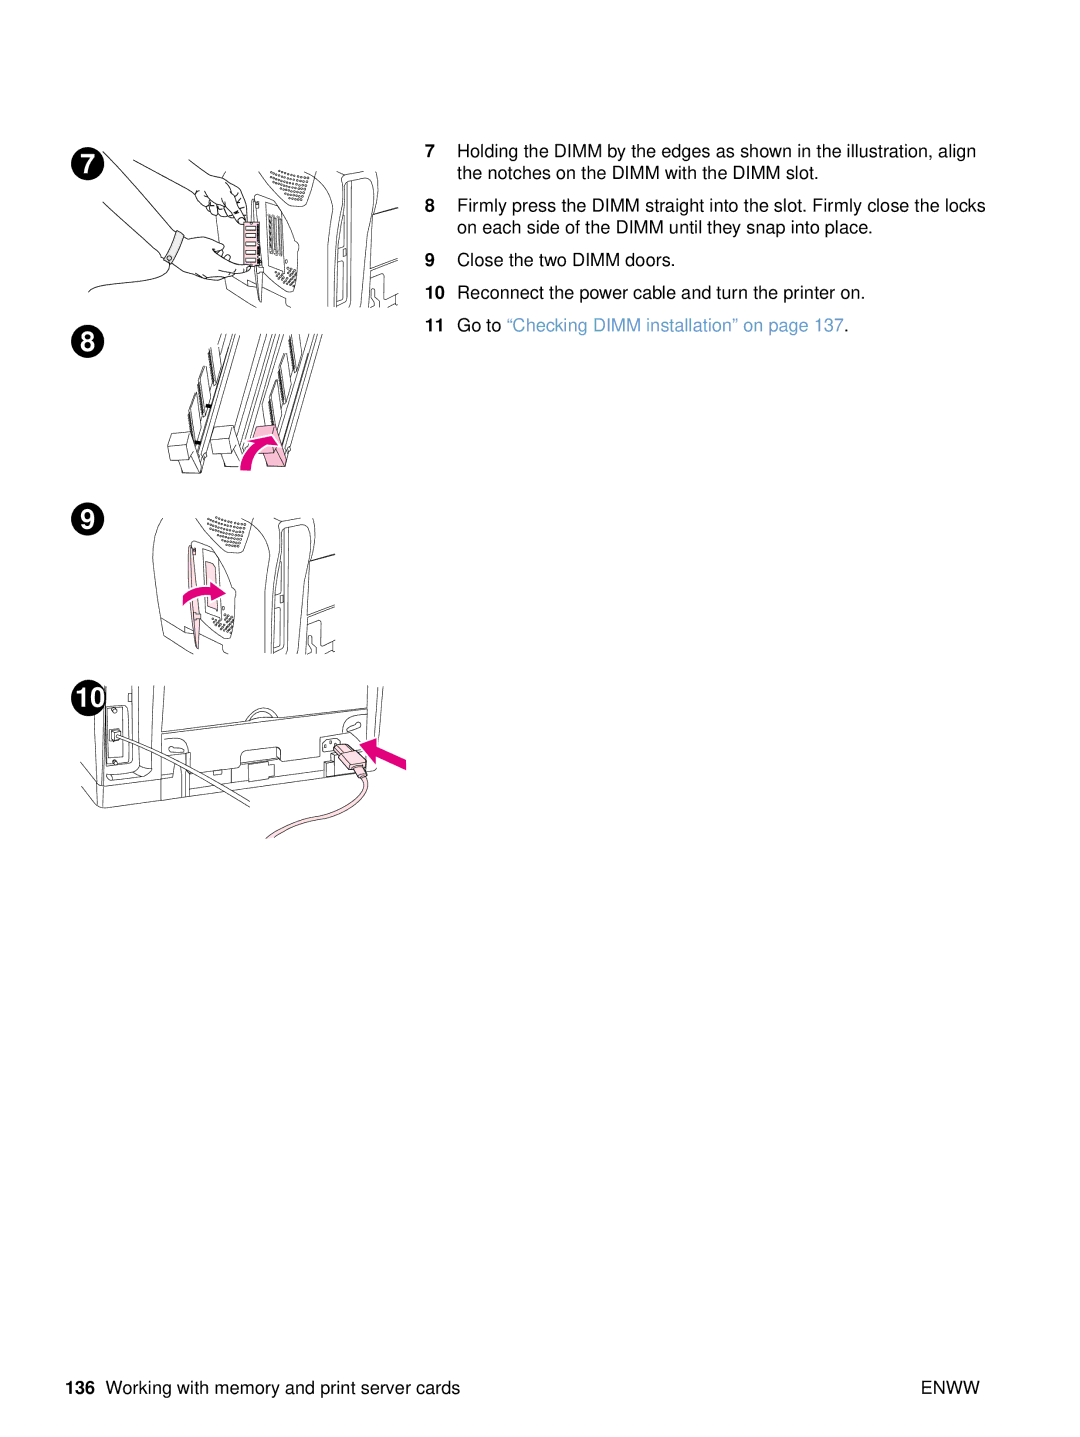
7Holding the DIMM by the edges as shown in the illustration, align the notches on the DIMM with the DIMM slot.
8Firmly press the DIMM straight into the slot. Firmly close the locks on each side of the DIMM until they snap into place.
9Close the two DIMM doors.
10Reconnect the power cable and turn the printer on.
11Go to “Checking DIMM installation” on page 137.
136 Working with memory and print server cards | ENWW |
