Chapter 1
Control panel
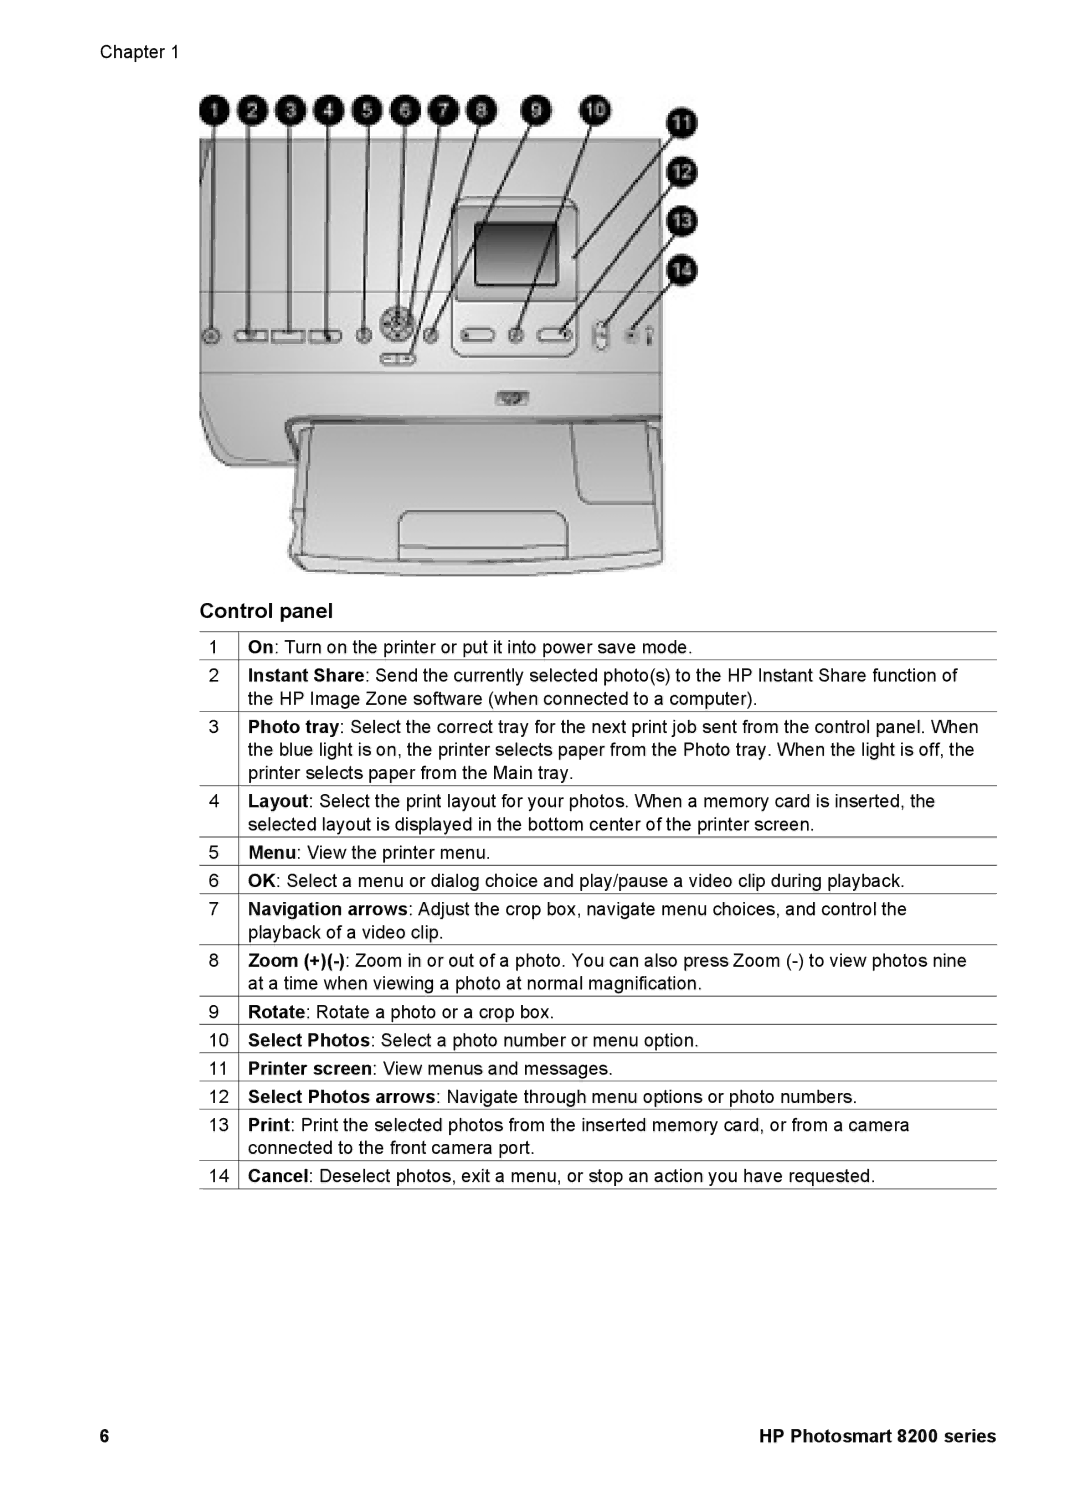
1![]() On: Turn on the printer or put it into power save mode.
On: Turn on the printer or put it into power save mode.
2Instant Share: Send the currently selected photo(s) to the HP Instant Share function of the HP Image Zone software (when connected to a computer).
3Photo tray: Select the correct tray for the next print job sent from the control panel. When the blue light is on, the printer selects paper from the Photo tray. When the light is off, the printer selects paper from the Main tray.
4Layout: Select the print layout for your photos. When a memory card is inserted, the selected layout is displayed in the bottom center of the printer screen.
5![]() Menu: View the printer menu.
Menu: View the printer menu.
6![]() OK: Select a menu or dialog choice and play/pause a video clip during playback.
OK: Select a menu or dialog choice and play/pause a video clip during playback.
7Navigation arrows: Adjust the crop box, navigate menu choices, and control the playback of a video clip.
8Zoom
9![]() Rotate: Rotate a photo or a crop box.
Rotate: Rotate a photo or a crop box.
10![]() Select Photos: Select a photo number or menu option.
Select Photos: Select a photo number or menu option.
11![]() Printer screen: View menus and messages.
Printer screen: View menus and messages.
12![]() Select Photos arrows: Navigate through menu options or photo numbers.
Select Photos arrows: Navigate through menu options or photo numbers.
13Print: Print the selected photos from the inserted memory card, or from a camera connected to the front camera port.
14![]() Cancel: Deselect photos, exit a menu, or stop an action you have requested.
Cancel: Deselect photos, exit a menu, or stop an action you have requested.
6 | HP Photosmart 8200 series |