Main and Output trays
1![]()
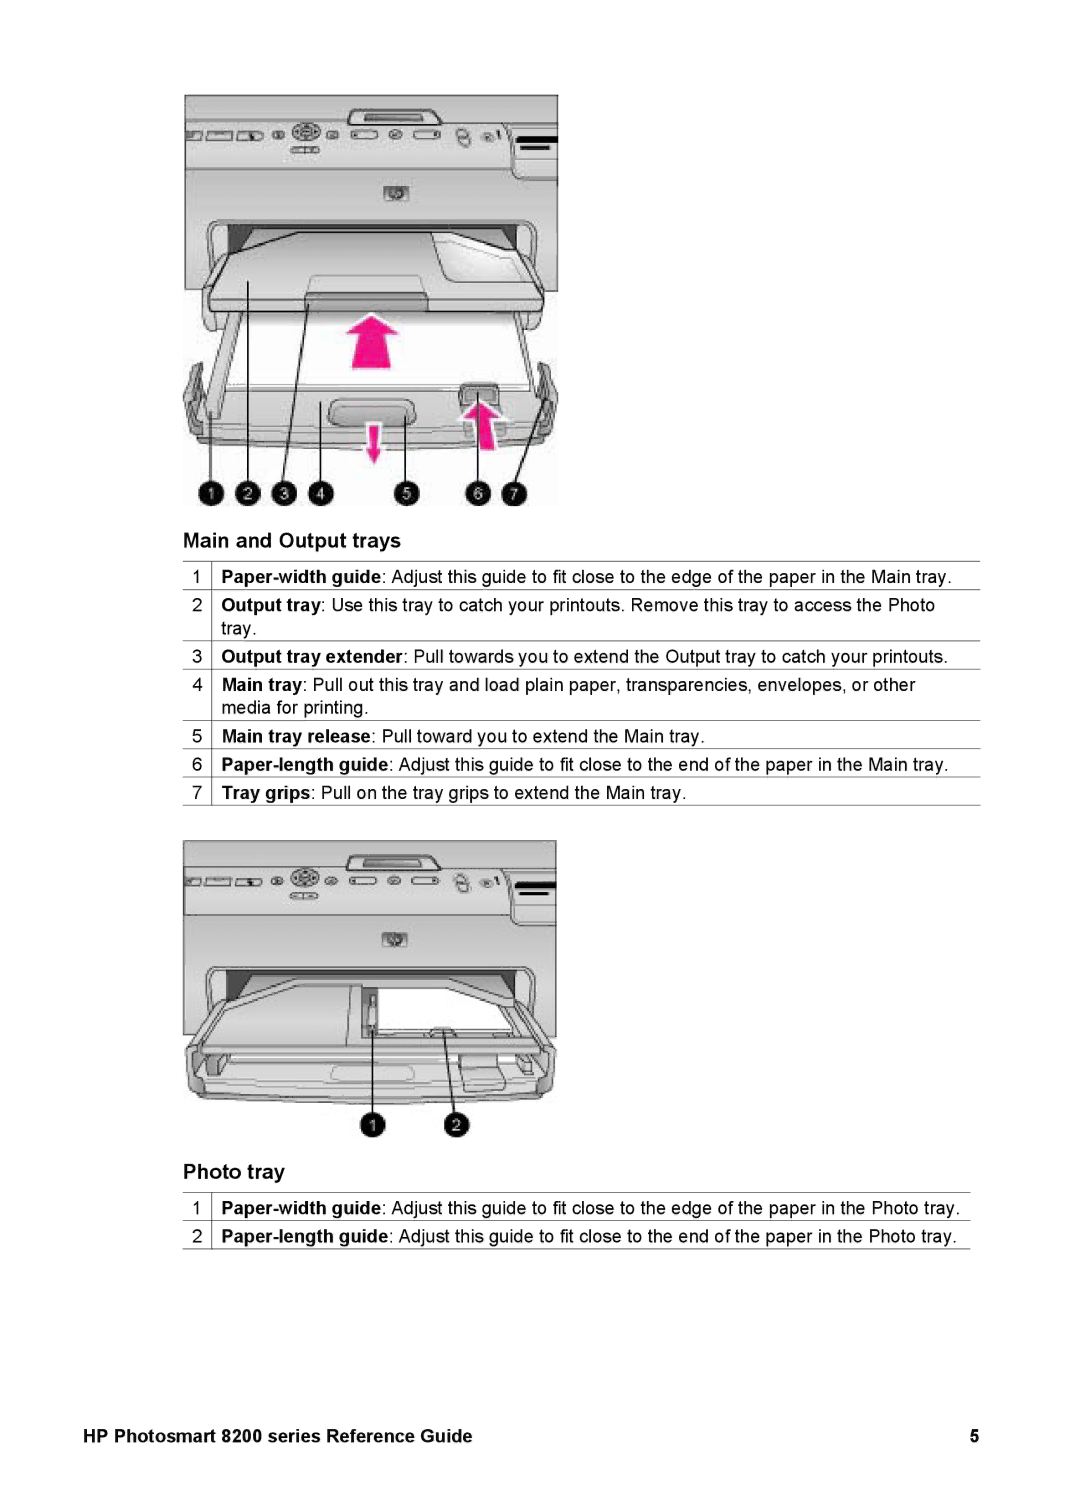
2Output tray: Use this tray to catch your printouts. Remove this tray to access the Photo tray.
3![]() Output tray extender: Pull towards you to extend the Output tray to catch your printouts.
Output tray extender: Pull towards you to extend the Output tray to catch your printouts.
4Main tray: Pull out this tray and load plain paper, transparencies, envelopes, or other media for printing.
5![]() Main tray release: Pull toward you to extend the Main tray.
Main tray release: Pull toward you to extend the Main tray.
6![]()
7![]() Tray grips: Pull on the tray grips to extend the Main tray.
Tray grips: Pull on the tray grips to extend the Main tray.
Photo tray
1![]()
2![]()
HP Photosmart 8200 series Reference Guide | 5 |