Removal and Replacement Procedures
Disassembly Sequence Chart (Continued)
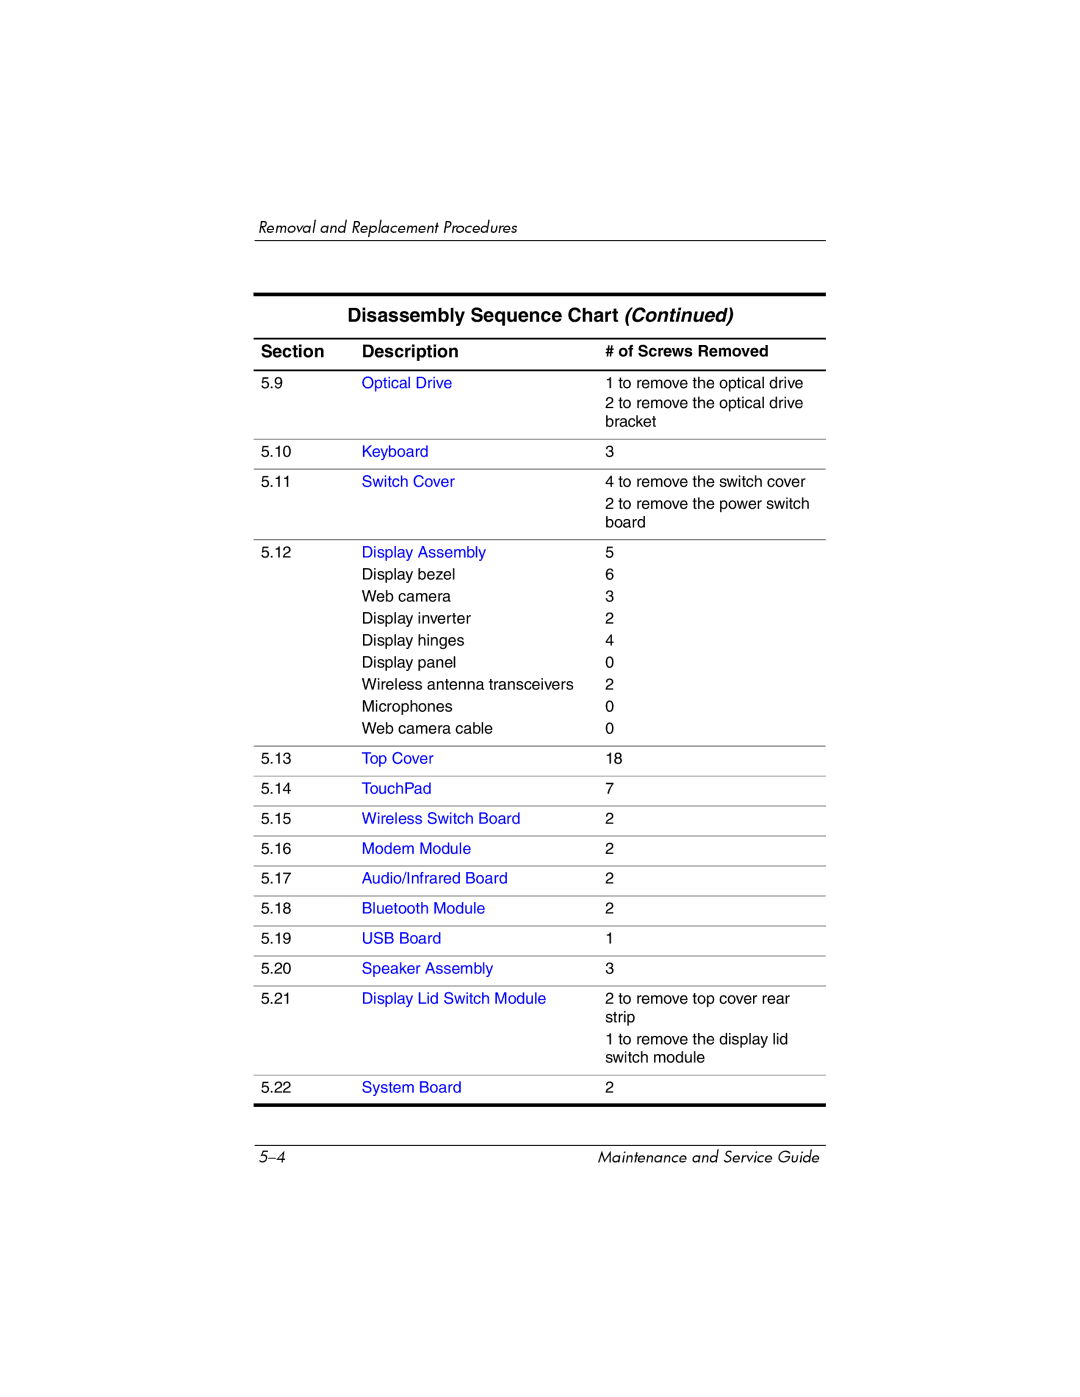
Section | Description | # of Screws Removed |
|
|
|
5.9 | Optical Drive | 1 to remove the optical drive |
|
| 2 to remove the optical drive |
|
| bracket |
|
|
|
5.10 | Keyboard | 3 |
|
|
|
5.11 | Switch Cover | 4 to remove the switch cover |
|
| 2 to remove the power switch |
|
| board |
|
|
|
5.12 | Display Assembly | 5 |
| Display bezel | 6 |
| Web camera | 3 |
| Display inverter | 2 |
| Display hinges | 4 |
| Display panel | 0 |
| Wireless antenna transceivers | 2 |
| Microphones | 0 |
| Web camera cable | 0 |
|
|
|
5.13 | Top Cover | 18 |
|
|
|
5.14 | TouchPad | 7 |
|
|
|
5.15 | Wireless Switch Board | 2 |
|
|
|
5.16 | Modem Module | 2 |
|
|
|
5.17 | Audio/Infrared Board | 2 |
|
|
|
5.18 | Bluetooth Module | 2 |
|
|
|
5.19 | USB Board | 1 |
|
|
|
5.20 | Speaker Assembly | 3 |
|
|
|
5.21 | Display Lid Switch Module | 2 to remove top cover rear |
|
| strip |
|
| 1 to remove the display lid |
|
| switch module |
|
|
|
5.22 | System Board | 2 |
|
|
|
Maintenance and Service Guide |