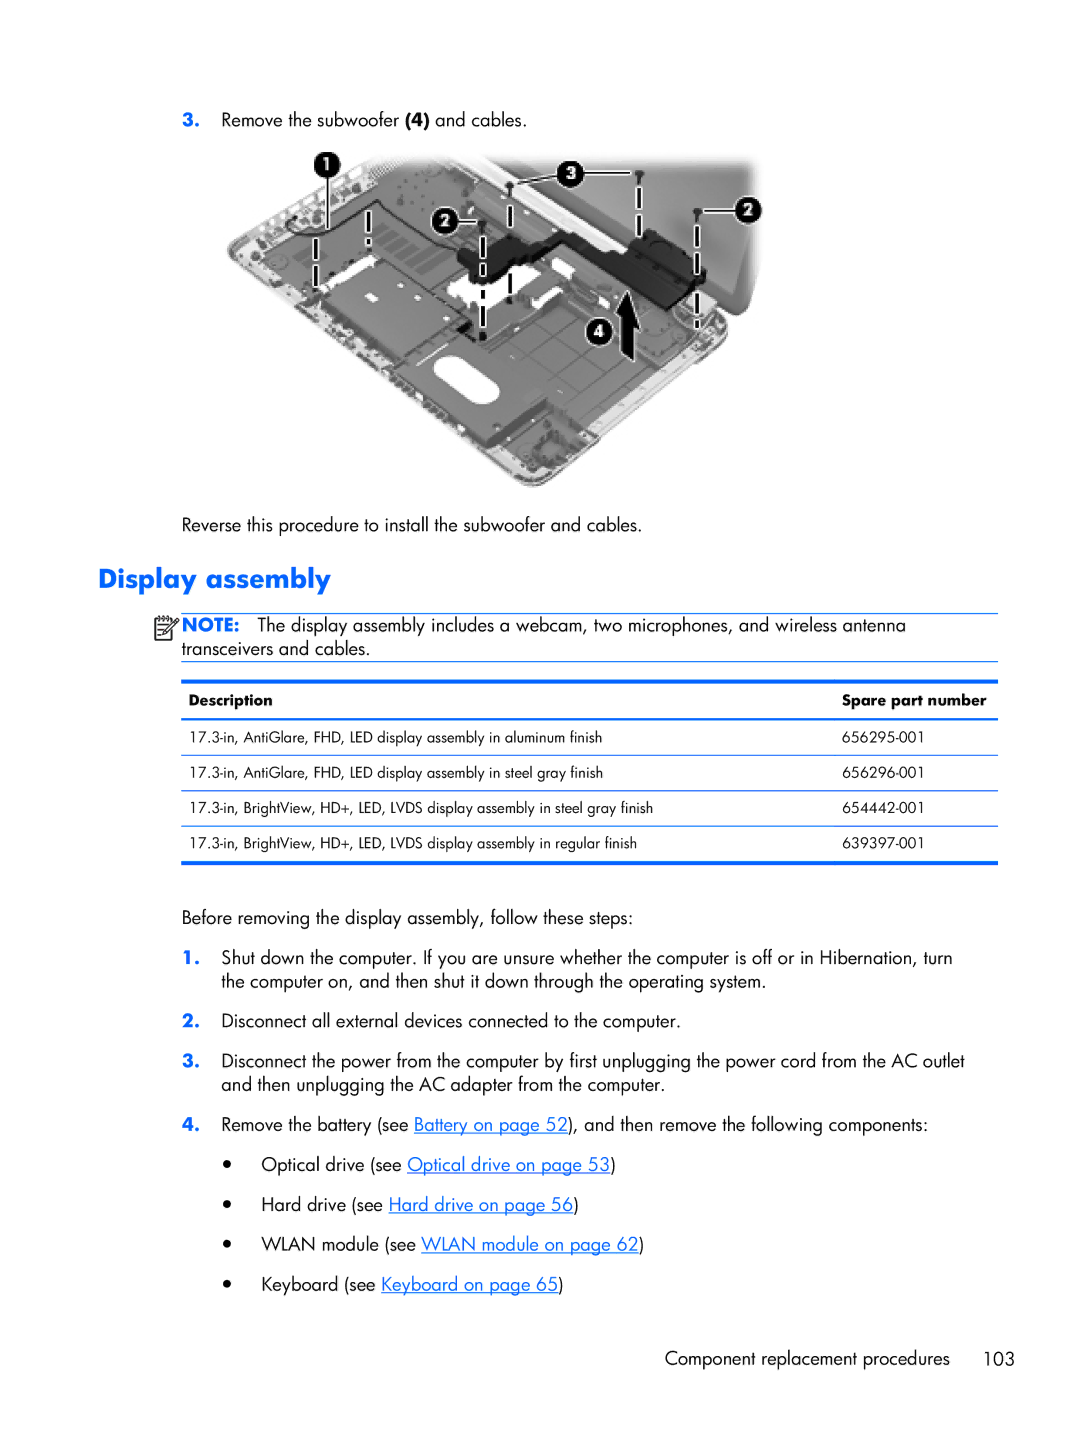
3.Remove the subwoofer (4) and cables.
Reverse this procedure to install the subwoofer and cables.
Display assembly
 NOTE: The display assembly includes a webcam, two microphones, and wireless antenna transceivers and cables.
Description | Spare part number |
|
|
|
|
|
|
|
|
|
|
Before removing the display assembly, follow these steps:
1.Shut down the computer. If you are unsure whether the computer is off or in Hibernation, turn the computer on, and then shut it down through the operating system.
2.Disconnect all external devices connected to the computer.
3.Disconnect the power from the computer by first unplugging the power cord from the AC outlet and then unplugging the AC adapter from the computer.
4.Remove the battery (see Battery on page 52), and then remove the following components:
●Optical drive (see Optical drive on page 53)
●Hard drive (see Hard drive on page 56)
●WLAN module (see WLAN module on page 62)
●Keyboard (see Keyboard on page 65)
Component replacement procedures | 103 |