Installation
c.Connect the end of the tube (T) to the pump fluid outlet fitting (Z).
![]() CAUTION
CAUTION
The Graco warranty is void if the spray gun is con- nected to a
![]() CAUTION
CAUTION
Factory Mutual approval is valid only when this gun is used with Factory Mutual approved voltage isolation systems.
245895 Agitator Kit
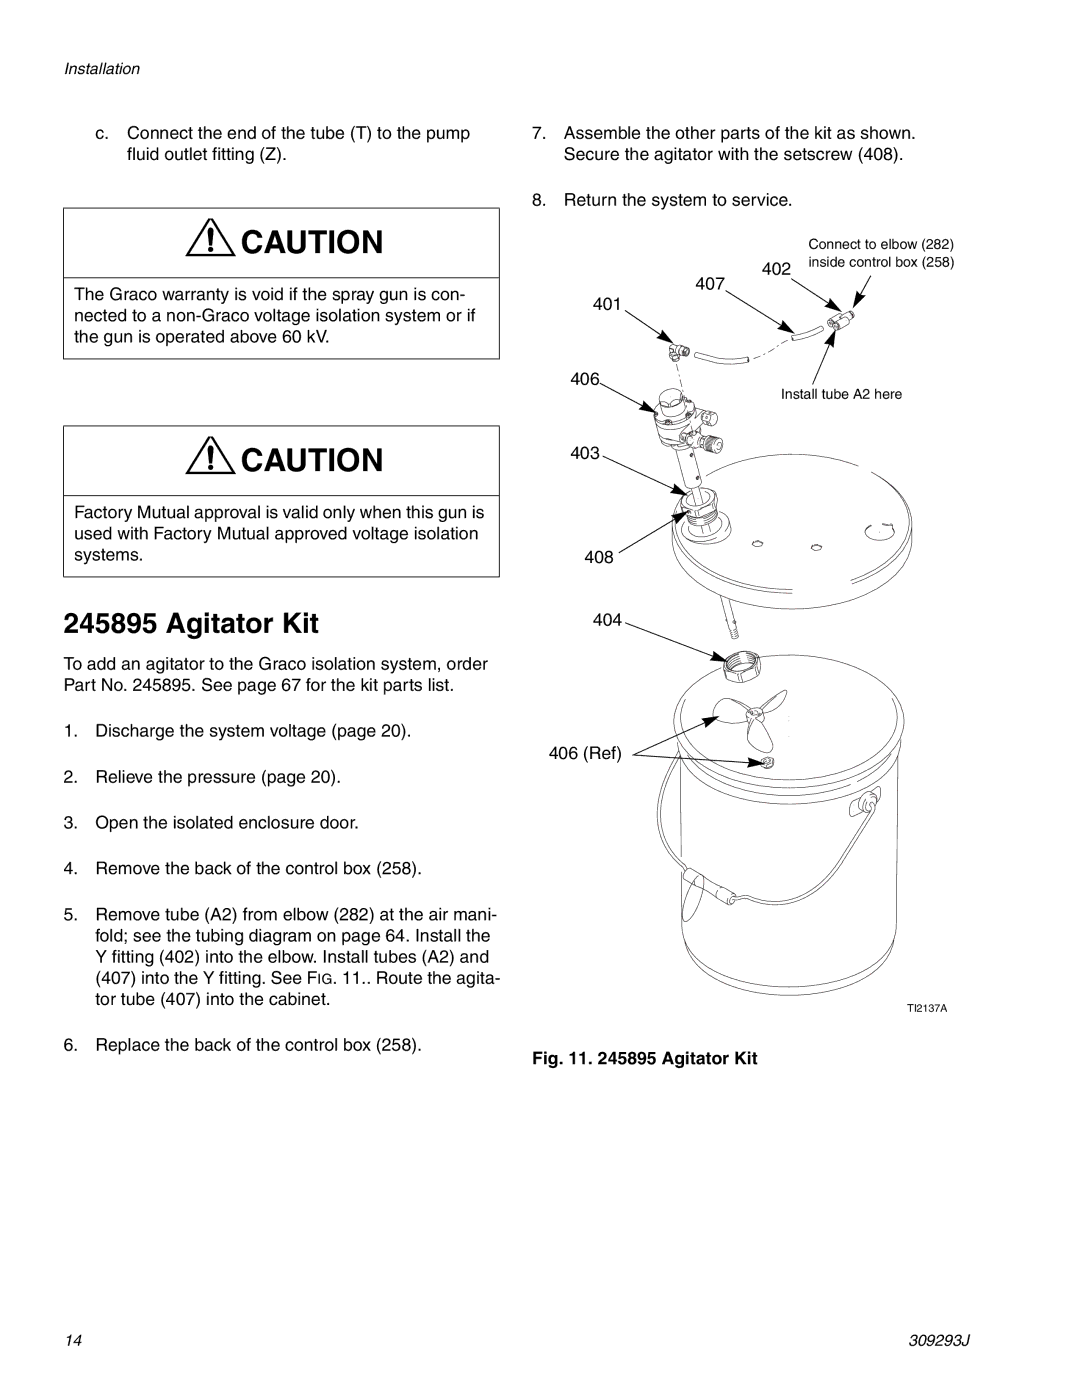
To add an agitator to the Graco isolation system, order Part No. 245895. See page 67 for the kit parts list.
1.Discharge the system voltage (page 20).
2.Relieve the pressure (page 20).
3.Open the isolated enclosure door.
4.Remove the back of the control box (258).
5.Remove tube (A2) from elbow (282) at the air mani- fold; see the tubing diagram on page 64. Install the Y fitting (402) into the elbow. Install tubes (A2) and (407) into the Y fitting. See FIG. 11.. Route the agita- tor tube (407) into the cabinet.
6.Replace the back of the control box (258).
7.Assemble the other parts of the kit as shown. Secure the agitator with the setscrew (408).
8.Return the system to service.
Connect to elbow (282)
402 inside control box (258)
407
401
406
Install tube A2 here
403
408
404
406 (Ref)
TI2137A
Fig. 11. 245895 Agitator Kit
14 | 309293J |
