8.Adjust the pump air regulator to start the fluid supply unit. Adjust the fluid flow with the air pressure regu- lator until the stream from the gun travels
Operation
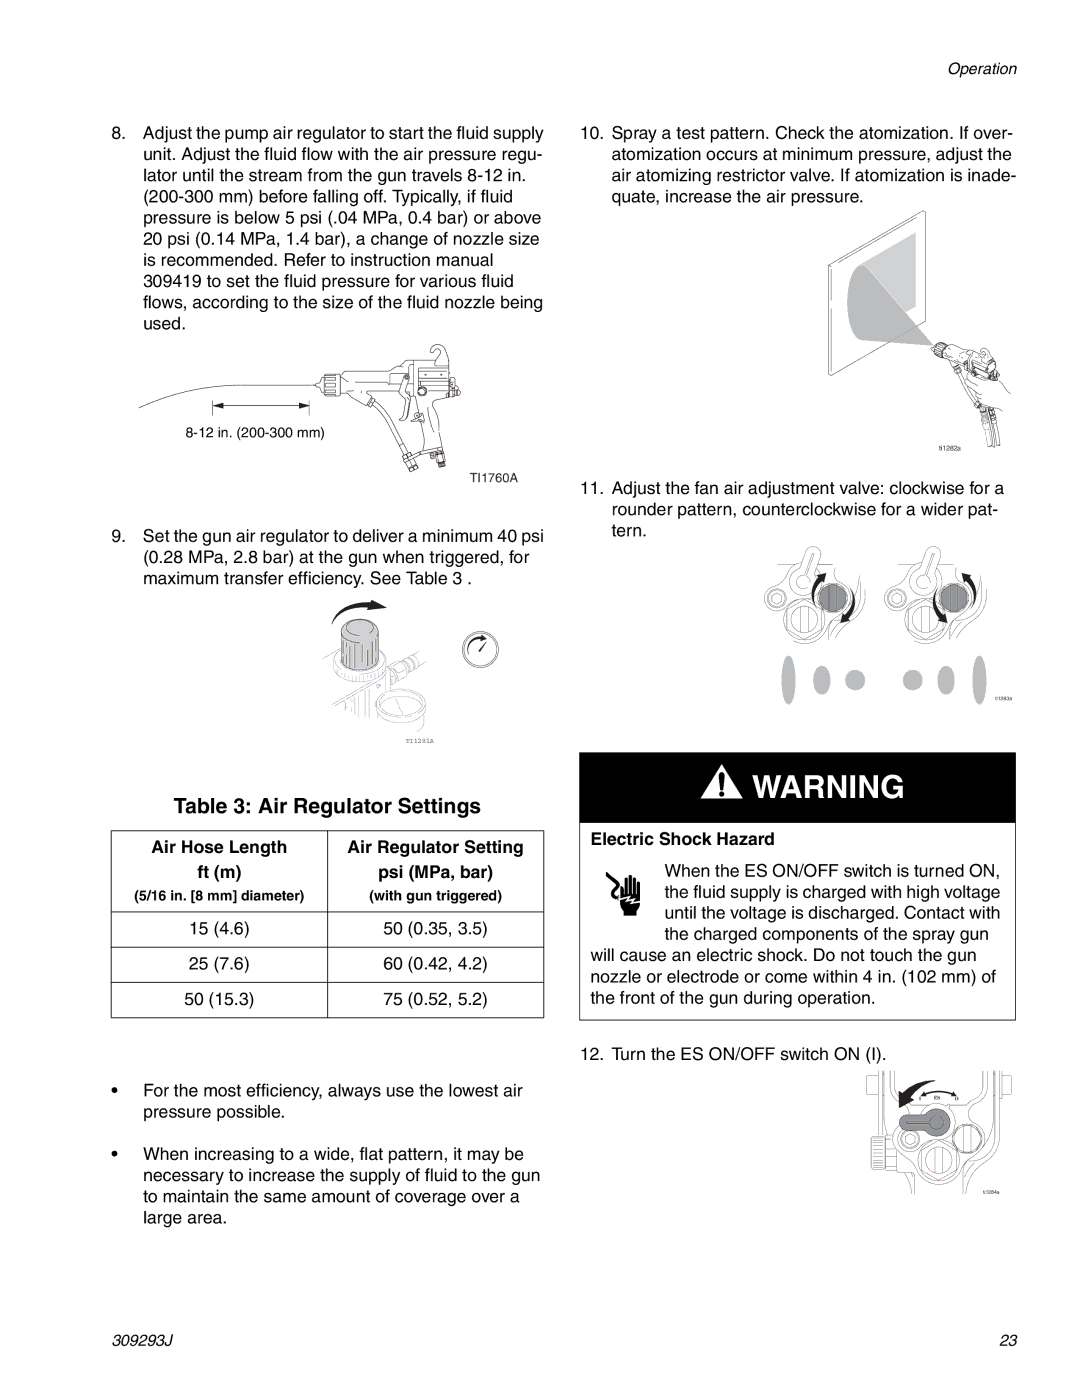
10.Spray a test pattern. Check the atomization. If over- atomization occurs at minimum pressure, adjust the air atomizing restrictor valve. If atomization is inade- quate, increase the air pressure.
TI1760A
9.Set the gun air regulator to deliver a minimum 40 psi (0.28 MPa, 2.8 bar) at the gun when triggered, for maximum transfer efficiency. See Table 3 .
ti1282a
11.Adjust the fan air adjustment valve: clockwise for a rounder pattern, counterclockwise for a wider pat- tern.
ti1283a
| TI1281A |
Table 3: Air Regulator Settings | |
|
|
Air Hose Length | Air Regulator Setting |
ft (m) | psi (MPa, bar) |
(5/16 in. [8 mm] diameter) | (with gun triggered) |
|
|
15 (4.6) | 50 (0.35, 3.5) |
|
|
25 (7.6) | 60 (0.42, 4.2) |
|
|
50 (15.3) | 75 (0.52, 5.2) |
|
|
•For the most efficiency, always use the lowest air pressure possible.
•When increasing to a wide, flat pattern, it may be necessary to increase the supply of fluid to the gun to maintain the same amount of coverage over a large area.
![]() WARNING
WARNING
Electric Shock Hazard
When the ES ON/OFF switch is turned ON, the fluid supply is charged with high voltage until the voltage is discharged. Contact with
the charged components of the spray gun will cause an electric shock. Do not touch the gun nozzle or electrode or come within 4 in. (102 mm) of the front of the gun during operation.
12. Turn the ES ON/OFF switch ON (I).
I ES O
ti1284a
309293J | 23 |