Hardware Upgrades
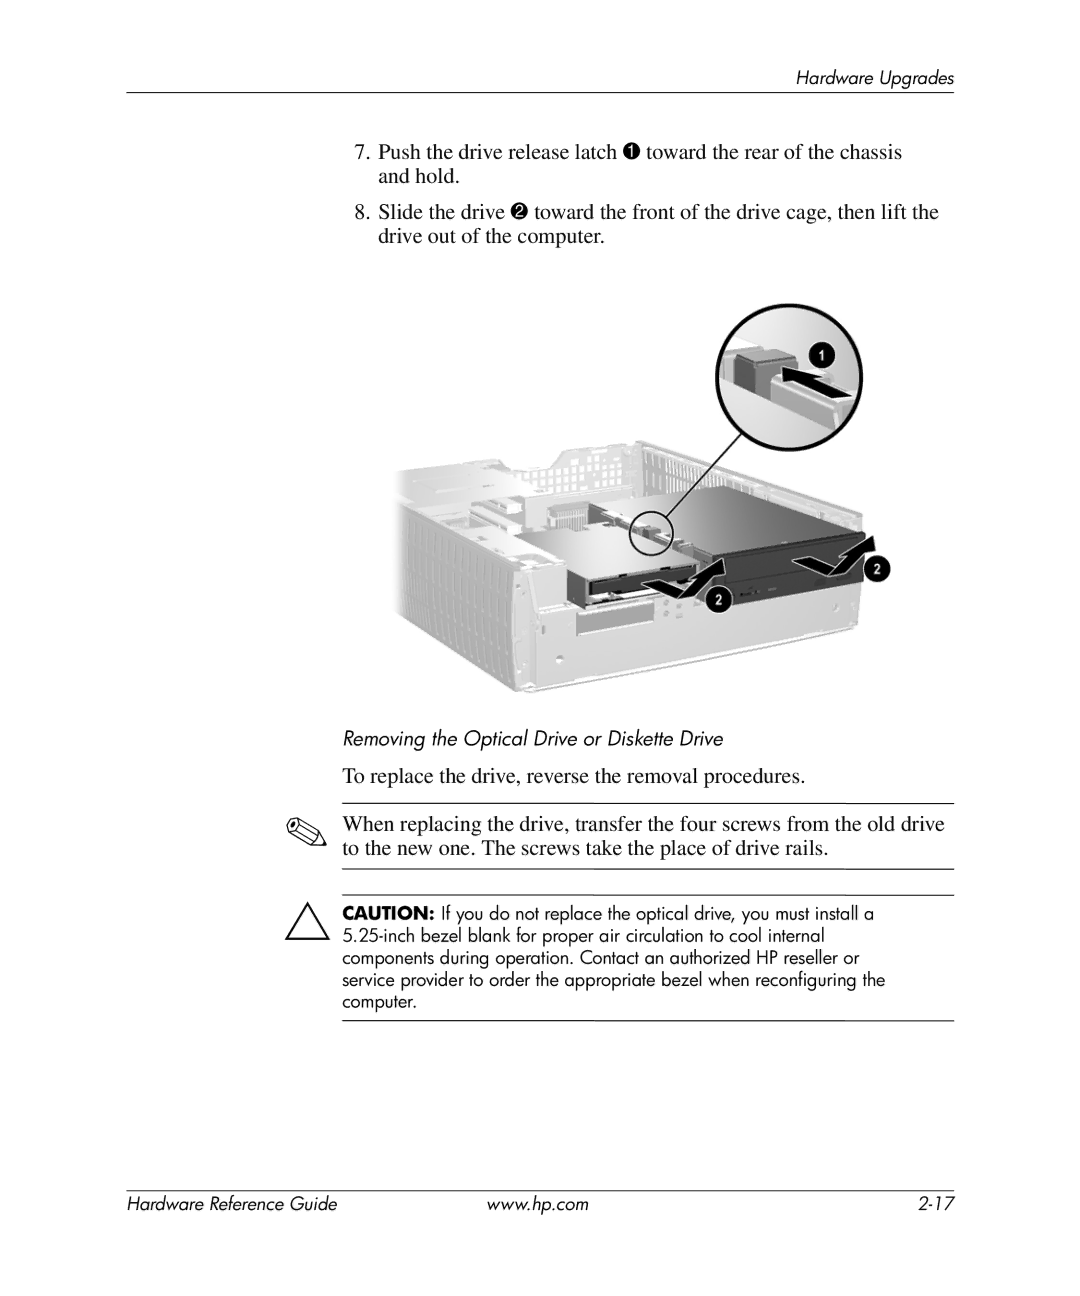
7.Push the drive release latch 1 toward the rear of the chassis and hold.
8.Slide the drive 2 toward the front of the drive cage, then lift the drive out of the computer.
Removing the Optical Drive or Diskette Drive
To replace the drive, reverse the removal procedures.
✎When replacing the drive, transfer the four screws from the old drive to the new one. The screws take the place of drive rails.
ÄCAUTION: If you do not replace the optical drive, you must install a
Hardware Reference Guide | www.hp.com |