HP rp5000 Point of Sale manual Installing a Hard Drive into the 3.5-inch Drive Bay

Models: rp5000 Base Model Point of Sale rp5000 Point of Sale

1 63
Download 63 pages 3.59 Kb
Page 38
Image 38

Hardware Upgrades

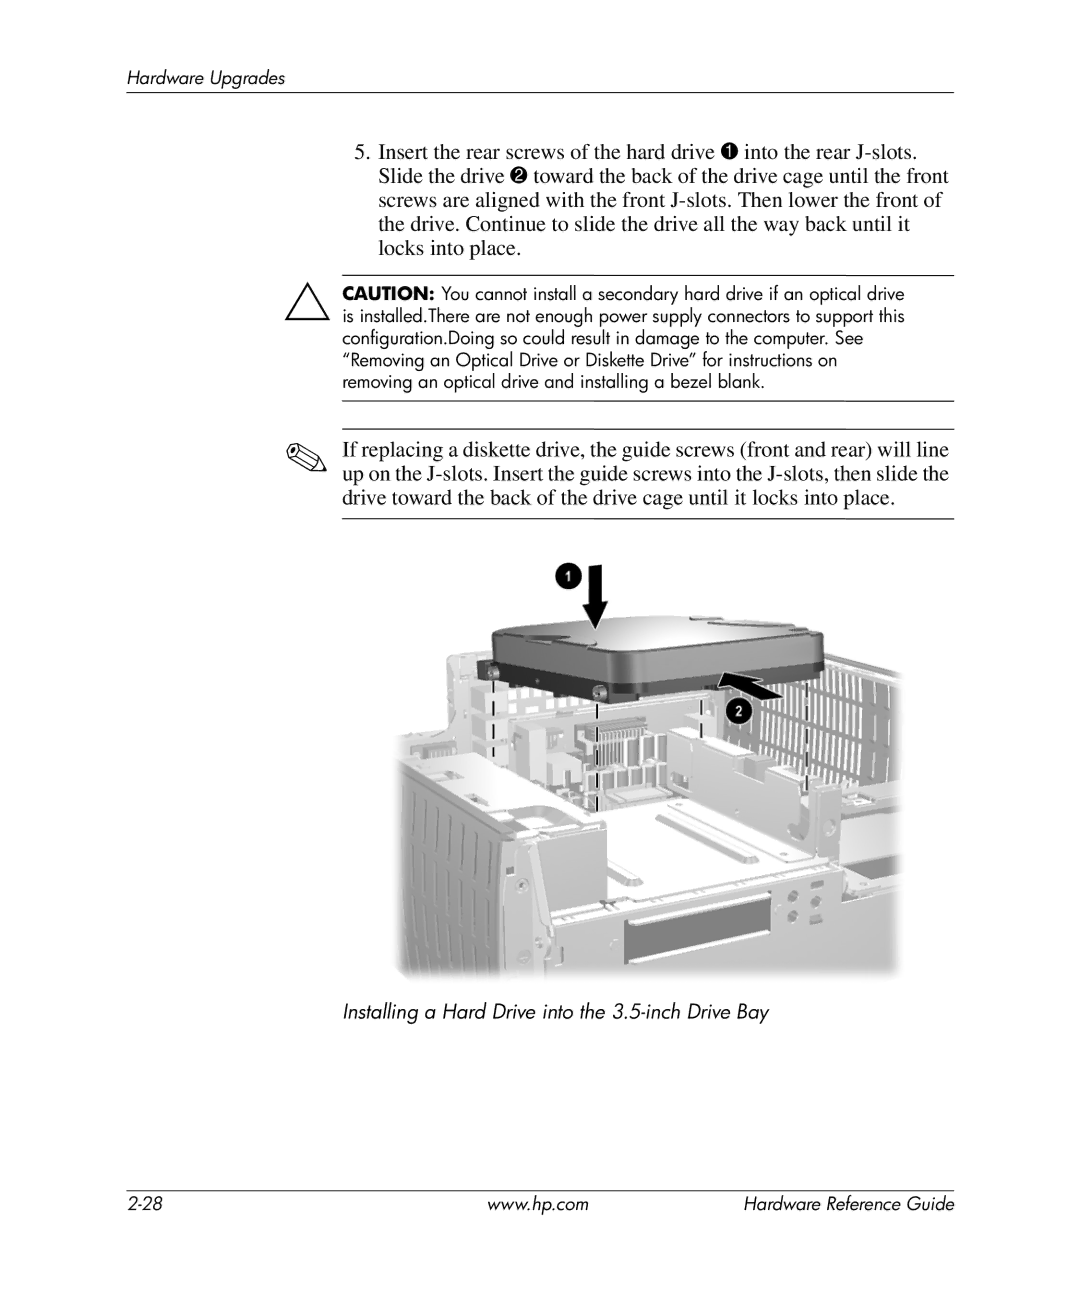
5.Insert the rear screws of the hard drive 1 into the rear J-slots. Slide the drive 2 toward the back of the drive cage until the front screws are aligned with the front J-slots. Then lower the front of the drive. Continue to slide the drive all the way back until it locks into place.

ÄCAUTION: You cannot install a secondary hard drive if an optical drive is installed.There are not enough power supply connectors to support this configuration.Doing so could result in damage to the computer. See “Removing an Optical Drive or Diskette Drive” for instructions on removing an optical drive and installing a bezel blank.

If replacing a diskette drive, the guide screws (front and rear) will line up on the J-slots. Insert the guide screws into the J-slots, then slide the drive toward the back of the drive cage until it locks into place.

Installing a Hard Drive into the 3.5-inch Drive Bay

2-28

www.hp.com

Hardware Reference Guide

Page 38
Image 38
HP rp5000 Point of Sale, rp5000 Base Model Point of Sale manual Installing a Hard Drive into the 3.5-inch Drive Bay