Removing and Replacing System Memory
System memory DIMMs are located on the system board.
WARNING! Ensure that the system is
Voltages are present at various locations within the server whenever an AC power source is connected. This voltage is present even when the main power switch is in the off position.
Failure to observe this warning could result in personal injury or damage to equipment.
CAUTION: Observe all ESD safety precautions before attempting this procedure. Failure to follow ESD safety precautions could result in damage to the server.
Supported DIMM Sizes
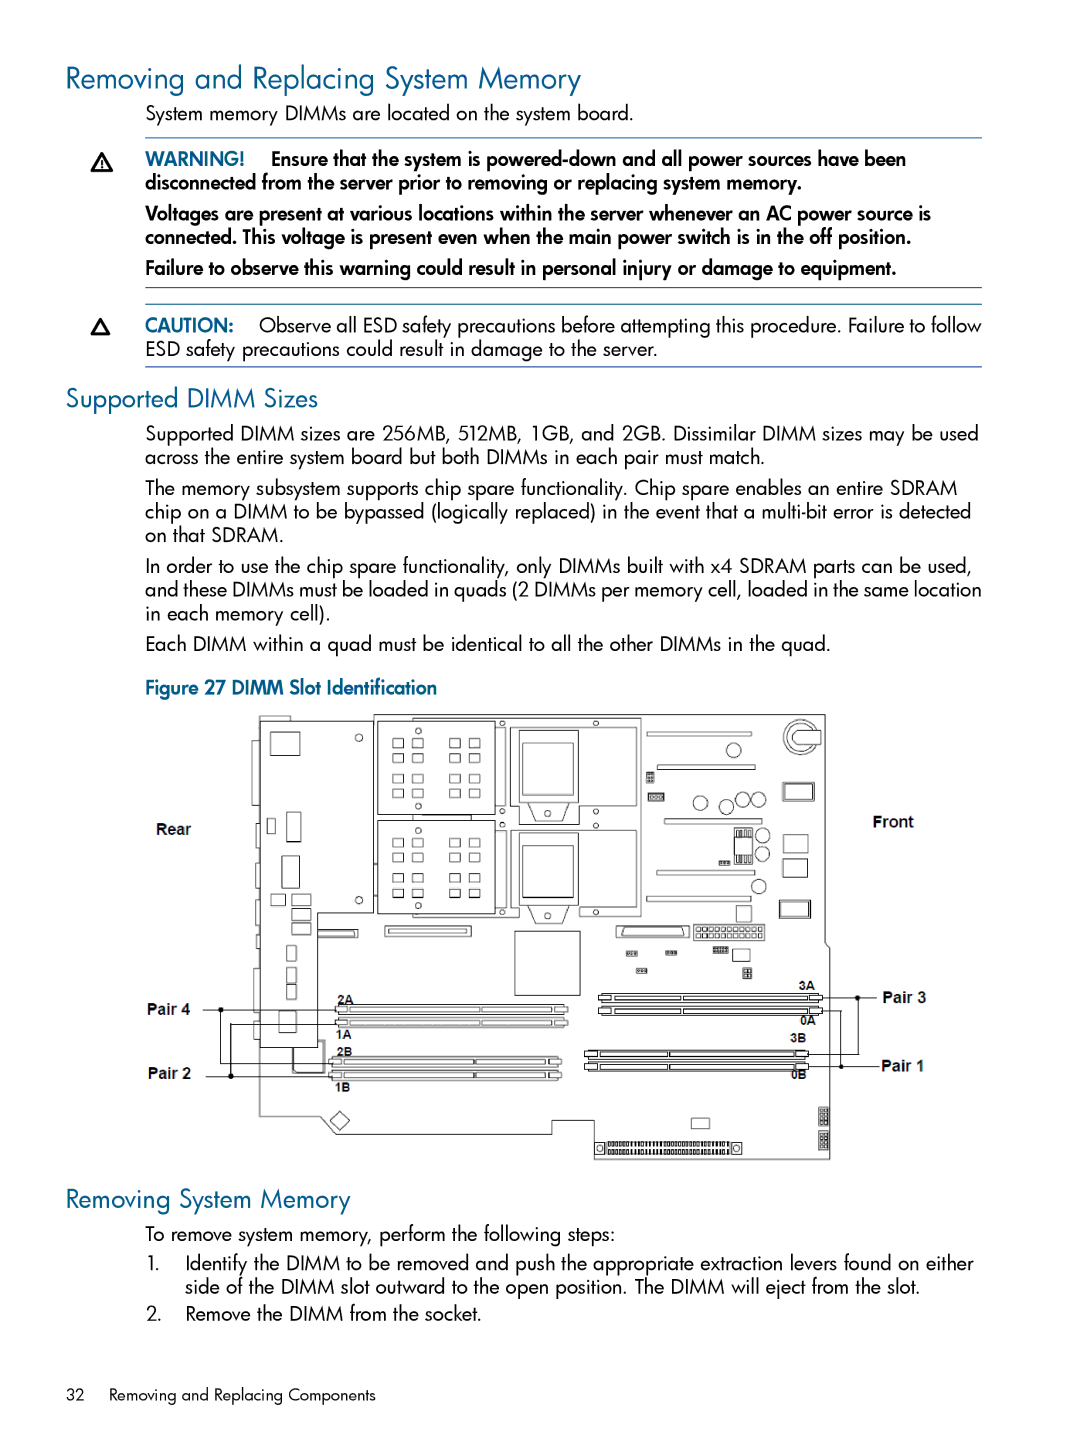
Supported DIMM sizes are 256MB, 512MB, 1GB, and 2GB. Dissimilar DIMM sizes may be used across the entire system board but both DIMMs in each pair must match.
The memory subsystem supports chip spare functionality. Chip spare enables an entire SDRAM chip on a DIMM to be bypassed (logically replaced) in the event that a
In order to use the chip spare functionality, only DIMMs built with x4 SDRAM parts can be used, and these DIMMs must be loaded in quads (2 DIMMs per memory cell, loaded in the same location in each memory cell).
Each DIMM within a quad must be identical to all the other DIMMs in the quad.
Figure 27 DIMM Slot Identification
Removing System Memory
To remove system memory, perform the following steps:
1.Identify the DIMM to be removed and push the appropriate extraction levers found on either side of the DIMM slot outward to the open position. The DIMM will eject from the slot.
2.Remove the DIMM from the socket.
32 Removing and Replacing Components