3. INSTALLATION
•Transformer (20)
•Low voltage cable (17)
•Staples (21)
•Connector for the loop wire (18)
•Screws for the charging station (19)
•Measurement gauge (22)
•Solderless coupler for the loop wire (23) During installation you will also need:
•Hammer/plastic mallet to simplify putting the staples in the ground
•Combination pliers for cutting the boundary
wire and pressing the contact units together.
•Edge cutter/straight spade if the boundary wire must be buried.Installation of the charging station.
3.2Installation of the charging station
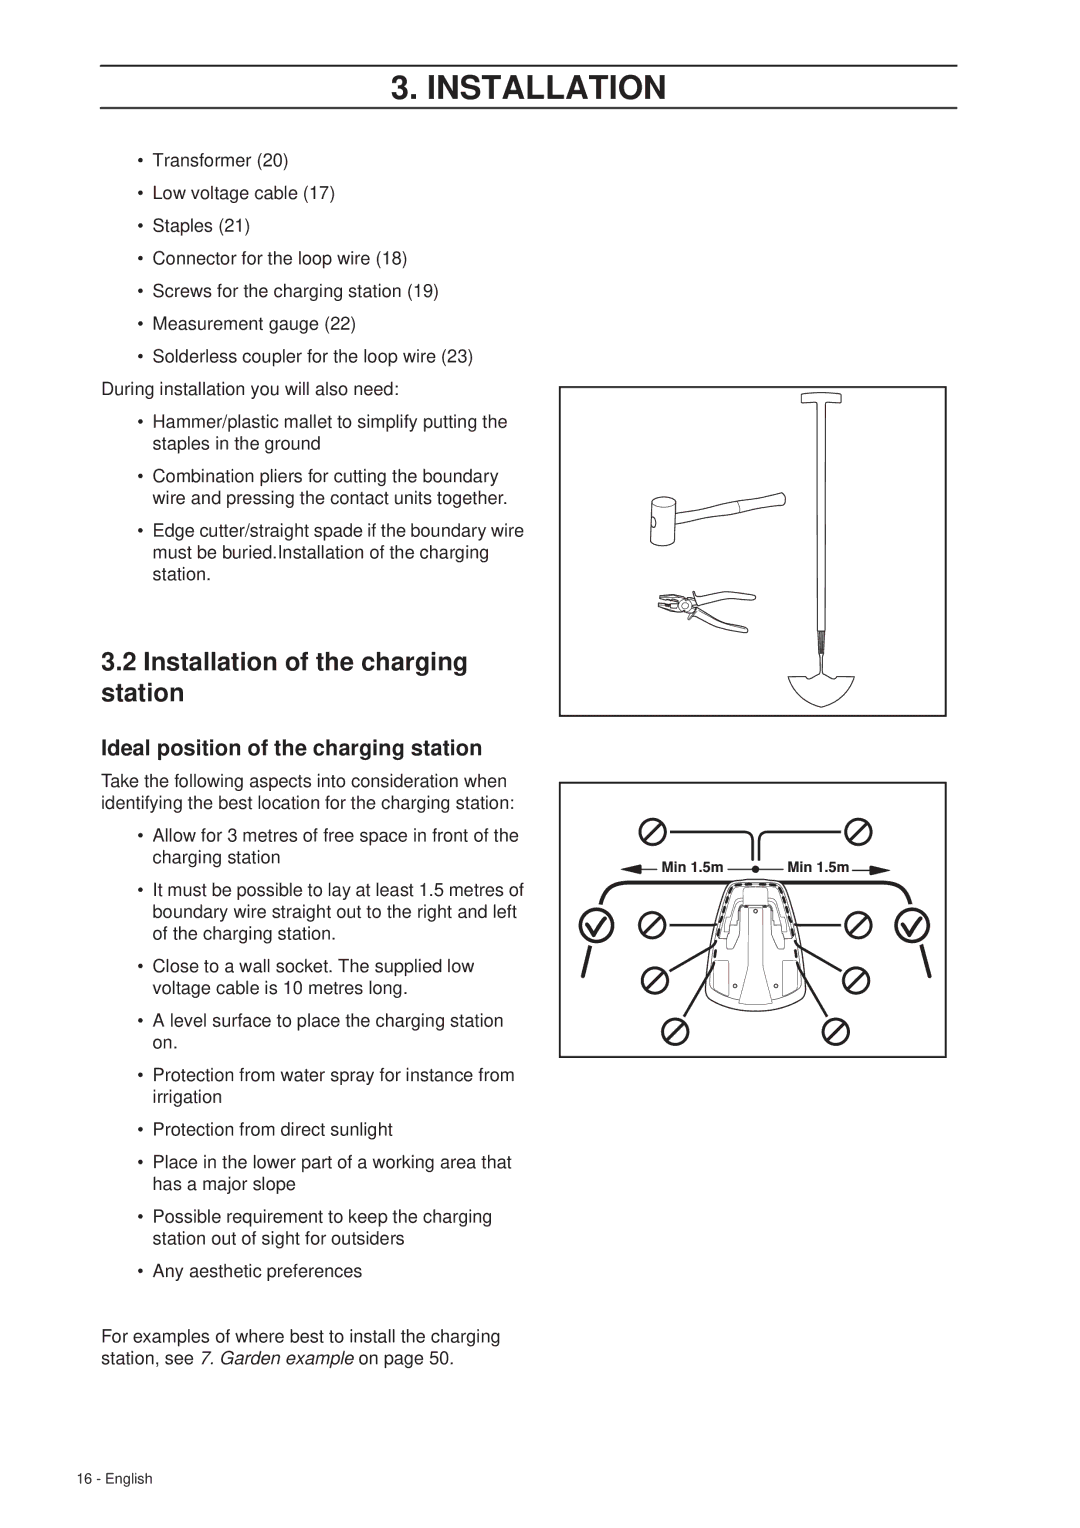
Ideal position of the charging station
Take the following aspects into consideration when identifying the best location for the charging station:
• Allow for 3 metres of free space in front of the charging station
• It must be possible to lay at least 1.5 metres of boundary wire straight out to the right and left of the charging station.
• Close to a wall socket. The supplied low voltage cable is 10 metres long.
•A level surface to place the charging station on.
•Protection from water spray for instance from irrigation
•Protection from direct sunlight
•Place in the lower part of a working area that has a major slope
•Possible requirement to keep the charging station out of sight for outsiders
•Any aesthetic preferences
For examples of where best to install the charging station, see 7. Garden example on page 50.
16 - English