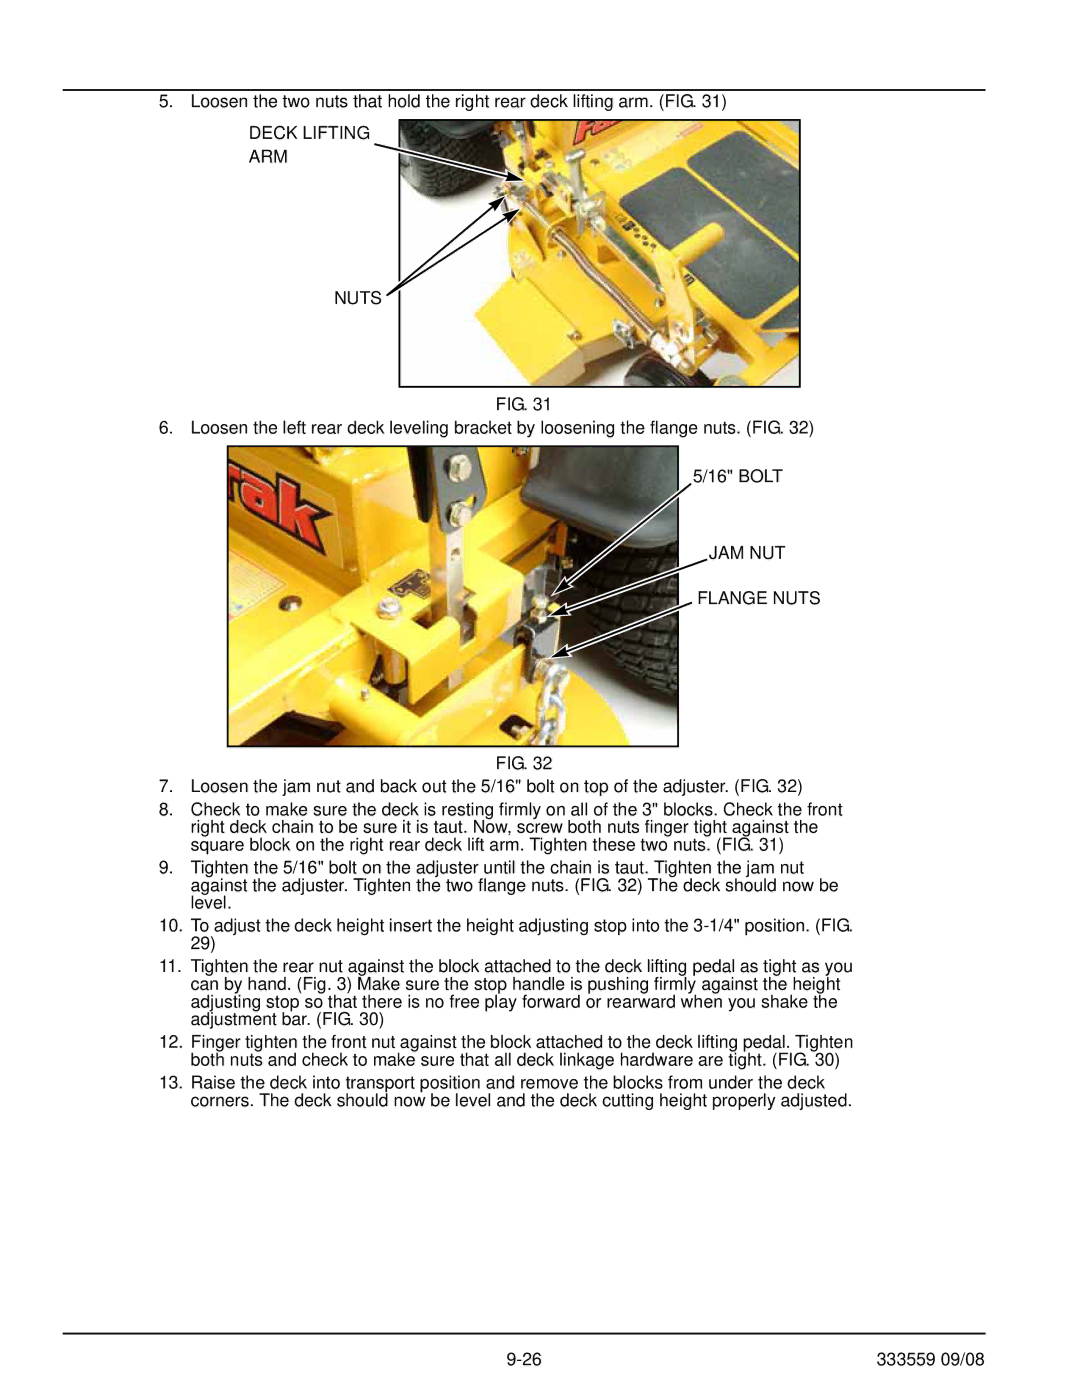
5. Loosen the two nuts that hold the right rear deck lifting arm. (FIG. 31)
DECK LIFTING ARM
NUTS
FIG. 31
6.Loosen the left rear deck leveling bracket by loosening the flange nuts. (FIG. 32) 5/16" BOLT
JAM NUT
FLANGE NUTS
FIG. 32
7.Loosen the jam nut and back out the 5/16" bolt on top of the adjuster. (FIG. 32)
8.Check to make sure the deck is resting firmly on all of the 3" blocks. Check the front right deck chain to be sure it is taut. Now, screw both nuts finger tight against the square block on the right rear deck lift arm. Tighten these two nuts. (FIG. 31)
9.Tighten the 5/16" bolt on the adjuster until the chain is taut. Tighten the jam nut against the adjuster. Tighten the two flange nuts. (FIG. 32) The deck should now be level.
10.To adjust the deck height insert the height adjusting stop into the
11.Tighten the rear nut against the block attached to the deck lifting pedal as tight as you can by hand. (Fig. 3) Make sure the stop handle is pushing firmly against the height adjusting stop so that there is no free play forward or rearward when you shake the adjustment bar. (FIG. 30)
12.Finger tighten the front nut against the block attached to the deck lifting pedal. Tighten both nuts and check to make sure that all deck linkage hardware are tight. (FIG. 30)
13.Raise the deck into transport position and remove the blocks from under the deck corners. The deck should now be level and the deck cutting height properly adjusted.
333559 09/08 |
