Step 6. Attaching the cables to the drive
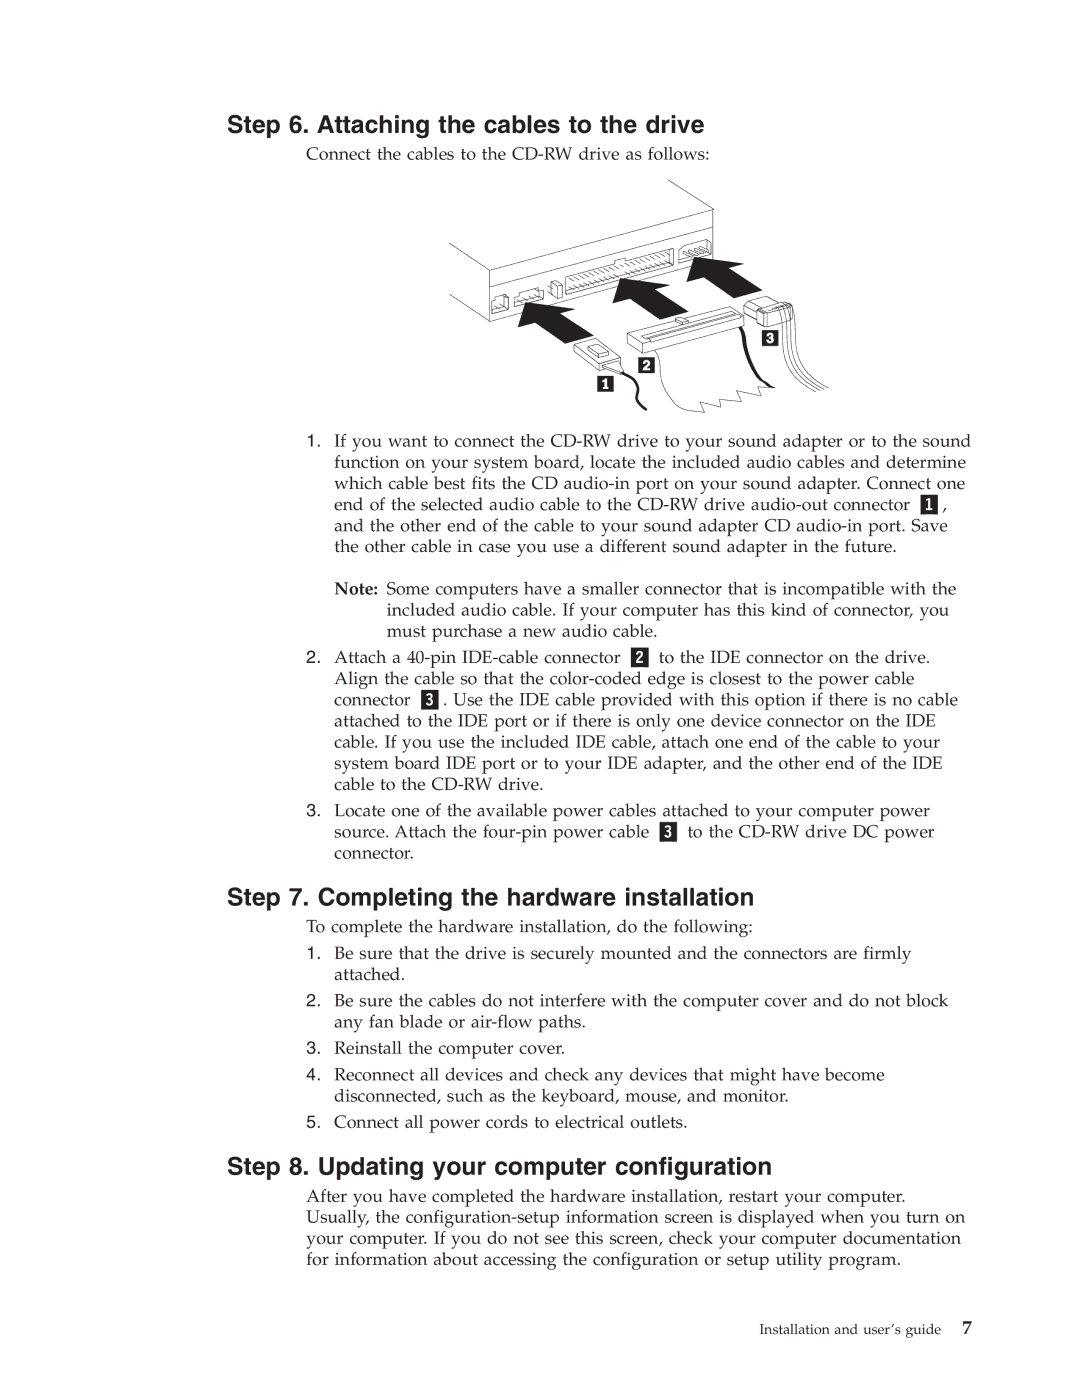
Connect the cables to the
1.If you want to connect the
which cable best fits the CD
end of the selected audio cable to the
Note: Some computers have a smaller connector that is incompatible with the included audio cable. If your computer has this kind of connector, you must purchase a new audio cable.
2. Attach a | to the IDE connector on the drive. | |
Align the cable so that the | ||
connector | . Use the IDE cable provided with this option if there is no cable | |
attached to the IDE port or if there is only one device connector on the IDE cable. If you use the included IDE cable, attach one end of the cable to your system board IDE port or to your IDE adapter, and the other end of the IDE cable to the
3.Locate one of the available power cables attached to your computer power
source. Attach the | to the |
connector. |
|
Step 7. Completing the hardware installation
To complete the hardware installation, do the following:
1.Be sure that the drive is securely mounted and the connectors are firmly attached.
2.Be sure the cables do not interfere with the computer cover and do not block any fan blade or
3.Reinstall the computer cover.
4.Reconnect all devices and check any devices that might have become disconnected, such as the keyboard, mouse, and monitor.
5.Connect all power cords to electrical outlets.
Step 8. Updating your computer configuration
After you have completed the hardware installation, restart your computer. Usually, the
Installation and user’s guide 7