3301690 CPU Card
![]() CAUTION:
CAUTION:
The heatsink has a layer of thermal paste sprayed on the lower surface. Do not accidentally wipe the thermal paste away when you unpack or install the heatsink. Thermal paste between the CPU and the heatsink is important for optimal heat dissipation.
To install the cooling kit, follow the instructions below.
Step 1: Place the heatsink onto the socket. Make sure that the CPU cable can be
properly routed when the heatsink is installed.
Step 2: Align the heatsink so that its fourspring screw fasteners can pass through the
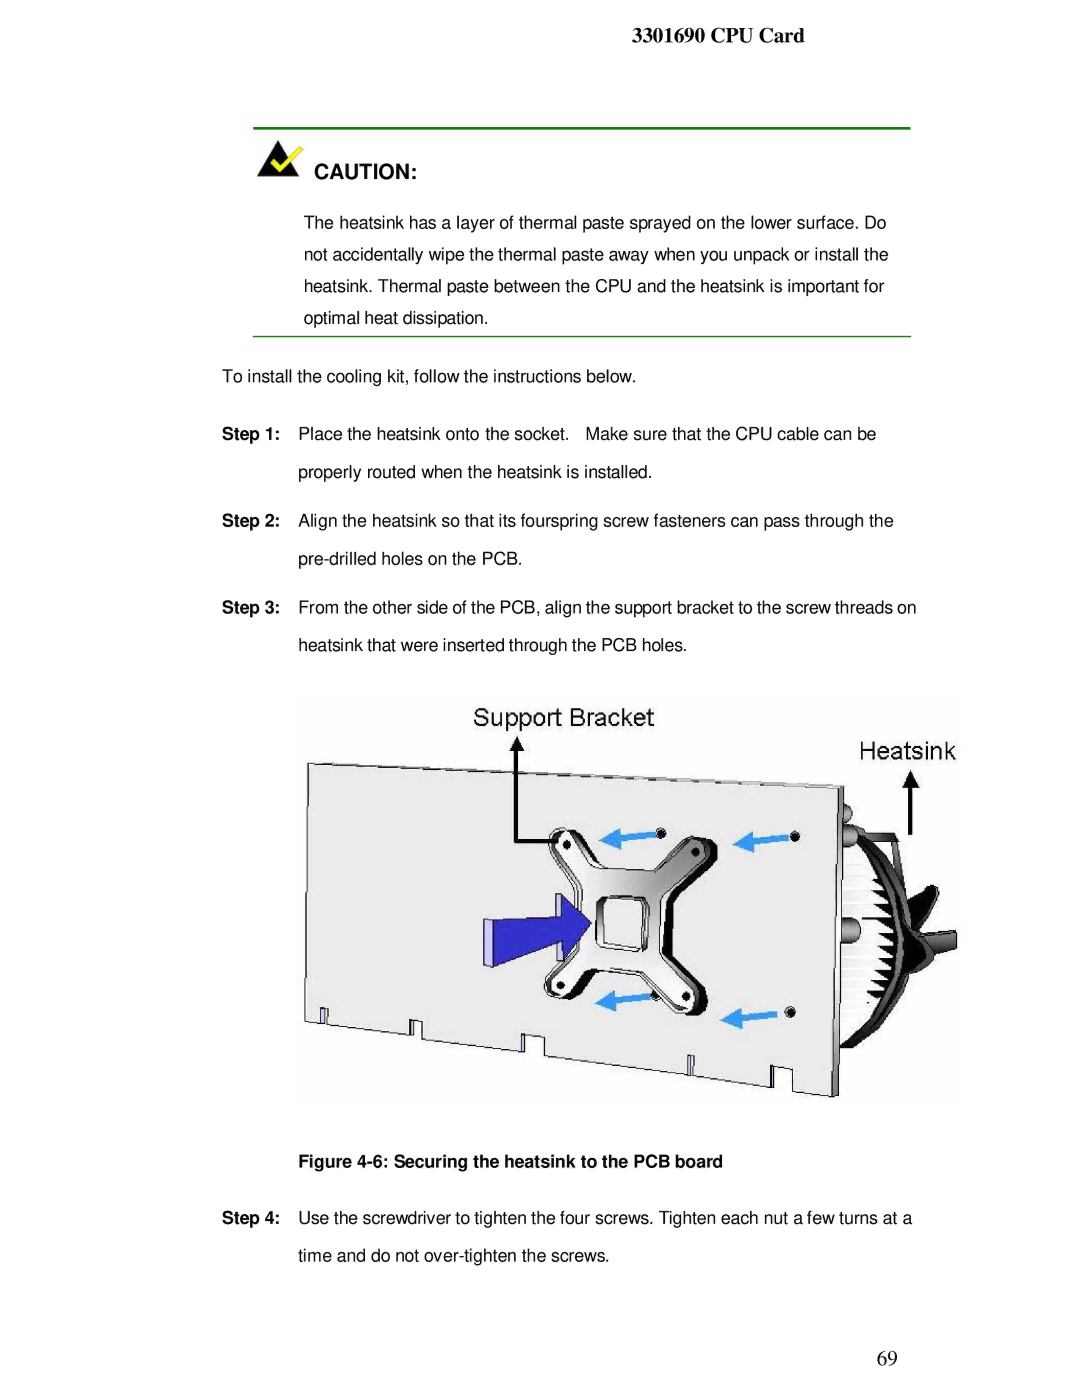
Step 3: From the other side of the PCB, align the support bracket to the screw threads on
heatsink that were inserted through the PCB holes.
Figure 4-6: Securing the heatsink to the PCB board
Step 4: Use the screwdriver to tighten the four screws. Tighten each nut a few turns at a
time and do not
69