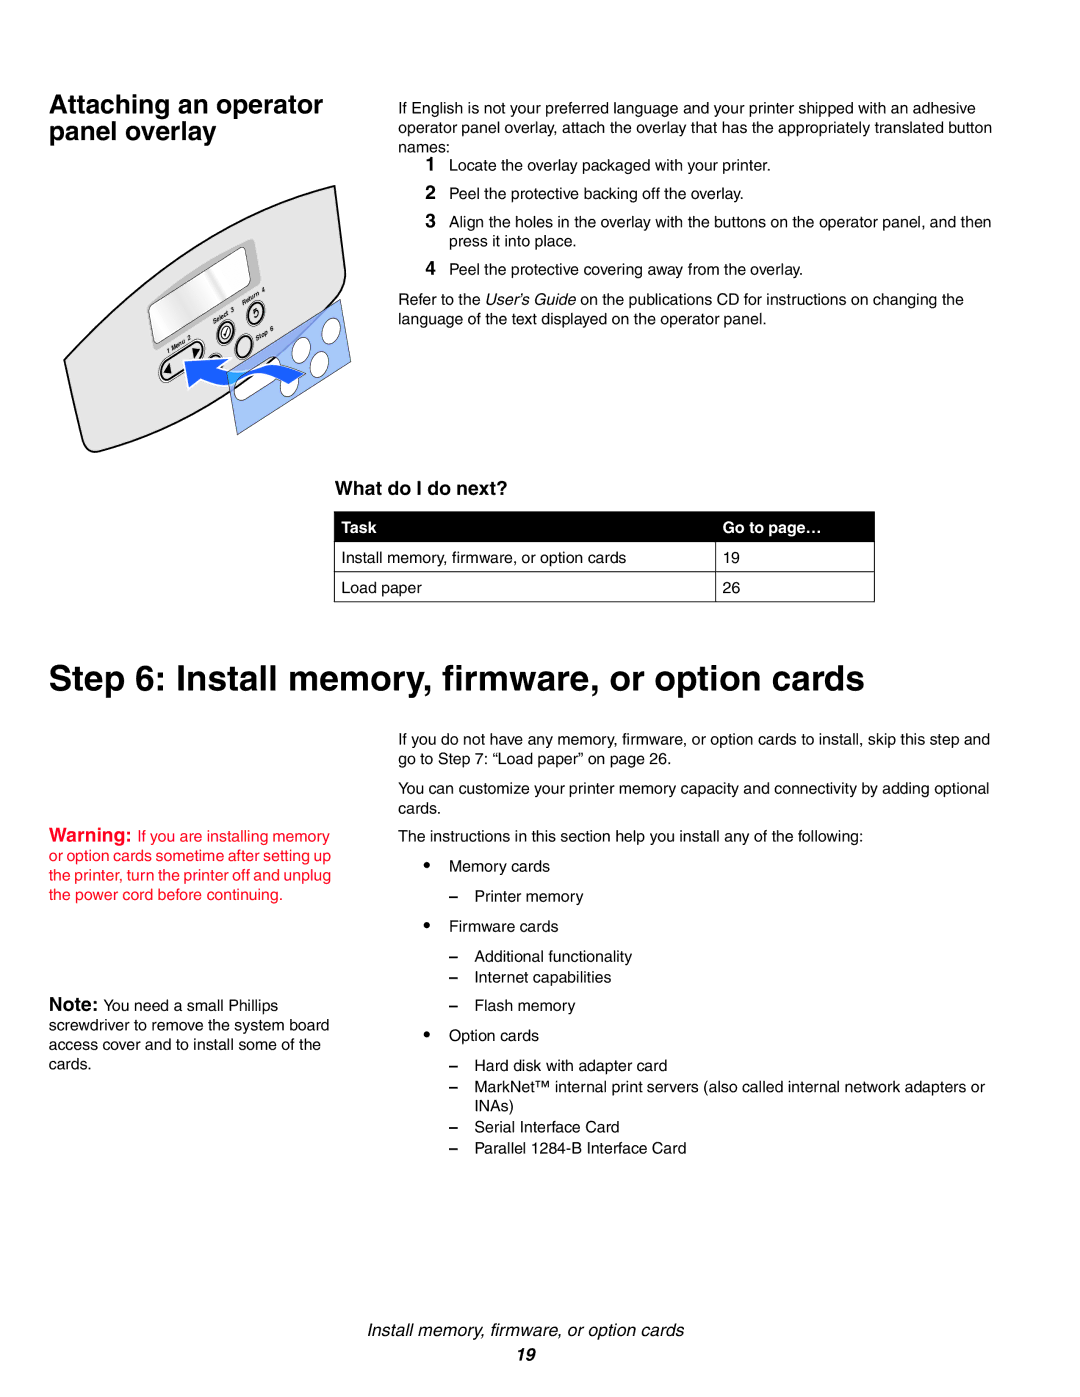
Attaching an operator panel overlay
|
|
|
| 4 |
|
|
|
| Return |
|
|
| t | 3 |
|
|
|
| |
|
|
| Select | 6 |
|
|
|
| |
| u | 2 |
| Stop |
|
|
|
| |
1 | Men |
|
|
|
|
|
|
| |
|
| Go | 5 |
|
|
|
|
|
If English is not your preferred language and your printer shipped with an adhesive operator panel overlay, attach the overlay that has the appropriately translated button names:
1Locate the overlay packaged with your printer.
2Peel the protective backing off the overlay.
3Align the holes in the overlay with the buttons on the operator panel, and then press it into place.
4Peel the protective covering away from the overlay.
Refer to the User’s Guide on the publications CD for instructions on changing the language of the text displayed on the operator panel.
What do I do next?
Task | Go to page… | |
|
| |
Install memory, firmware, or option cards | 19 | |
|
| |
Load paper | 26 | |
|
|
Step 6: Install memory, firmware, or option cards
Warning: If you are installing memory or option cards sometime after setting up the printer, turn the printer off and unplug the power cord before continuing.
Note: You need a small Phillips screwdriver to remove the system board access cover and to install some of the cards.
If you do not have any memory, firmware, or option cards to install, skip this step and go to Step 7: “Load paper” on page 26.
You can customize your printer memory capacity and connectivity by adding optional cards.
The instructions in this section help you install any of the following:
•Memory cards
–Printer memory
•Firmware cards
–Additional functionality
–Internet capabilities
–Flash memory
•Option cards
–Hard disk with adapter card
–MarkNet™ internal print servers (also called internal network adapters or INAs)
–Serial Interface Card
–Parallel
Install memory, firmware, or option cards
19
