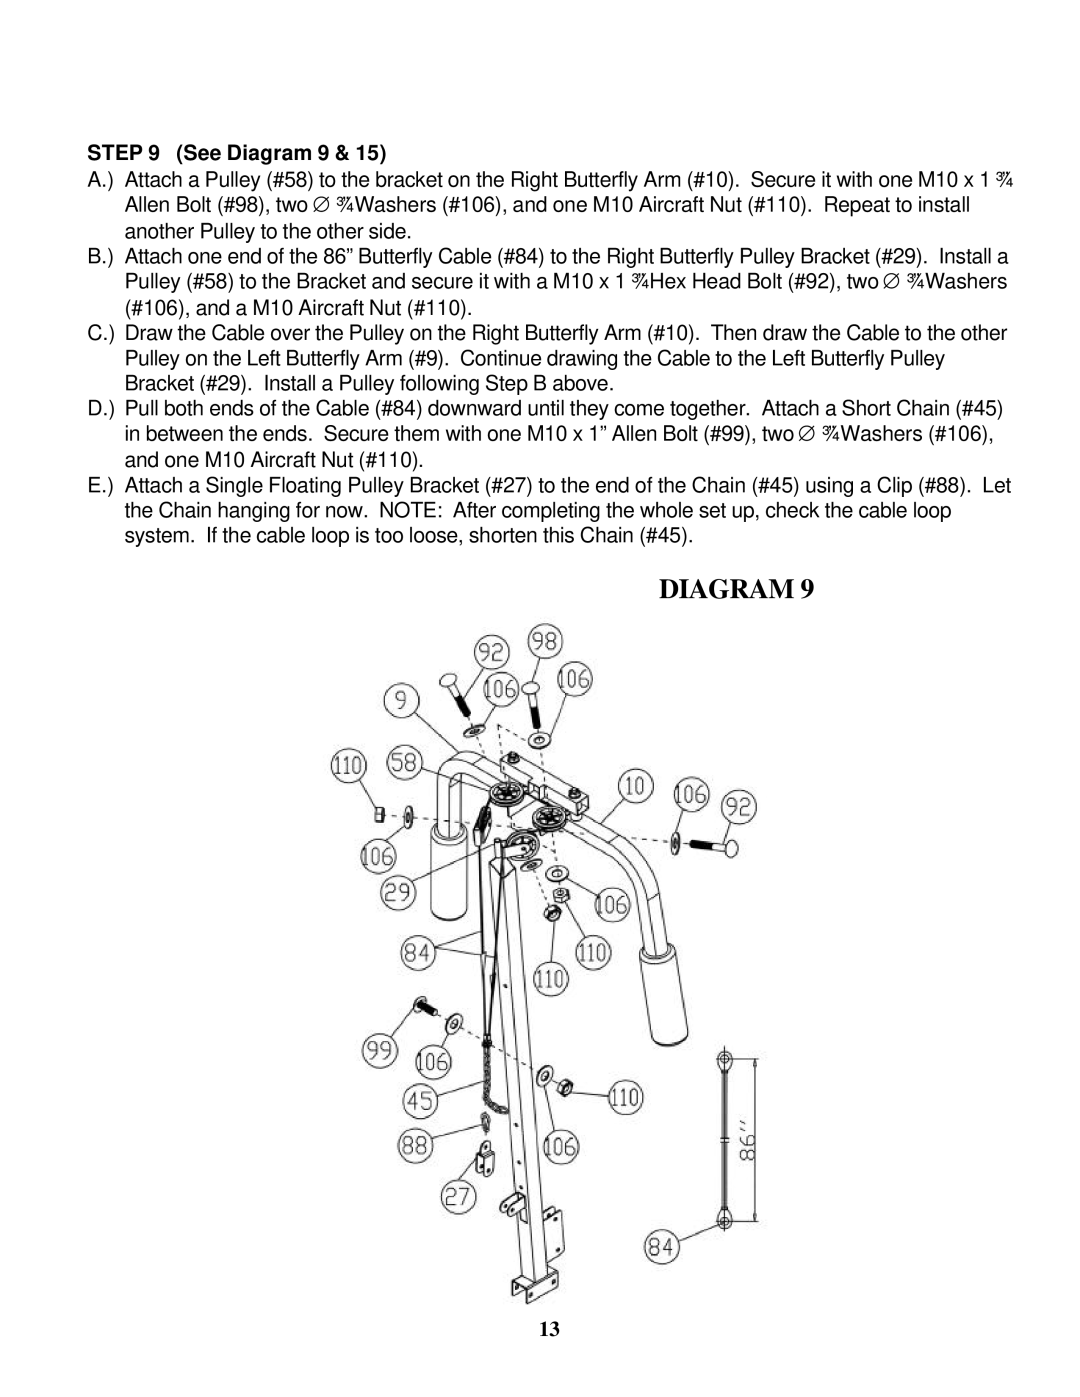
STEP 9 (See Diagram 9 & 15)
A.) Attach a Pulley (#58) to the bracket on the Right Butterfly Arm (#10). Secure it with one M10 x 1 ¾”
Allen Bolt (#98), two ∅ ¾” Washers (#106), and one M10 Aircraft Nut (#110). Repeat to install another Pulley to the other side.
B.) Attach one end of the 86” Butterfly Cable (#84) to the Right Butterfly Pulley Bracket (#29). Install a Pulley (#58) to the Bracket and secure it with a M10 x 1 ¾” Hex Head Bolt (#92), two ∅ ¾” Washers (#106), and a M10 Aircraft Nut (#110).
C.) Draw the Cable over the Pulley on the Right Butterfly Arm (#10). Then draw the Cable to the other Pulley on the Left Butterfly Arm (#9). Continue drawing the Cable to the Left Butterfly Pulley Bracket (#29). Install a Pulley following Step B above.
D.) Pull both ends of the Cable (#84) downward until they come together. Attach a Short Chain (#45) in between the ends. Secure them with one M10 x 1” Allen Bolt (#99), two ∅ ¾” Washers (#106), and one M10 Aircraft Nut (#110).
E.) Attach a Single Floating Pulley Bracket (#27) to the end of the Chain (#45) using a Clip (#88). Let the Chain hanging for now. NOTE: After completing the whole set up, check the cable loop system. If the cable loop is too loose, shorten this Chain (#45).
DIAGRAM 9
13