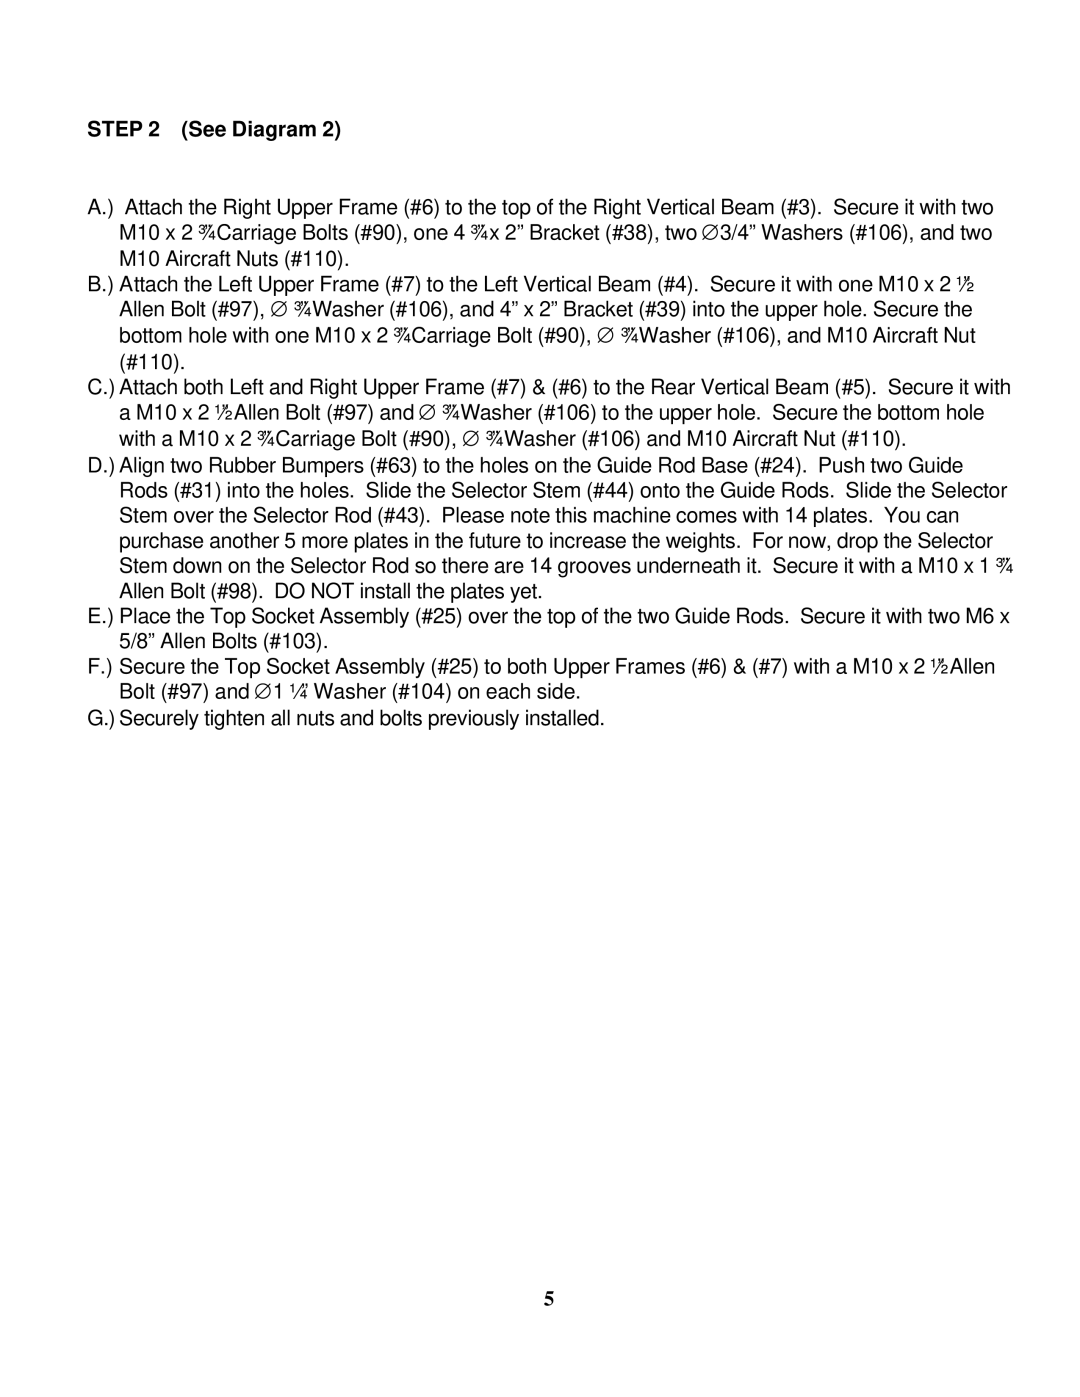
STEP 2 (See Diagram 2)
A.) Attach the Right Upper Frame (#6) to the top of the Right Vertical Beam (#3). Secure it with two M10 x 2 ¾” Carriage Bolts (#90), one 4 ¾” x 2” Bracket (#38), two ∅3/4” Washers (#106), and two M10 Aircraft Nuts (#110).
B.) Attach the Left Upper Frame (#7) to the Left Vertical Beam (#4). Secure it with one M10 x 2 ½” Allen Bolt (#97), ∅ ¾” Washer (#106), and 4” x 2” Bracket (#39) into the upper hole. Secure the bottom hole with one M10 x 2 ¾” Carriage Bolt (#90), ∅ ¾” Washer (#106), and M10 Aircraft Nut (#110).
C.) Attach both Left and Right Upper Frame (#7) & (#6) to the Rear Vertical Beam (#5). Secure it with a M10 x 2 ½” Allen Bolt (#97) and ∅ ¾” Washer (#106) to the upper hole. Secure the bottom hole with a M10 x 2 ¾” Carriage Bolt (#90), ∅ ¾” Washer (#106) and M10 Aircraft Nut (#110).
D.) Align two Rubber Bumpers (#63) to the holes on the Guide Rod Base (#24). Push two Guide Rods (#31) into the holes. Slide the Selector Stem (#44) onto the Guide Rods. Slide the Selector Stem over the Selector Rod (#43). Please note this machine comes with 14 plates. You can purchase another 5 more plates in the future to increase the weights. For now, drop the Selector Stem down on the Selector Rod so there are 14 grooves underneath it. Secure it with a M10 x 1 ¾” Allen Bolt (#98). DO NOT install the plates yet.
E.) Place the Top Socket Assembly (#25) over the top of the two Guide Rods. Secure it with two M6 x 5/8” Allen Bolts (#103).
F.) Secure the Top Socket Assembly (#25) to both Upper Frames (#6) & (#7) with a M10 x 2 ½” Allen Bolt (#97) and ∅1 ¼” Washer (#104) on each side.
G.) Securely tighten all nuts and bolts previously installed.
5