Connecting the DPC-7.4—Continued
Connecting 

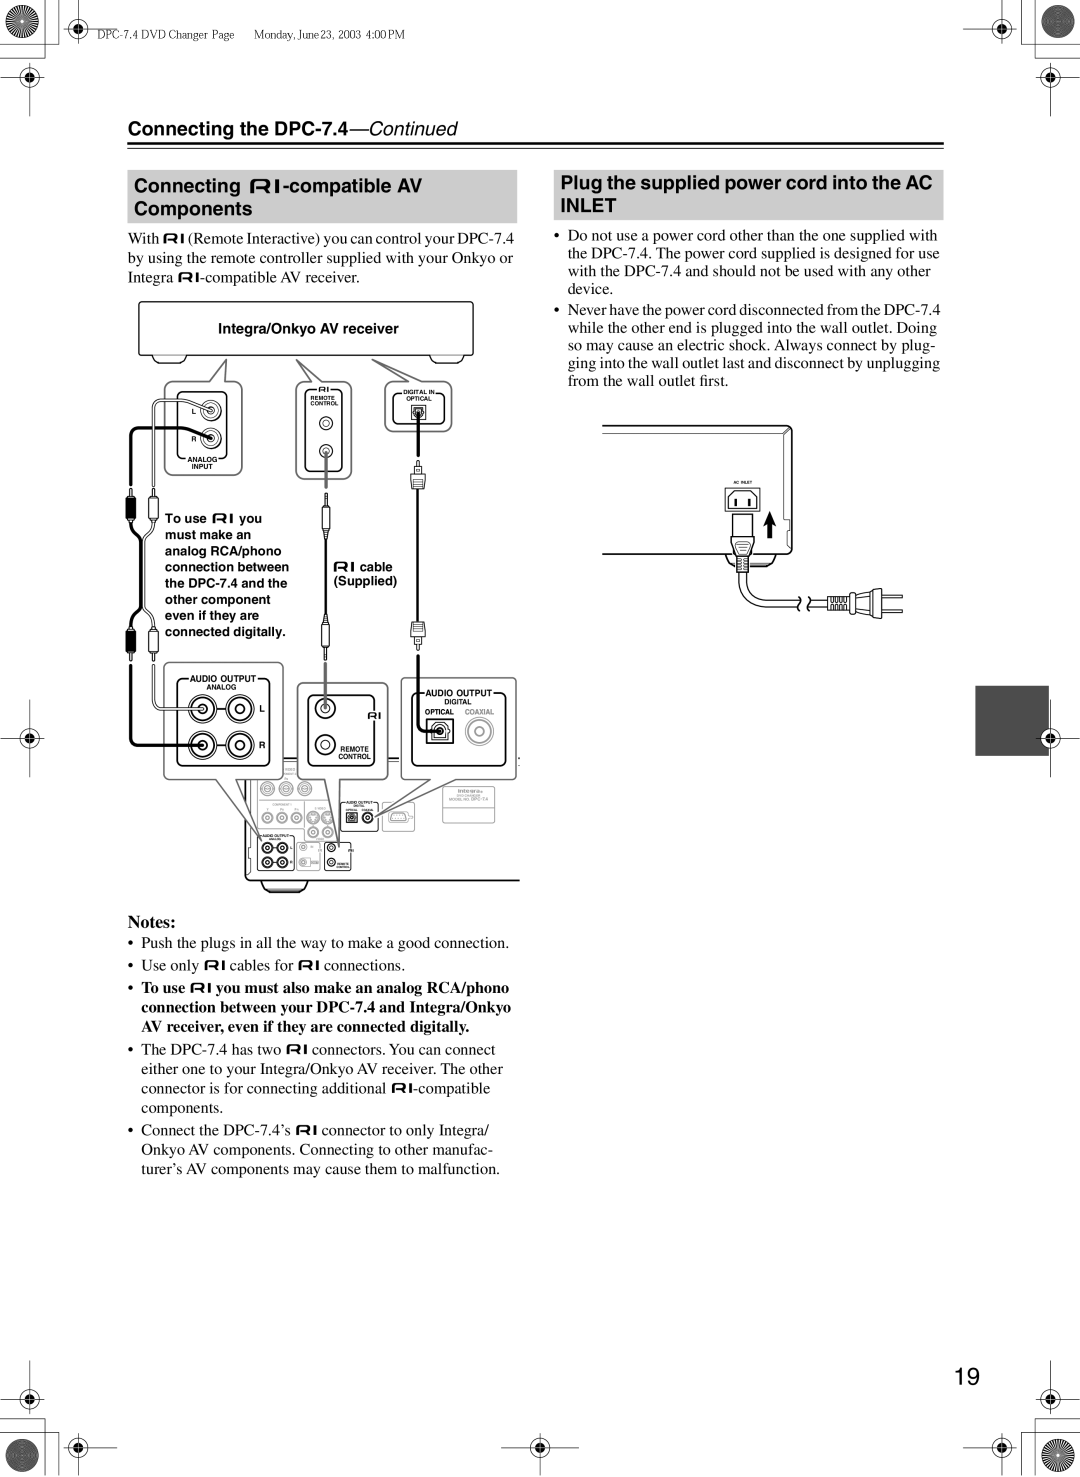
-compatible AV
Components
With ![]()
![]() (Remote Interactive) you can control your
(Remote Interactive) you can control your ![]()
![]() -compatible
-compatible
Integra/Onkyo AV receiver
REMOTE | DIGITAL IN |
OPTICAL | |
CONTROL |
|
L |
|
R
ANALOG
INPUT
Plug the supplied power cord into the AC INLET
•Do not use a power cord other than the one supplied with the
•Never have the power cord disconnected from the
ANGER
.
AC INLET
![]() To use
To use ![]() you must make an analog RCA/phono connection between the
you must make an analog RCA/phono connection between the ![]() connected digitally.
connected digitally.
![]() cable (Supplied)
cable (Supplied)
AUDIO OUTPUT
ANALOG
L
R
VIDEO OUTPUT
| COMPONENT 2 |
| |
Y | PB |
| PR |
| COMPONENT 1 |
|
|
Y | PB | PR | S VIDEO |
AUDIO OUTPUT
ANALOG | VIDEO |
LIN
IR
ROUT
AUDIO OUTPUT
DIGITAL
OPTICAL COAXIAL
REMOTE
CONTROL
DVD CHANGER
MODEL NO.
AUDIO OUTPUT | RS 232 |
DIGITAL
OPTICAL COAXIAL
REMOTE
CONTROL
Notes:
•Push the plugs in all the way to make a good connection.
•Use only ![]()
![]() cables for
cables for ![]()
![]() connections.
connections.
•To use ![]()
![]() you must also make an analog RCA/phono connection between your
you must also make an analog RCA/phono connection between your
•The ![]()
![]() connectors. You can connect either one to your Integra/Onkyo AV receiver. The other connector is for connecting additional
connectors. You can connect either one to your Integra/Onkyo AV receiver. The other connector is for connecting additional ![]()
![]() -compatible
-compatible
•Connect the ![]()
![]() connector to only Integra/ Onkyo AV components. Connecting to other manufac- turer’s AV components may cause them to malfunction.
connector to only Integra/ Onkyo AV components. Connecting to other manufac- turer’s AV components may cause them to malfunction.
19