SECTION
13. Turn the disinfectant valve to the on position.
NOTE: Liquid will be heard filling the interior plumbing of the tub.
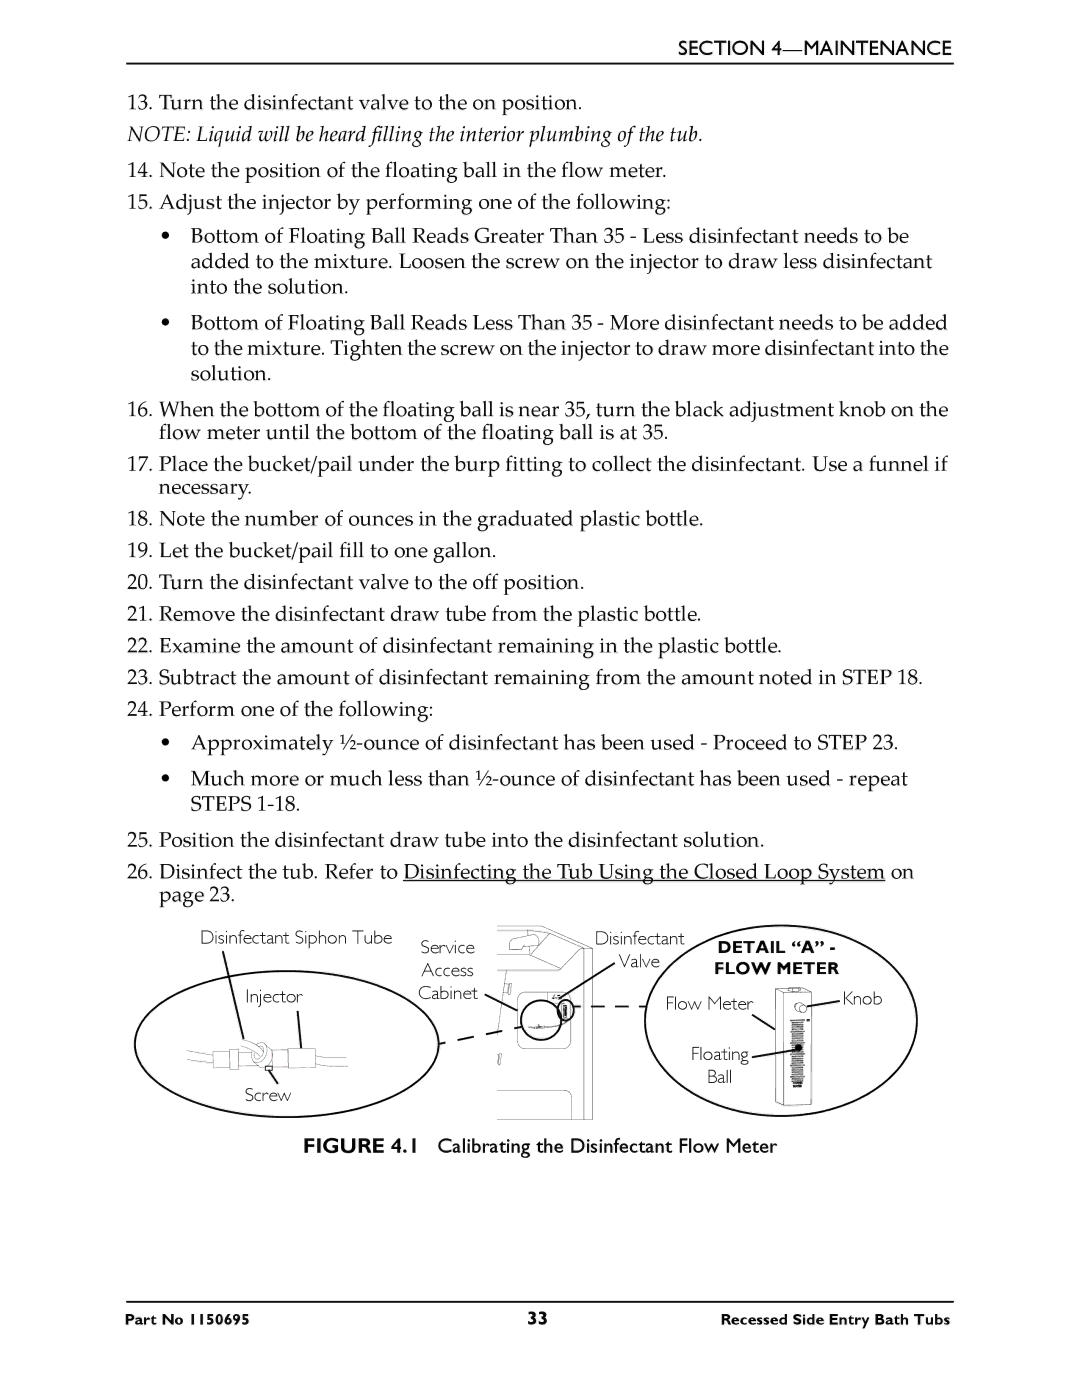
14.Note the position of the floating ball in the flow meter.
15.Adjust the injector by performing one of the following:
•Bottom of Floating Ball Reads Greater Than 35 ‐ Less disinfectant needs to be added to the mixture. Loosen the screw on the injector to draw less disinfectant into the solution.
•Bottom of Floating Ball Reads Less Than 35 ‐ More disinfectant needs to be added to the mixture. Tighten the screw on the injector to draw more disinfectant into the solution.
16.When the bottom of the floating ball is near 35, turn the black adjustment knob on the flow meter until the bottom of the floating ball is at 35.
17.Place the bucket/pail under the burp fitting to collect the disinfectant. Use a funnel if necessary.
18.Note the number of ounces in the graduated plastic bottle.
19.Let the bucket/pail fill to one gallon.
20.Turn the disinfectant valve to the off position.
21.Remove the disinfectant draw tube from the plastic bottle.
22.Examine the amount of disinfectant remaining in the plastic bottle.
23.Subtract the amount of disinfectant remaining from the amount noted in STEP 18.
24.Perform one of the following:
•Approximately ½‐ounce of disinfectant has been used ‐ Proceed to STEP 23.
•Much more or much less than ½‐ounce of disinfectant has been used ‐ repeat STEPS 1‐18.
25.Position the disinfectant draw tube into the disinfectant solution.
26.Disinfect the tub. Refer to Disinfecting the Tub Using the Closed Loop System on page 23.
Disinfectant Siphon Tube | Service | Disinfectant | DETAIL “A” - |
| |
| Valve |
|
| ||
| Access |
| FLOW METER |
| |
|
|
|
| ||
Injector | Cabinet |
| Flow Meter | Knob | |
|
|
|
| Floating |
|
Screw |
|
|
| Ball |
|
|
|
|
|
| |
FIGURE 4.1 Calibrating the Disinfectant Flow Meter
Part No 1150695 | 33 | Recessed Side Entry Bath Tubs |
