SECTION
Composite/Articulating Footplate Heel Loop Replacement
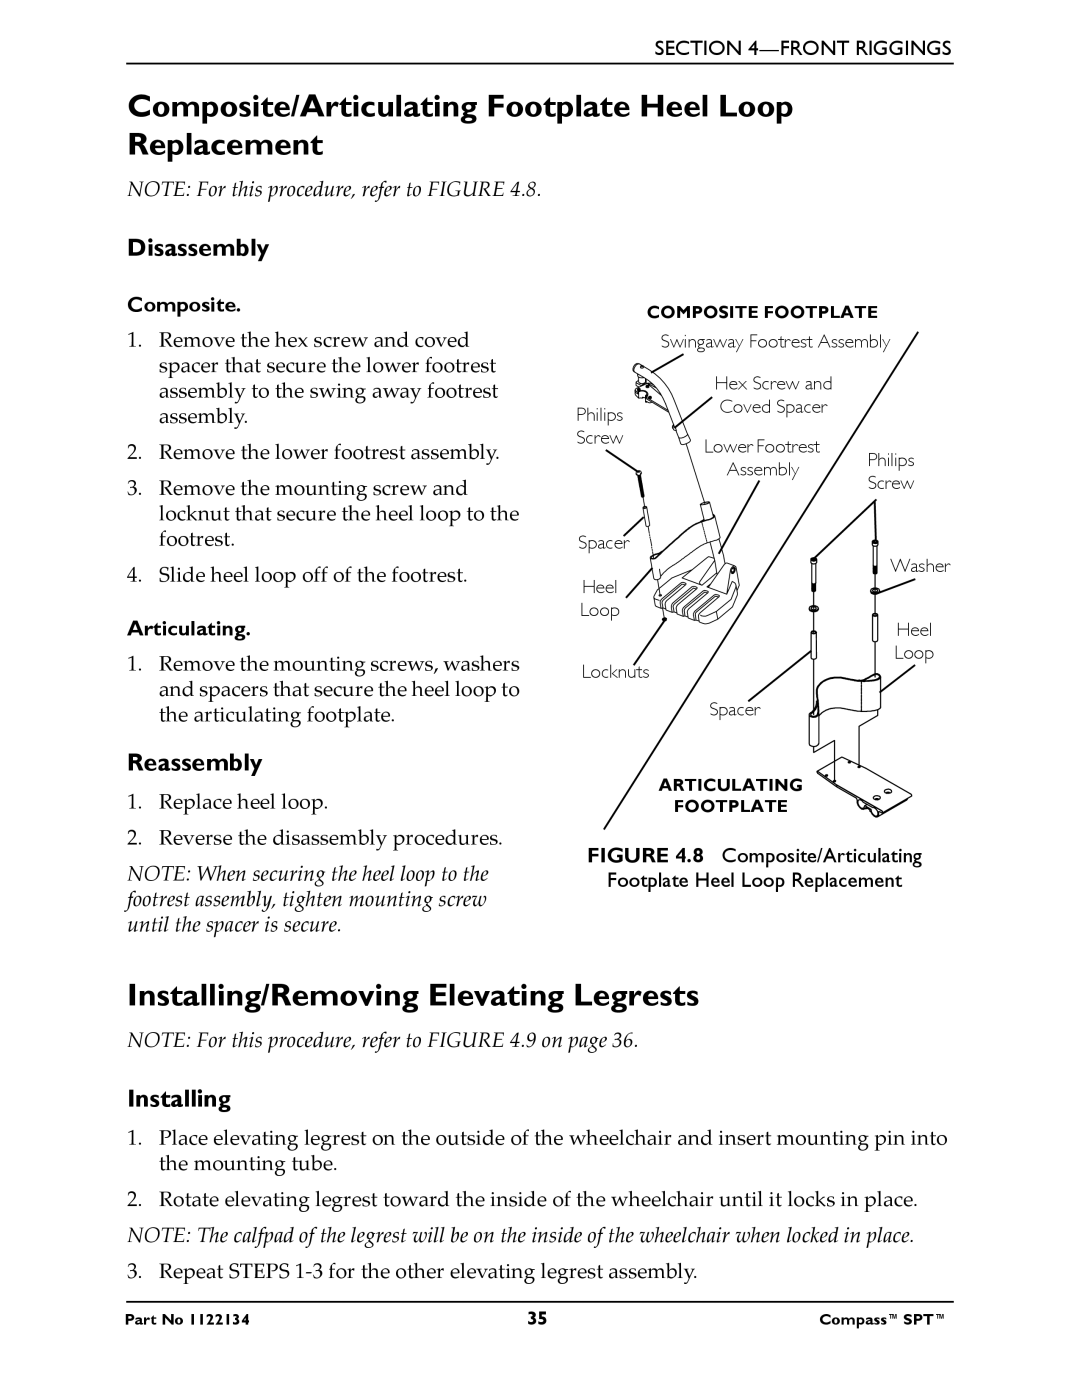
NOTE: For this procedure, refer to FIGURE 4.8.
Disassembly
Composite.
1.Remove the hex screw and coved spacer that secure the lower footrest assembly to the swing away footrest assembly.
2.Remove the lower footrest assembly.
3.Remove the mounting screw and locknut that secure the heel loop to the footrest.
4.Slide heel loop off of the footrest.
Articulating.
1.Remove the mounting screws, washers and spacers that secure the heel loop to the articulating footplate.
Reassembly
1.Replace heel loop.
2.Reverse the disassembly procedures.
NOTE: When securing the heel loop to the footrest assembly, tighten mounting screw until the spacer is secure.
COMPOSITE FOOTPLATE
| Swingaway Footrest Assembly | |
| Hex Screw and |
|
Philips | Coved Spacer |
|
|
| |
Screw | Lower Footrest | Philips |
| ||
| Assembly | |
| Screw | |
|
| |
Spacer |
|
|
Heel |
| Washer |
|
| |
Loop |
| Heel |
|
| |
Locknuts |
| Loop |
|
| |
| Spacer |
|
ARTICULATING
FOOTPLATE
FIGURE 4.8 Composite/Articulating
Footplate Heel Loop Replacement
Installing/Removing Elevating Legrests
NOTE: For this procedure, refer to FIGURE 4.9 on page 36.
Installing
1.Place elevating legrest on the outside of the wheelchair and insert mounting pin into the mounting tube.
2.Rotate elevating legrest toward the inside of the wheelchair until it locks in place.
NOTE: The calfpad of the legrest will be on the inside of the wheelchair when locked in place. 3. Repeat STEPS
Part No 1122134 | 35 | Compass™SPT™ |