PROCEDURE 3 | SEAT AND BACK |
|
|
S E A T
A N D
B A C K
This Procedure Includes the Following:
Assembling The Back to the Wheelchair Replacing the
Adjusting Seat Depth
Adjusting Seat Width
WARNING
After making adjustments, always make sure that parts are properly tightened BEFORE using the wheelchair.
ASSEMBLING THE BACK CANE TO THE WHEELCHAIR (FIGURE 1)
1.Remove the attaching hardware from the bottom of the back canes.
2.Insert the two (2) back canes into the two (2) mounting holes in the wheelchair frame.
3.Position the mounting hardware through the wheelchair frame and back canes as shown in FIGURE 1.
4.Securely tighten the attaching hardware. Torque to
Hex Screw
(Torque toBack Cane
Coved
Washer
Wheelchair
FrameLocknut
Coved Washer
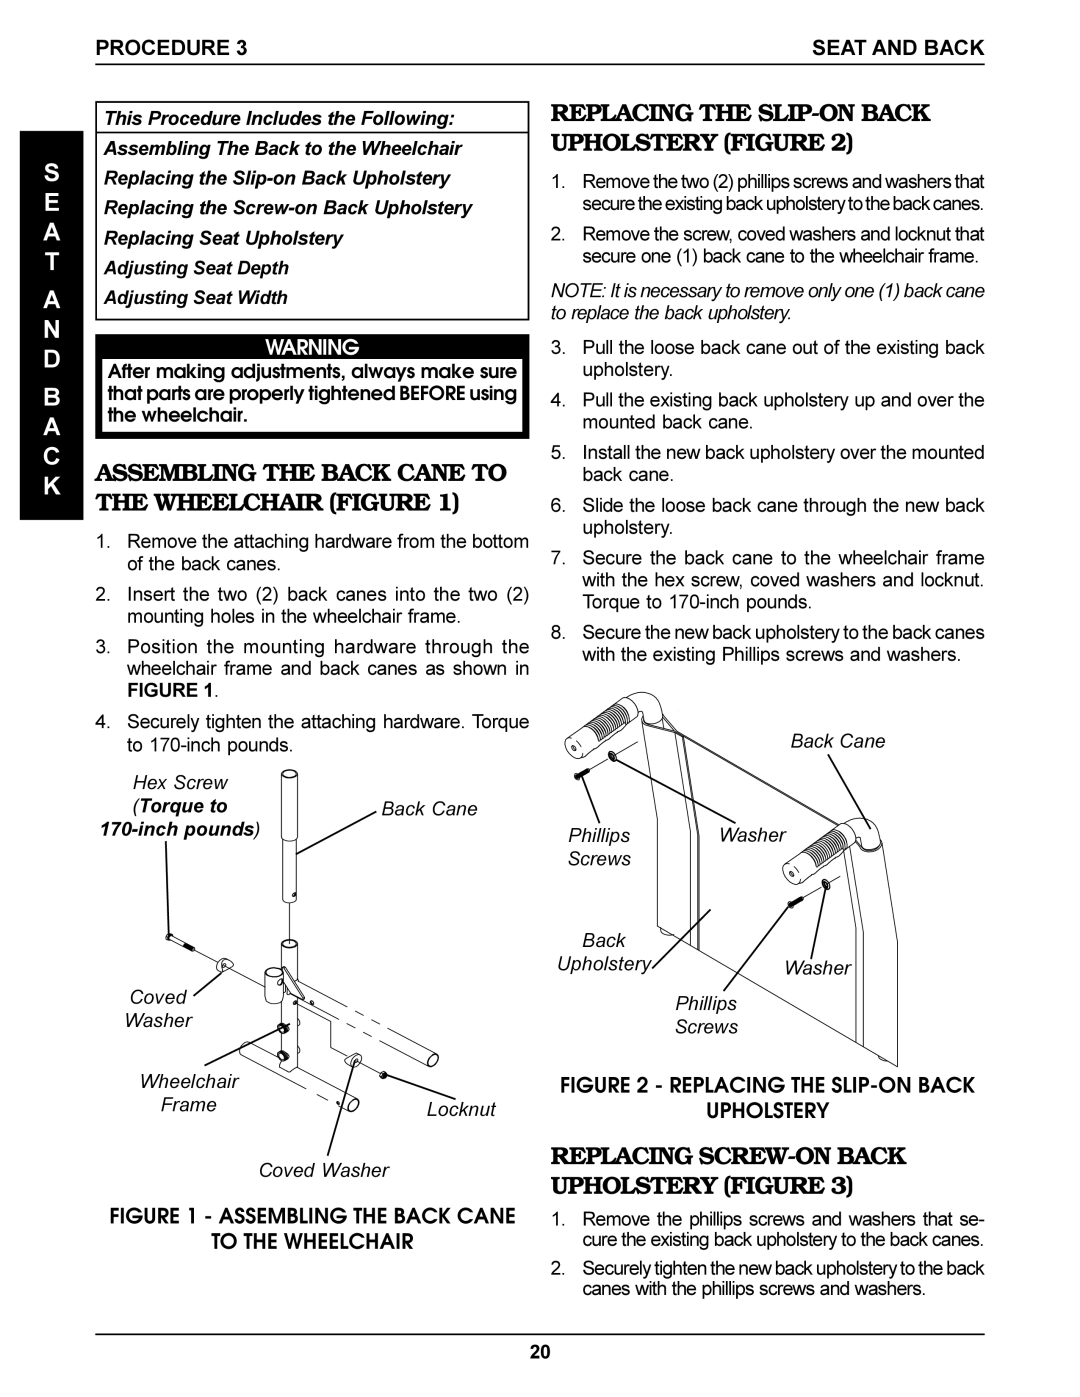
REPLACING THE SLIP-ON BACK UPHOLSTERY (FIGURE 2)
1.Remove the two (2) phillips screws and washers that securetheexistingbackupholsterytothebackcanes.
2.Remove the screw, coved washers and locknut that secure one (1) back cane to the wheelchair frame.
NOTE: It is necessary to remove only one (1) back cane to replace the back upholstery.
3.Pull the loose back cane out of the existing back upholstery.
4.Pull the existing back upholstery up and over the mounted back cane.
5.Install the new back upholstery over the mounted back cane.
6.Slide the loose back cane through the new back upholstery.
7.Secure the back cane to the wheelchair frame with the hex screw, coved washers and locknut. Torque to
8.Secure the new back upholstery to the back canes with the existing Phillips screws and washers.
Back Cane
Phillips Washer
Screws
Back
UpholsteryWasher
Phillips
Screws
FIGURE 2 - REPLACING THE SLIP-ON BACK
UPHOLSTERY
REPLACING SCREW-ON BACK UPHOLSTERY (FIGURE 3)
FIGURE 1 - ASSEMBLING THE BACK CANE 1. | Remove the phillips screws and washers that se- |
TO THE WHEELCHAIR | cure the existing back upholstery to the back canes. |
2. | Securely tighten the new back upholstery to the back |
| canes with the phillips screws and washers. |
20