Installation
This chapter will give you brief instructions on how to install the product. In section 2.1, we will configure the hardware part of the BOSS™ step by step. In section 2.2, we will check whether the IP address of your computer is assigned by DHCP. Once we complete the installation of the BOSS™ hardware and check your computer settings, we will use the
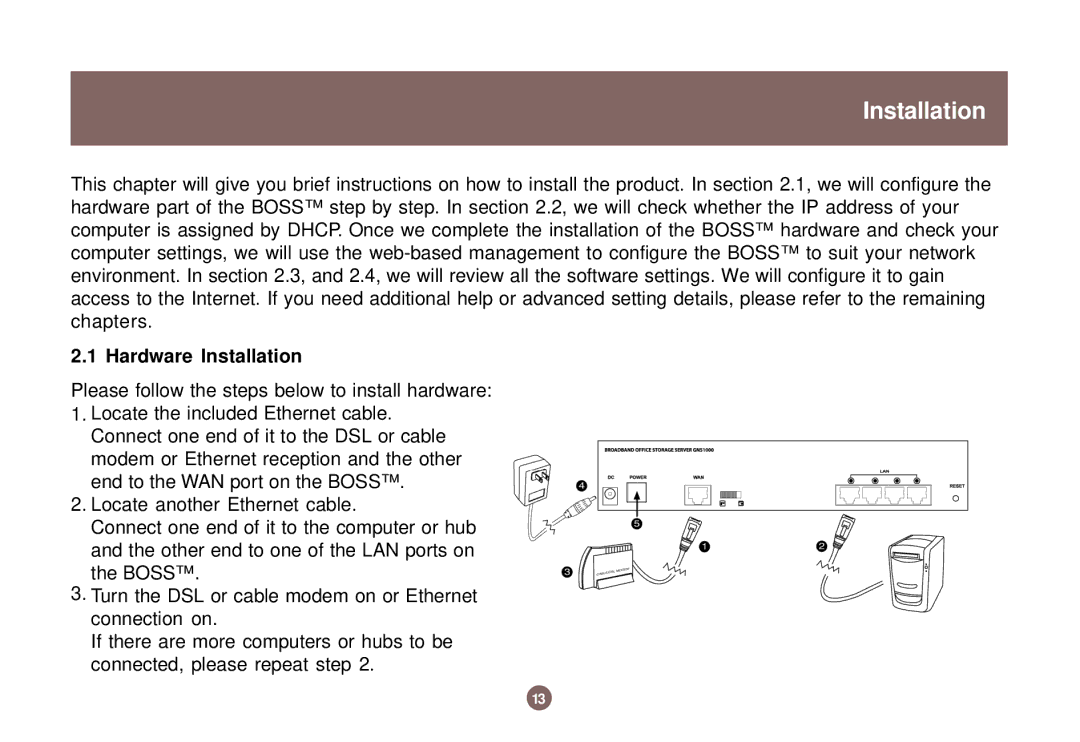
2.1 Hardware Installation
Please follow the steps below to install hardware:
1.Locate the included Ethernet cable. Connect one end of it to the DSL or cable modem or Ethernet reception and the other end to the WAN port on the BOSS™.
2.Locate another Ethernet cable.
Connect one end of it to the computer or hub and the other end to one of the LAN ports on the BOSS™.
3.Turn the DSL or cable modem on or Ethernet connection on.
If there are more computers or hubs to be connected, please repeat step 2.
13