Filename |
|
Masterpage:Left+ | |
|
64 EN EDITING
NOTES: |
|
| Digital Audio Dubbing | |
● If you have a satellite receiver or a decoder connected to the |
|
| ||
DECODER connector, be sure to set |
|
|
| |
You can dub selected audio from a DVD or Audio CD disc to a | ||||
appropriate mode after editing. | ||||
● If you are not connecting a satellite receiver or a decoder to the | digital audio device. | |||
IN/DECODER connector, leave | However, it is not possible to dub | |||
●When
“SAT” appears on the TV screen or front display panel instead of | ● Turn on the TV and select the AV mode. | |
● Slide the TV/CABLE/SAT/DVD switch to DVD. | ||
● If |
| |
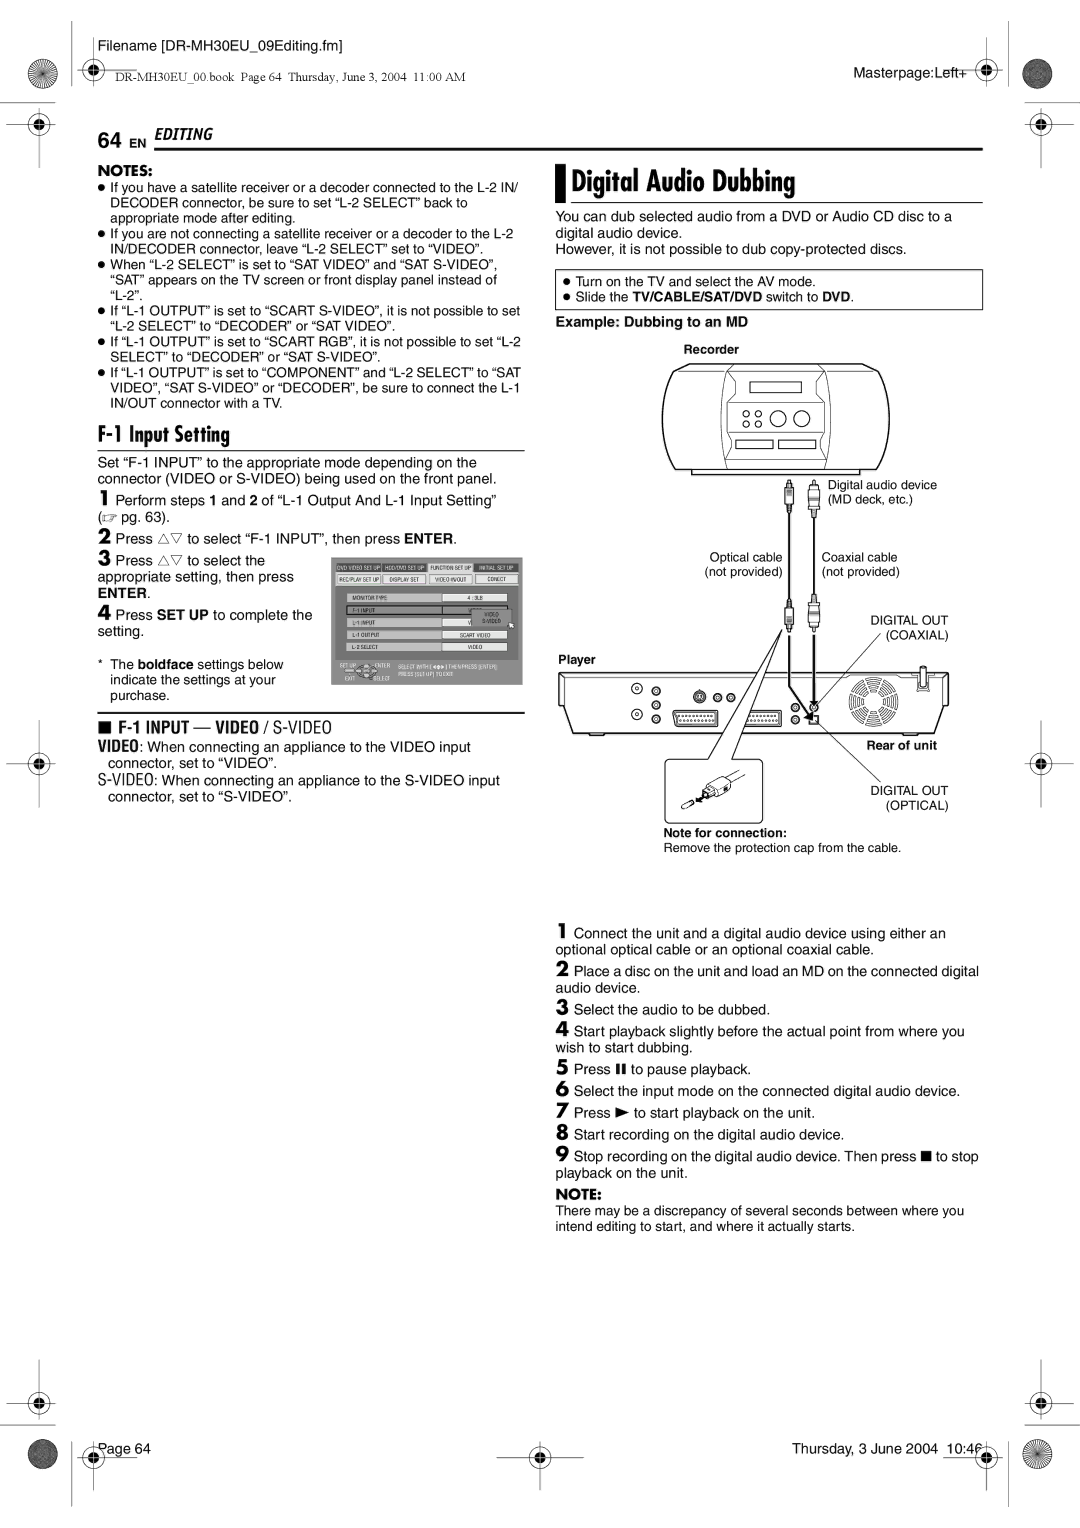
Example: Dubbing to an MD | ||
● If | Recorder | |
SELECT” to “DECODER” or “SAT | ||
|
●If
F-1 Input Setting
Set
1 Perform steps 1 and 2 of
2 Press rt to select
3 Press rt to select the |
|
|
|
|
|
|
|
DVD VIDEO SET UP | HDD/DVD SET UP | FUNCTION SET UP | INITIAL SET UP | ||||
appropriate setting, then press | REC/PLAY SET UP | DISPLAY SET | VIDEO IN/OUT | CONECT | |||
ENTER. |
|
|
|
|
|
|
|
| MONITOR TYPE |
| 4 : 3LB |
| |||
4 Press SET UP to complete the |
|
|
|
|
|
| |
|
|
|
|
| |||
|
|
|
| ||||
setting. |
|
|
|
|
| VIDEO |
|
|
|
|
|
|
|
| |
|
|
|
|
|
| ||
|
| SCART VIDEO |
| ||||
|
|
|
|
|
|
|
|
|
|
| VIDEO |
| |||
* | The boldface settings below | SET UP | ENTER | SELECT WITH [ | Player |
] THEN PRESS [ENTER] | |||||
| indicate the settings at your | EXIT | SELECT | PRESS [SET UP] TO EXIT | |
|
|
| |||
| purchase. |
|
|
|
|
Optical cable (not provided)
Digital audio device (MD deck, etc.)
Coaxial cable (not provided)
DIGITAL OUT (COAXIAL)
8F-1 INPUT — VIDEO / S-VIDEO
VIDEO: When connecting an appliance to the VIDEO input connector, set to “VIDEO”.
Rear of unit
DIGITAL OUT (OPTICAL)
Note for connection:
Remove the protection cap from the cable.
1 Connect the unit and a digital audio device using either an optional optical cable or an optional coaxial cable.
2Place a disc on the unit and load an MD on the connected digital audio device.
3Select the audio to be dubbed.
4Start playback slightly before the actual point from where you wish to start dubbing.
5Press 9 to pause playback.
6Select the input mode on the connected digital audio device.
7Press 4 to start playback on the unit.
8Start recording on the digital audio device.
9Stop recording on the digital audio device. Then press 8 to stop playback on the unit.
NOTE:
There may be a discrepancy of several seconds between where you intend editing to start, and where it actually starts.
Page 64 |
Thursday, 3 June 2004 10:46 |