USER MAINTENANCE | EN 91 |

 After Use
1Turn off the camcorder.
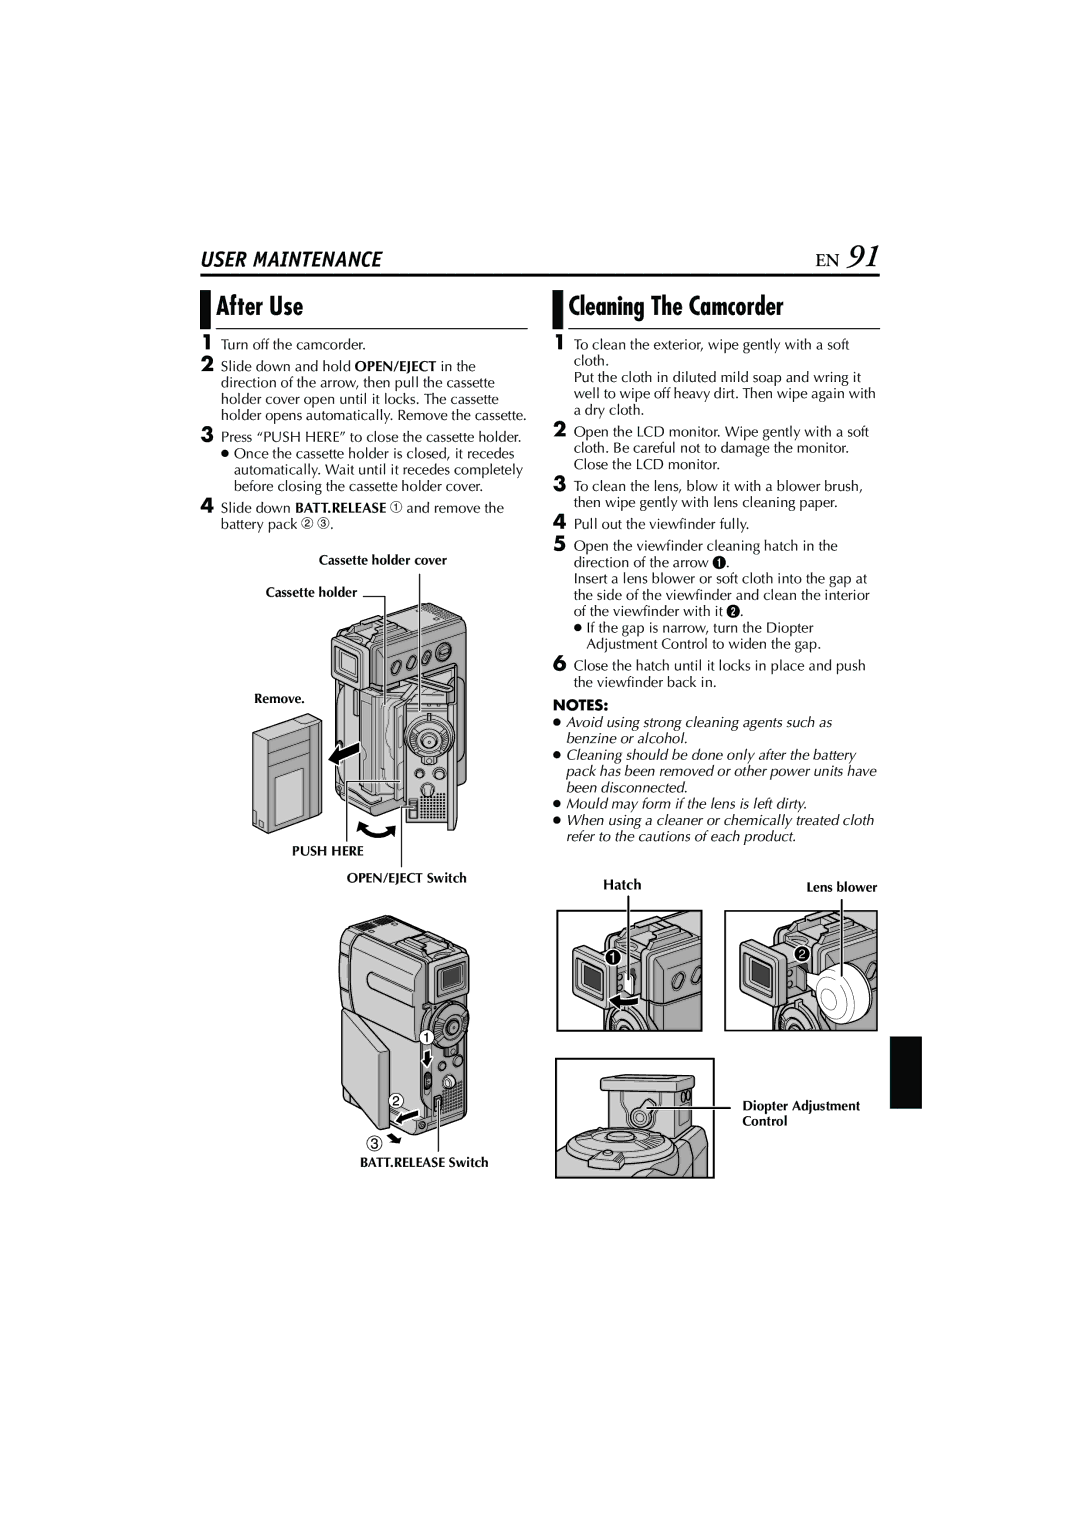
2Slide down and hold OPEN/EJECT in the direction of the arrow, then pull the cassette holder cover open until it locks. The cassette holder opens automatically. Remove the cassette.
3Press “PUSH HERE” to close the cassette holder.
●Once the cassette holder is closed, it recedes automatically. Wait until it recedes completely before closing the cassette holder cover.
4Slide down BATT.RELEASE 1 and remove the battery pack 2 3.
Cassette holder cover
Cassette holder ![]()
Remove.
PUSH HERE
OPEN/EJECT Switch

 Cleaning The Camcorder
1To clean the exterior, wipe gently with a soft cloth.
Put the cloth in diluted mild soap and wring it well to wipe off heavy dirt. Then wipe again with a dry cloth.
2Open the LCD monitor. Wipe gently with a soft cloth. Be careful not to damage the monitor. Close the LCD monitor.
3To clean the lens, blow it with a blower brush, then wipe gently with lens cleaning paper.
4Pull out the viewfinder fully.
5Open the viewfinder cleaning hatch in the direction of the arrow A.
Insert a lens blower or soft cloth into the gap at the side of the viewfinder and clean the interior of the viewfinder with it B.
●If the gap is narrow, turn the Diopter Adjustment Control to widen the gap.
6Close the hatch until it locks in place and push the viewfinder back in.
NOTES:
●Avoid using strong cleaning agents such as benzine or alcohol.
●Cleaning should be done only after the battery pack has been removed or other power units have been disconnected.
●Mould may form if the lens is left dirty.
●When using a cleaner or chemically treated cloth refer to the cautions of each product.
Hatch | Lens blower |
BATT.RELEASE Switch
Diopter Adjustment Control