26EN RECORDING Advanced Features For Video And D.S.C. (cont.)
 POWER Switch
Lock Button
 Operation Switch
MENU Wheel
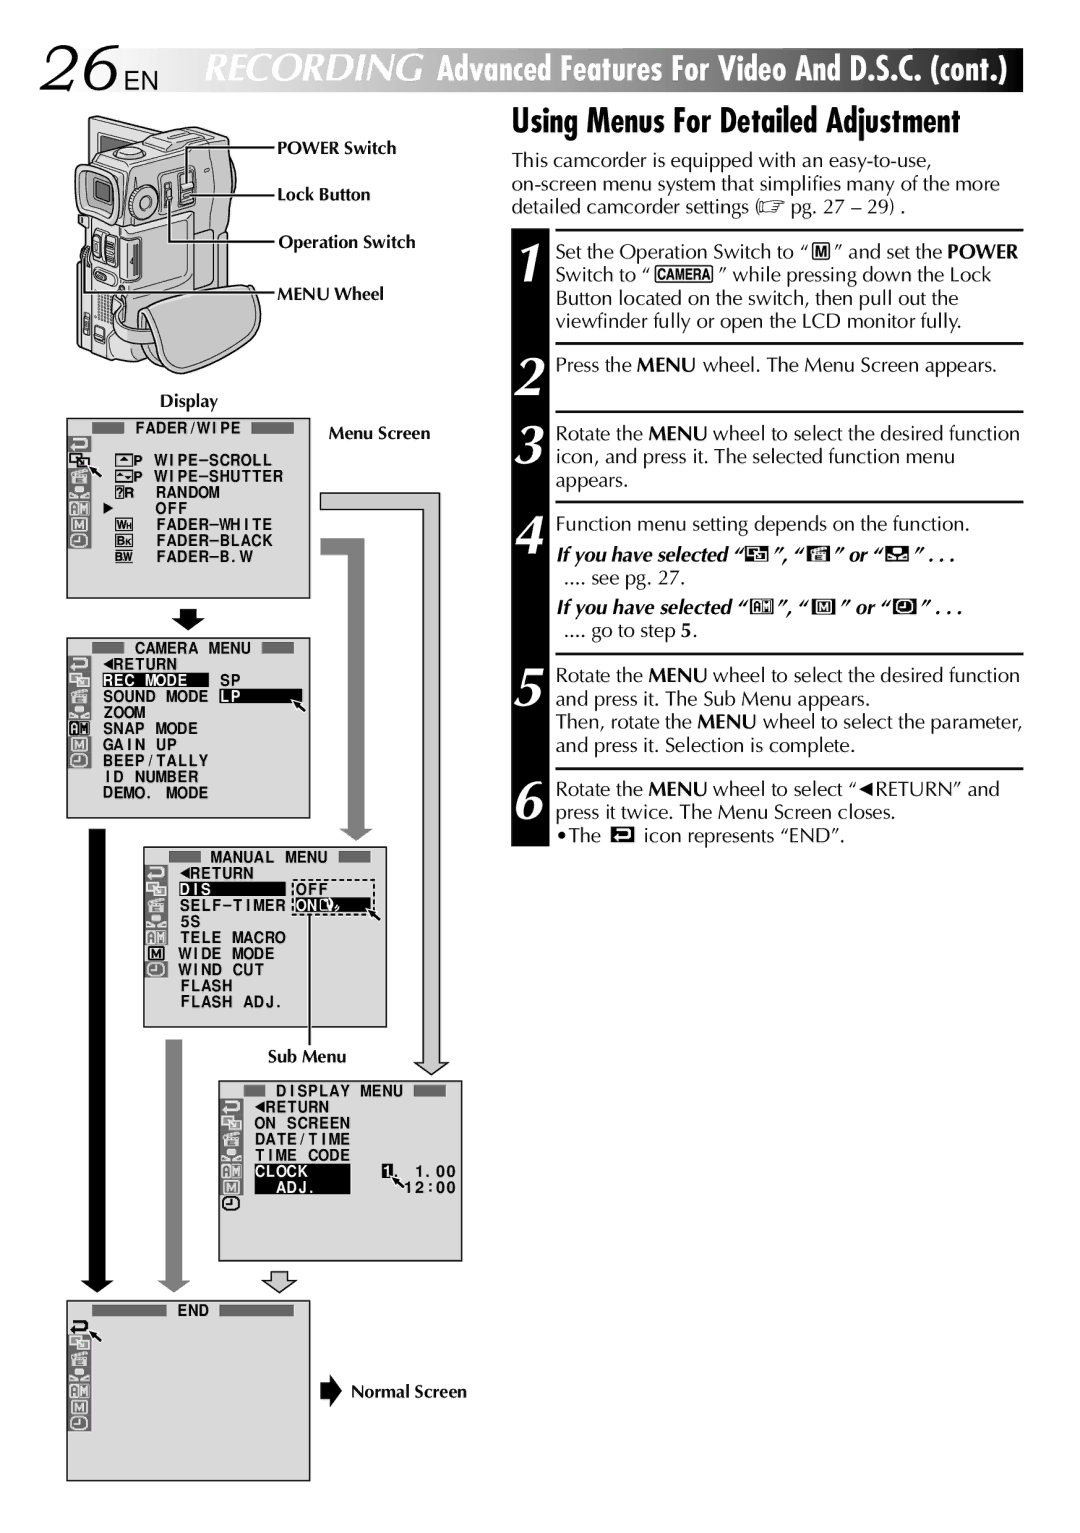
Using Menus For Detailed Adjustment
This camcorder is equipped with an
1 Set the Operation Switch to “  ” and set the POWER
Switch to “ ![]()
![]()
![]() ” while pressing down the Lock Button located on the switch, then pull out the viewfinder fully or open the LCD monitor fully.
” while pressing down the Lock Button located on the switch, then pull out the viewfinder fully or open the LCD monitor fully.
Display
FADER / W I PE
W I
W I
RANDOM
4 OF F
CAMERA MENU
1RETURN
REC MODE SP
SOUND MODE LP
ZOOM
SNAP MODE
GA I N UP BEEP / TAL L Y I D NUMBER DEMO. MODE
Menu Screen
2 Press the MENU wheel. The Menu Screen appears.
3 Rotate the MENU wheel to select the desired function icon, and press it. The selected function menu appears.
Function menu setting depends on the function. | ||||||||||
4 If you have selected “ |
|
| ”, “ |
|
|
| ” or “ |
|
| ” . . . |
.... see pg. 27. |
|
|
|
|
|
|
|
| ||
If you have selected “ |
| ”, “ |
| ” or “ |
| ” . . . | ||||
|
|
|
| |||||||
.... go to step 5. |
|
|
|
|
|
|
|
| ||
5 Rotate the MENU wheel to select the desired function and press it. The Sub Menu appears.
Then, rotate the MENU wheel to select the parameter, and press it. Selection is complete.
6 Rotate the MENU wheel to select “1RETURN” and press it twice. The Menu Screen closes.
•The ![]() icon represents “END”.
icon represents “END”.
MANUAL MENU | |
1RE TURN |
|
D I S | OF F |
SEL F – T I MER | ON |
5S |
|
T ELE MACRO |
|
W I DE MODE |
|
W I ND CUT |
|
F LASH |
|
F LASH ADJ . |
|
Sub Menu
|
| D I SP LAY MENU |
|
|
|
| |||
| 1RETURN |
|
|
|
| ||||
| ON SCREEN |
|
|
|
| ||||
| DAT E / T I ME |
|
|
|
| ||||
| T I ME | CODE | 1 |
|
| ||||
| CLOCK |
| 1 | . | . 0 0 | ||||
|
| ADJ . |
|
| 1 2 | : 0 0 | |||
|
|
|
|
|
|
|
|
|
|
END