English
6Check if the drivers are correctly installed.
1Open the Control Panel on your PC: Select [Start] = [Settings] = [Control Panel]
2Click [System] = [Hardware] = [Device Manager] = [Sound, video and game controllers] and [Universal Serial Bus controllers]
•The following window appears, and you can check whether the drivers are installed.
*The installed drivers can be shown only when the System is connected to the PC.
To play back sounds on the PC
Refer to the manuals supplied with the sound reproduction application installed in the PC.
•Microsoft®, Windows® 98SE, Windows® Me, Windows® 2000 and Windows® XP are registered trademarks of Microsoft corporation.
Playing Back from Other External Equipment
IMPORTANT
•Turn the power off to all components before connections.
•Always set volume to VOL MIN when connecting or disconnecting the other equipment.
By connecting an external audio equipment or game console, you can enjoy the dynamic sound with this system.
•When enjoying a video game with your game console connected to this System, connect this System and your TV/monitor with the composite video cable (see page 6).
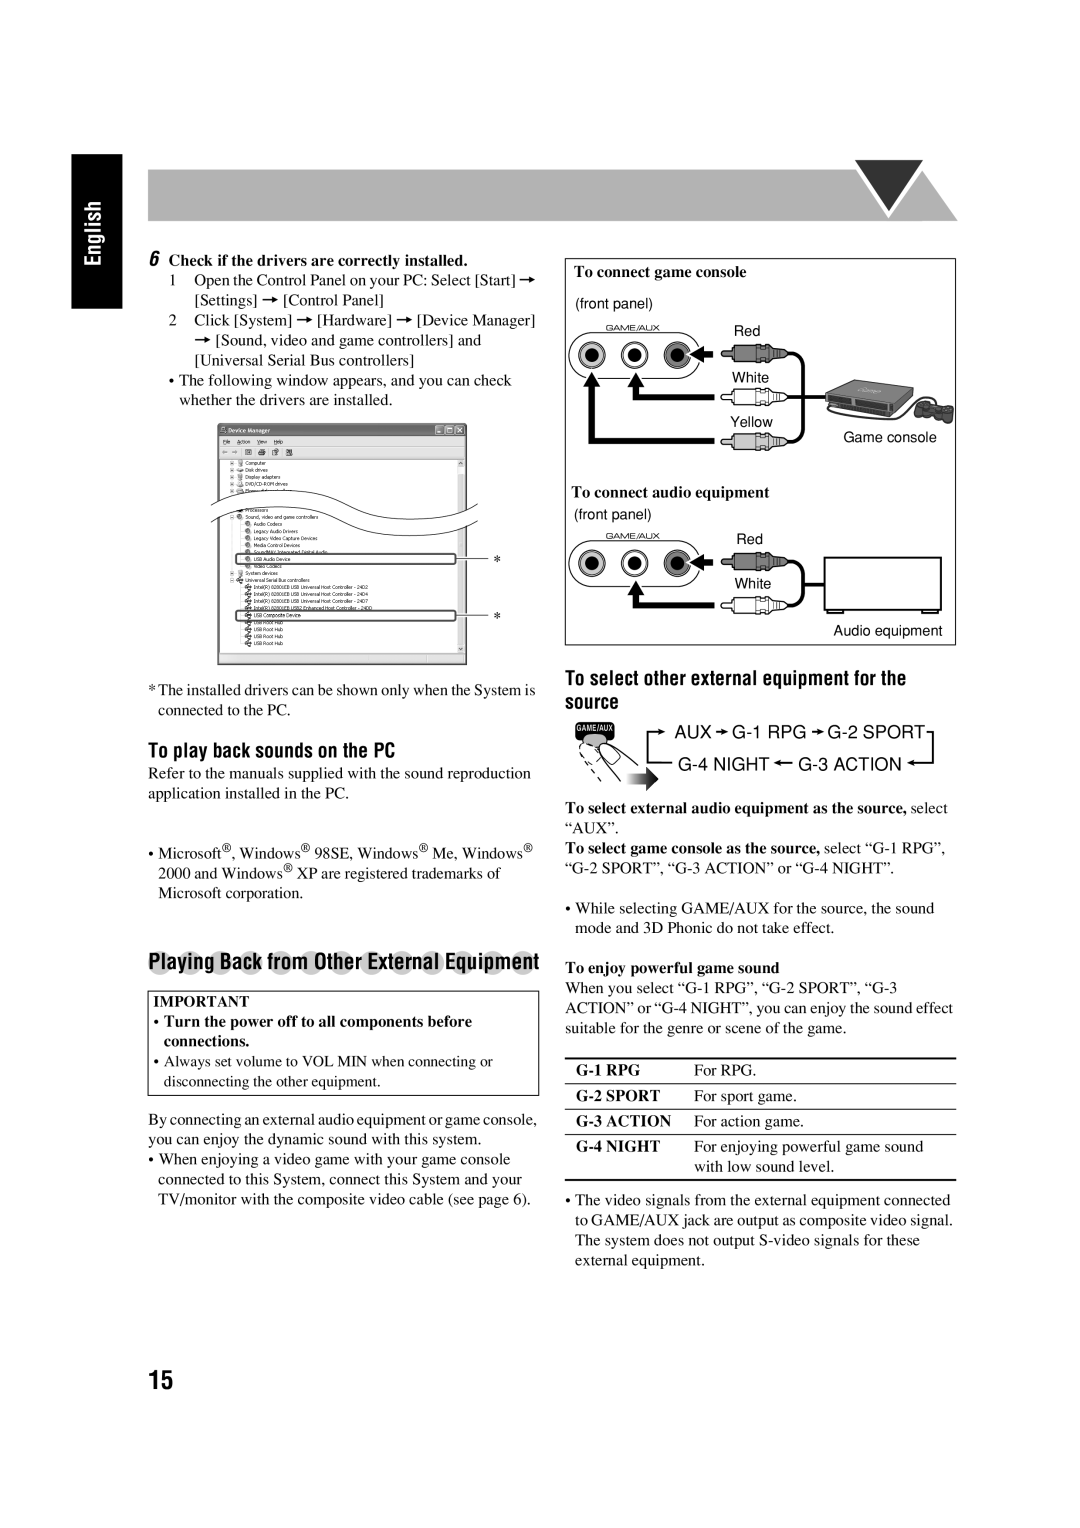
To connect game console |
(front panel) |
Red |
White |
Yellow |
Game console |
To connect audio equipment |
(front panel) |
Red |
White |
Audio equipment |
To select other external equipment for the source
AUX 
G-1 RPG  G-2
G-2
![]()
![]()
To select external audio equipment as the source, select
“AUX”.
To select game console as the source, select
•While selecting GAME/AUX for the source, the sound mode and 3D Phonic do not take effect.
To enjoy powerful game sound
When you select
For RPG. | |
For sport game. | |
|
|
| For action game. |
•The video signals from the external equipment connected to GAME/AUX jack are output as composite video signal. The system does not output
15