Digital Connections

This receiver is equipped with four DIGITAL IN terminals—one digital coaxial terminal and three digital optical terminals—and one DIGITAL OUT (optical) terminal on the rear.

IMPORTANT:

Digital output terminal

You can connect any digital components which have an optical digital input terminal.

Digital optical cable (not supplied) between digital optical terminals

When connecting a DVD player, digital TV broadcast tuner or DBS tuner using the digital terminals, you also need to connect it to the video jacks on the rear. Without connecting it to the video jacks, you can view no playback picture.

After connecting the components using the DIGITAL IN terminals, set the following correctly if necessary.

Set the digital input (DIGITAL IN) terminal setting correctly. For details, see “Setting the Digital Input Terminals” on page 28.

Select the digital input mode correctly. For details, see “Selecting the Analog or Digital Input Mode” on page 16.

Digital input terminals

You can connect any digital components having coaxial or optical

When the digital recording equipment such as an MD recorder and CD recorder has a digital optical input terminal, connecting it to the DIGITAL OUT terminal enables you to perform digital-to- digital recording.

Note:

PCM/ DOLBY DIGITAL / DTS

DIGITAL OUT

digital output terminal.

Digital coaxial cable (not supplied) between digital coaxial terminals

Digital optical cable (not supplied) between digital optical terminals

The digital signal format transmitted through the DIGITAL OUT terminal is the same as that of the input signal. This means that when the DTS Digital Surround signals are input, the DTS Digital Surround signals are transmitted.

Connecting the Power Cord

When the component has a digital coaxial output terminal, connect it to the DIGITAL 1 (DVD) terminal, using a digital coaxial cable (not supplied).

DIGITAL IN

Before plugging the receiver into an AC outlet, make sure that all connections have been made.

Plug the power cord into an AC outlet.

Keep the power cord away from the connecting cables and the antenna. The power cord may cause noise or screen interference.

DIGITAL 1 (DVD)

When the component has a digital optical output terminal, connect it to the DIGITAL 2 (CD), DIGITAL 3 (TV) or DIGITAL 4 (CDR) terminal, using a digital optical cable (not supplied).

Before connecting a digital optical cable, unplug the protective plug.

Notes:

DIGITAL 2 (CD)

DIGITAL 3 (TV)

DIGITAL 4 (CDR)

Note:

The preset settings such as preset channels and sound adjustment may be erased in a few days in the following cases:

When you unplug the power cord.

When a power failure occurs.

CAUTIONS:

Do not touch the power cord with wet hands.

Do not pull on the power cord to unplug the cord. When unplugging the cord, always grasp the plug so as not to damage the cord.

When shipped from the factory, the DIGITAL IN terminals have been set for use with the following components:

DIGITAL 1 (coaxial): For DVD player

DIGITAL 2 (optical): For CD player

DIGITAL 3 (optical): For digital TV broadcast tuner

DIGITAL 4 (optical): For CD recorder

When you want to operate the CD player or CD recorder, using the COMPU LINK remote control system, connect the target component also as described in “Analog Connections” (see pages 10).

13

Page 16
Image 16
JVC RX-7032VSL manual Connecting the Power Cord, Digital Connections, Digital output terminal, Digital input terminals

RX-7032VSL specifications

The JVC RX-7032VSL is a versatile and powerful audio receiver that caters to both audiophiles and casual listeners alike. Renowned for its robust build quality and exceptional sound performance, this model blends advanced audio technologies with user-friendly features, making it a solid choice for home audio setups.

At the heart of the RX-7032VSL is its impressive amplifier section, delivering a substantial output power of up to 100 watts per channel. This ensures that even the most demanding speakers can be driven effortlessly, producing rich audio clarity and dynamic soundscapes that elevate your listening experience. The receiver supports various speaker configurations, enabling optimal flexibility in setup.

One of the standout features of the JVC RX-7032VSL is its incorporation of Dolby Pro Logic II technology, which enhances stereo sound and creates a more immersive surround experience. This technology allows users to enjoy stereo sources in a multi-channel format, enriching movie and music playback with enhanced spatial audio depth. Additionally, the unit includes built-in DSP modes that offer preset sound profiles tailored for different genres and media types, allowing users to easily switch modes depending on their listening preferences.

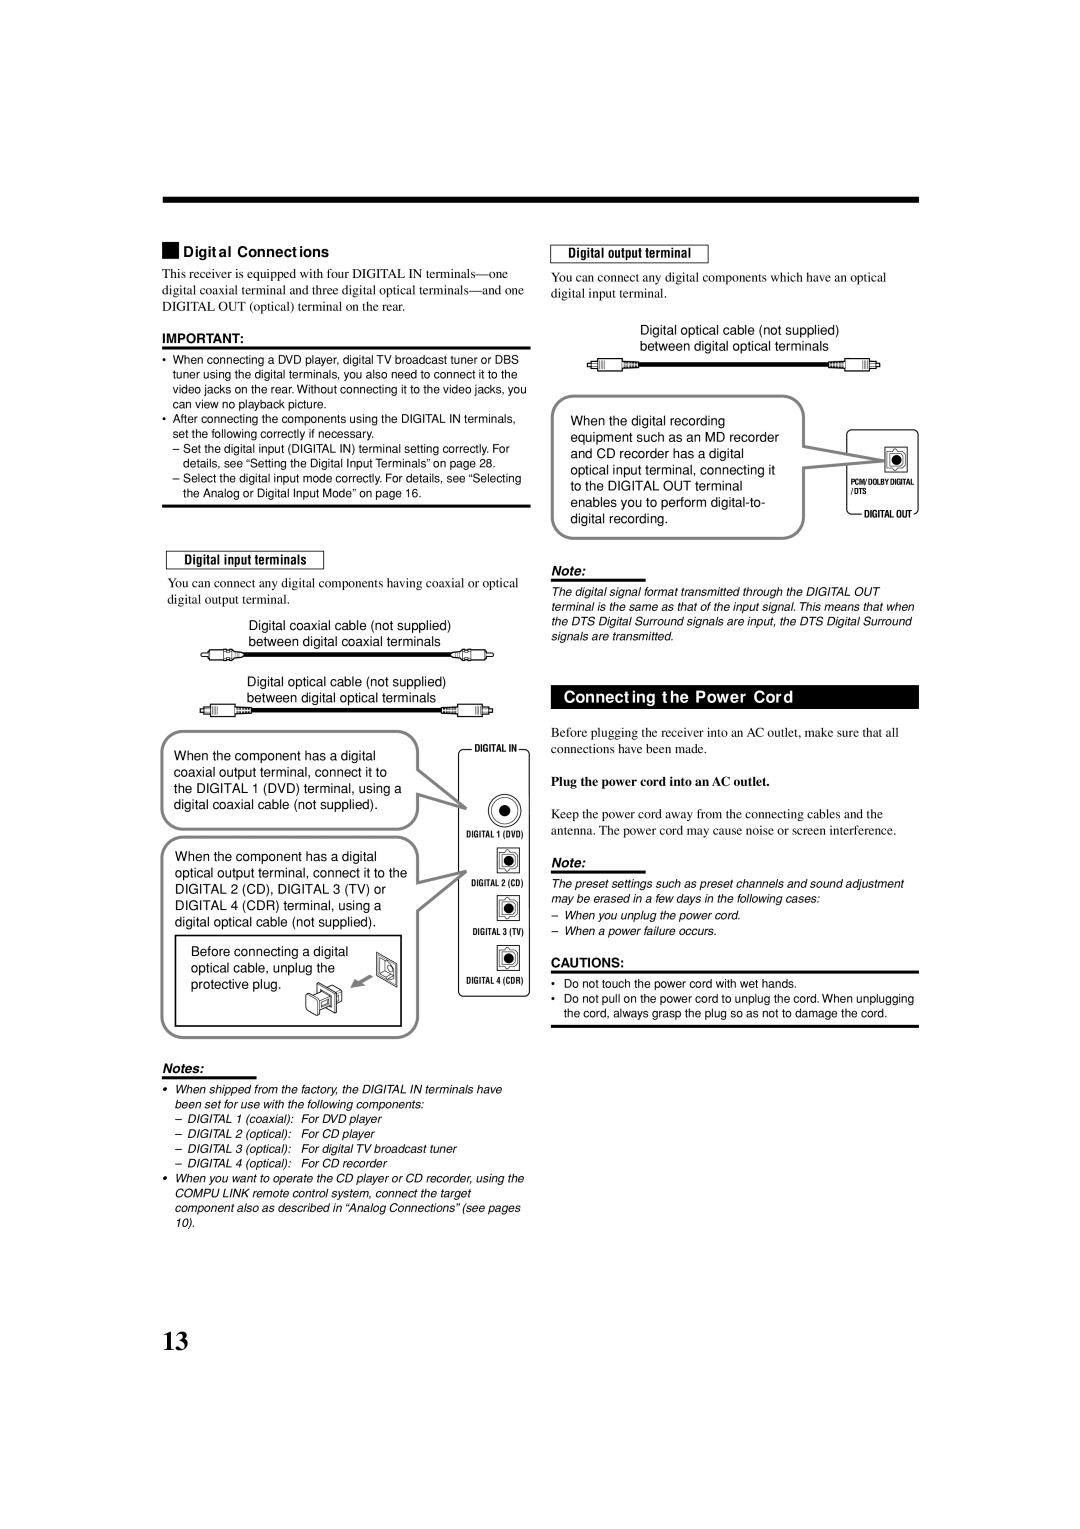
Connectivity is another forte of the RX-7032VSL. The receiver boasts multiple audio inputs, including standard RCA and digital optical and coaxial options. This broad range of inputs allows users to connect various devices, from CD players and turntables to gaming consoles and media streaming devices. Moreover, the unit is equipped with dual-zone capabilities, enabling audio playback in separate areas of your home, expanding its functionality for entertainment purposes.

The design of the RX-7032VSL emphasizes both aesthetics and practicality. Its sleek, modern appearance features an intuitive front panel with easy-to-read displays and controls for effortless operation. Users can navigate settings and inputs quickly, enhancing the overall usability of the product.

In summary, the JVC RX-7032VSL is a feature-rich audio receiver that combines powerful amplification, advanced surround sound processing, and extensive connectivity options. Whether you're watching movies, listening to music, or gaming, it’s designed to provide an extraordinary audio experience that meets a variety of needs. With its blend of performance, flexibility, and ease of use, the RX-7032VSL certainly stands out in the competitive landscape of home audio receivers.