5 PREPARATION |
E model |
6 RECORDING
| |||
|
|
| � |
|
|
| |
|
|
| REC |
REC | STOP REC |
| EJECT OPERATE |
| CHECK |
| OPERATE |
|
|
| RESET/ |
|
|
| CANCEL ON SCREEN |
REW REVERSE PAUSE PLAY FF |
| SHIFT | |
| TRACKING | V. LOCK | TIMER SEARCH DISPLAY LOCK CNT RESETMENU TIME MODE |
FIELD REV | FIELD ADV – + | – + | – S E T + |
|
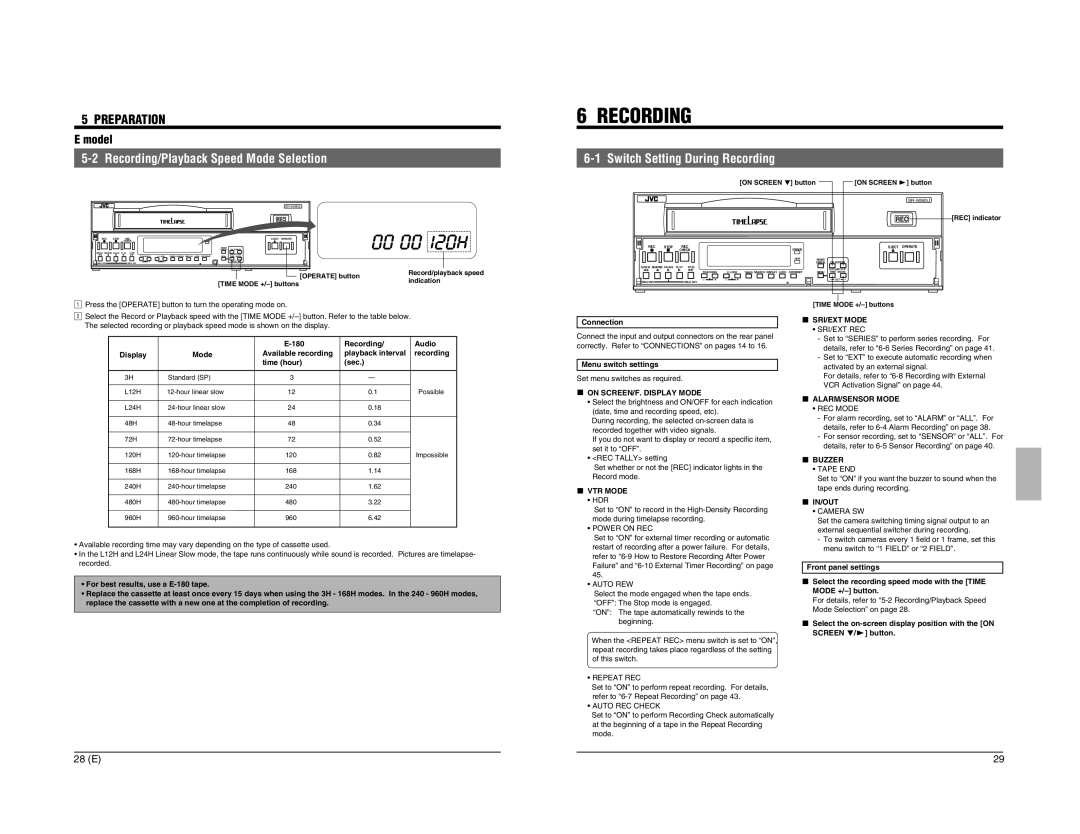
| [OPERATE] button | Record/playback speed |
| [TIME MODE | indication | |
1 |
| ||
|
|
|
|
| ||
|
| [ON SCREEN 7] button |
| [ON SCREEN f] button |
|
|
|
| � |
|
|
|
| |
|
|
|
| REC |
REC | STOP REC |
|
| EJECT OPERATE |
| CHECK | OPERATE |
|
|
|
| HDR | RESET/ | ON SCREEN |
|
|
| CANCEL | |
REW REVERSE PAUSE PLAY FF |
|
| SHIFT | |
|
|
|
| |
| TRACKING | V. LOCK TIMER SEARCH DISPLAY LOCK CNT RESET | MENU | TIME MODE |
FIELD REV | – + | – + |
| – S E T + |
FIELD ADV |
|
|
| |
[REC] indicator
2Press the [OPERATE] button to turn the operating mode on. |
|
| ||
Select the Record or Playback speed with the [TIME MODE |
| |||
The selected recording or playback speed mode is shown on the display. |
|
| ||
|
| Recording/ | Audio | |
Display | Mode | Available recording | playback interval | recording |
|
| time (hour) | (sec.) |
|
3H | Standard (SP) | 3 | — |
|
L12H | 12 | 0.1 | Possible | |
L24H | 24 | 0.18 |
| |
48H | 48 | 0.34 |
| |
72H | 72 | 0.52 |
| |
120H | 120 | 0.82 | Impossible | |
168H | 168 | 1.14 |
| |
240H | 240 | 1.62 |
| |
480H | 480 | 3.22 |
| |
960H | 960 | 6.42 |
| |
•Available recording time may vary depending on the type of cassette used.
•In the L12H and L24H Linear Slow mode, the tape runs continuously while sound is recorded. Pictures are timelapse- recorded.
•For best results, use a
•Replace the cassette at least once every 15 days when using the 3H - 168H modes. In the 240 - 960H modes, replace the cassette with a new one at the completion of recording.
Connection
Connect the input and output connectors on the rear panel correctly. Refer to “CONNECTIONS” on pages 14 to 16.
Menu switch settings Set menu switches as required. 5 ON SCREEN/F. DISPLAY MODE
| • Select the brightness and ON/OFF for each indication |
| (date, time and recording speed, etc). |
| During recording, the selected |
| recorded together with video signals. |
| If you do not want to display or record a specific item, |
| set it to “OFF”. |
| • <REC TALLY> setting |
| Set whether or not the [REC] indicator lights in the |
| Record mode. |
5 | VTR MODE |
| • HDR |
| Set to “ON” to record in the |
| mode during timelapse recording. |
| • POWER ON REC |
| Set to “ON” for external timer recording or automatic |
| restart of recording after a power failure. For details, |
| refer to |
| Failure” and |
| 45. |
| • AUTO REW |
| Select the mode engaged when the tape ends. |
| “OFF”: The Stop mode is engaged. |
| “ON”: The tape automatically rewinds to the |
| beginning. |
| When the <REPEAT REC> menu switch is set to “ON”, |
| repeat recording takes place regardless of the setting |
| of this switch. |
| • REPEAT REC |
| Set to “ON” to perform repeat recording. For details, |
| refer to |
| • AUTO REC CHECK |
| Set to “ON” to perform Recording Check automatically |
| at the beginning of a tape in the Repeat Recording |
| mode. |
[TIME MODE +/–] buttons 5 SRI/EXT MODE
•SRI/EXT REC
-Set to “SERIES” to perform series recording. For details, refer to
-Set to “EXT” to execute automatic recording when activated by an external signal.
For details, refer to
5 ALARM/SENSOR MODE
•REC MODE
-For alarm recording, set to “ALARM” or “ALL”. For details, refer to
-For sensor recording, set to “SENSOR” or “ALL”. For details, refer to
5 BUZZER • TAPE END Set to “ON” if you want the buzzer to sound when the tape ends during recording.
5 IN/OUT
•CAMERA SW
Set the camera switching timing signal output to an external sequential switcher during recording.
-To switch cameras every 1 field or 1 frame, set this menu switch to “1 FIELD” or “2 FIELD”.
Front panel settings
5 Select the recording speed mode with the [TIME MODE
5 Select the
28 (E) | 29 |