56 EN SYSTEM CONNECTIONS
Connecting To A Dolby Digital Decoder Or An Amplifier With
These instructions enable you to connect your unit to a Dolby Digital Decoder or an amplifier with
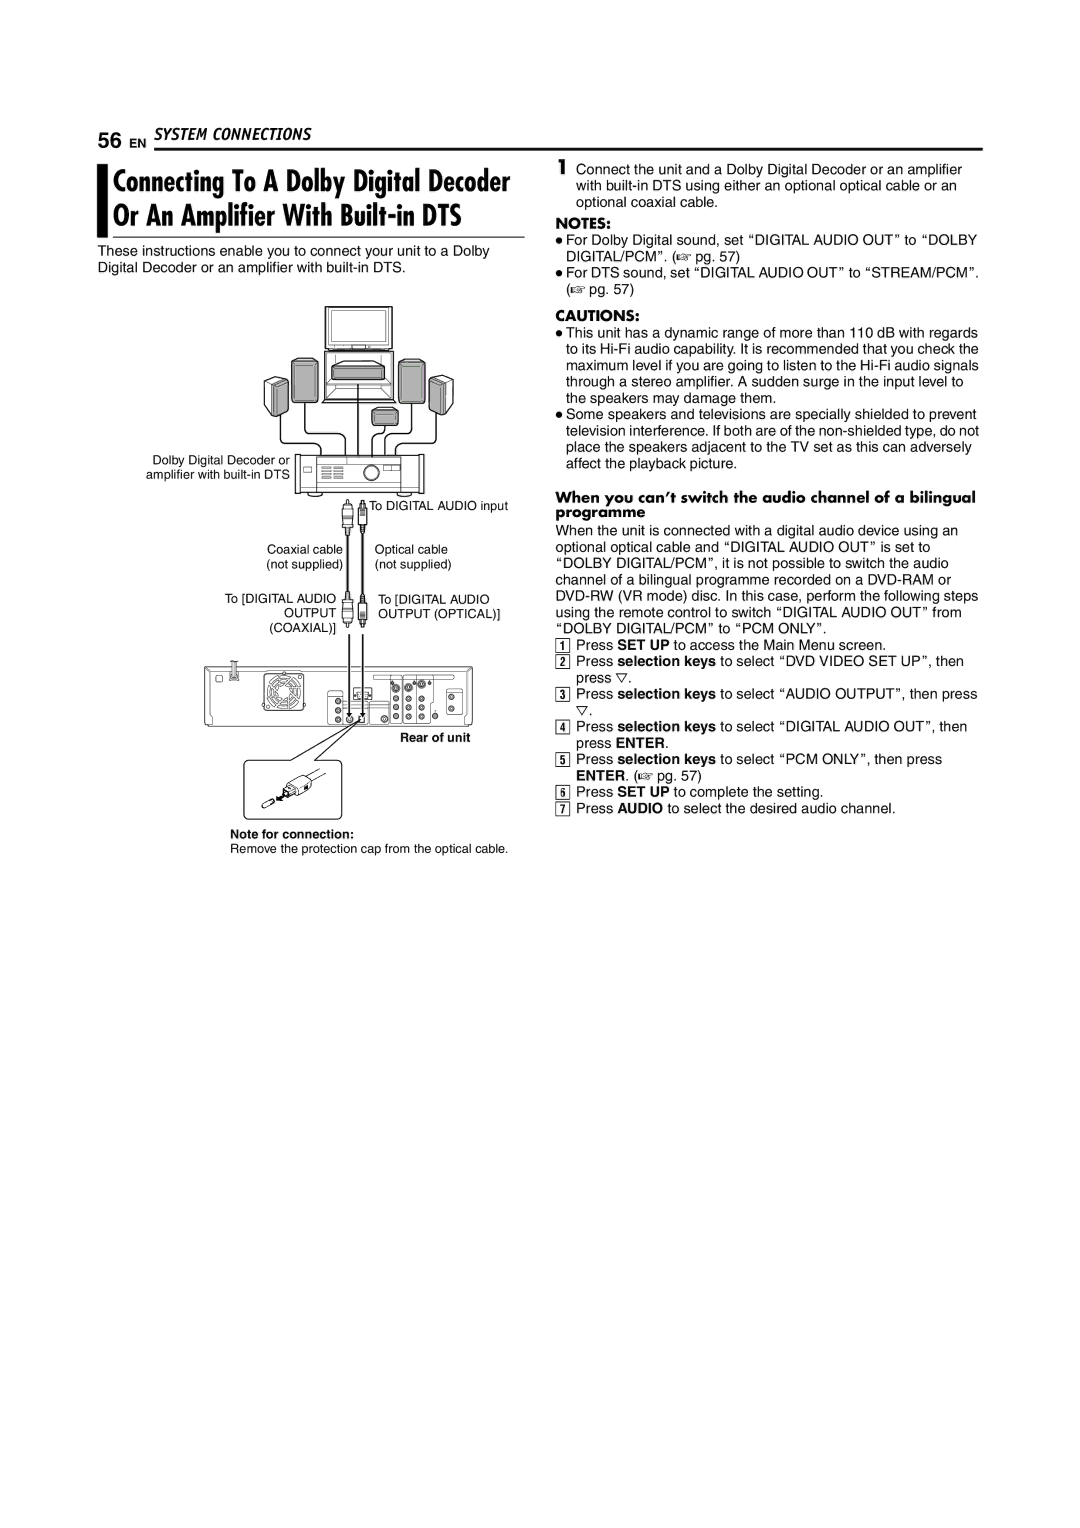
Dolby Digital Decoder or amplifier with
![]()
![]() To DIGITAL AUDIO input
To DIGITAL AUDIO input
1Connect the unit and a Dolby Digital Decoder or an amplifier with
NOTES:
●For Dolby Digital sound, set ADIGITAL AUDIO OUTB to ADOLBY DIGITAL/PCMB. (A pg. 57)
●For DTS sound, set ADIGITAL AUDIO OUTB to ASTREAM/PCMB. (A pg. 57)
CAUTIONS:
●This unit has a dynamic range of more than 110 dB with regards to its
●Some speakers and televisions are specially shielded to prevent television interference. If both are of the
When you can’t switch the audio channel of a bilingual programme
When the unit is connected with a digital audio device using an
Coaxial cable (not supplied)
To [DIGITAL AUDIO ![]() OUTPUT
OUTPUT ![]() (COAXIAL)]
(COAXIAL)]
Optical cable (not supplied)
To [DIGITAL AUDIO OUTPUT (OPTICAL)]
optional optical cable and ADIGITAL AUDIO OUTB is set to
ADOLBY DIGITAL/PCMB, it is not possible to switch the audio channel of a bilingual programme recorded on a
Rear of unit
APress SET UP to access the Main Menu screen.
BPress selection keys to select ADVD VIDEO SET UPB, then press G.
CPress selection keys to select AAUDIO OUTPUTB, then press
G.
DPress selection keys to select ADIGITAL AUDIO OUTB, then press ENTER.
EPress selection keys to select APCM ONLYB, then press ENTER. (A pg. 57)
FPress SET UP to complete the setting.
GPress AUDIO to select the desired audio channel.
Note for connection:
Remove the protection cap from the optical cable.