TOP

PLAY


INSERT

PAUSE

.DUB A

T

W

3

1

2


2

4

5

6

7

8

9

C.RESET

0

4


PLAY

1

DV

VHS

STOP


PAUSE


3


JOG/SHUTTLE

JOG

SHUTTLE

EN63


RESET THE COUNTER

5

(VHS deck only)

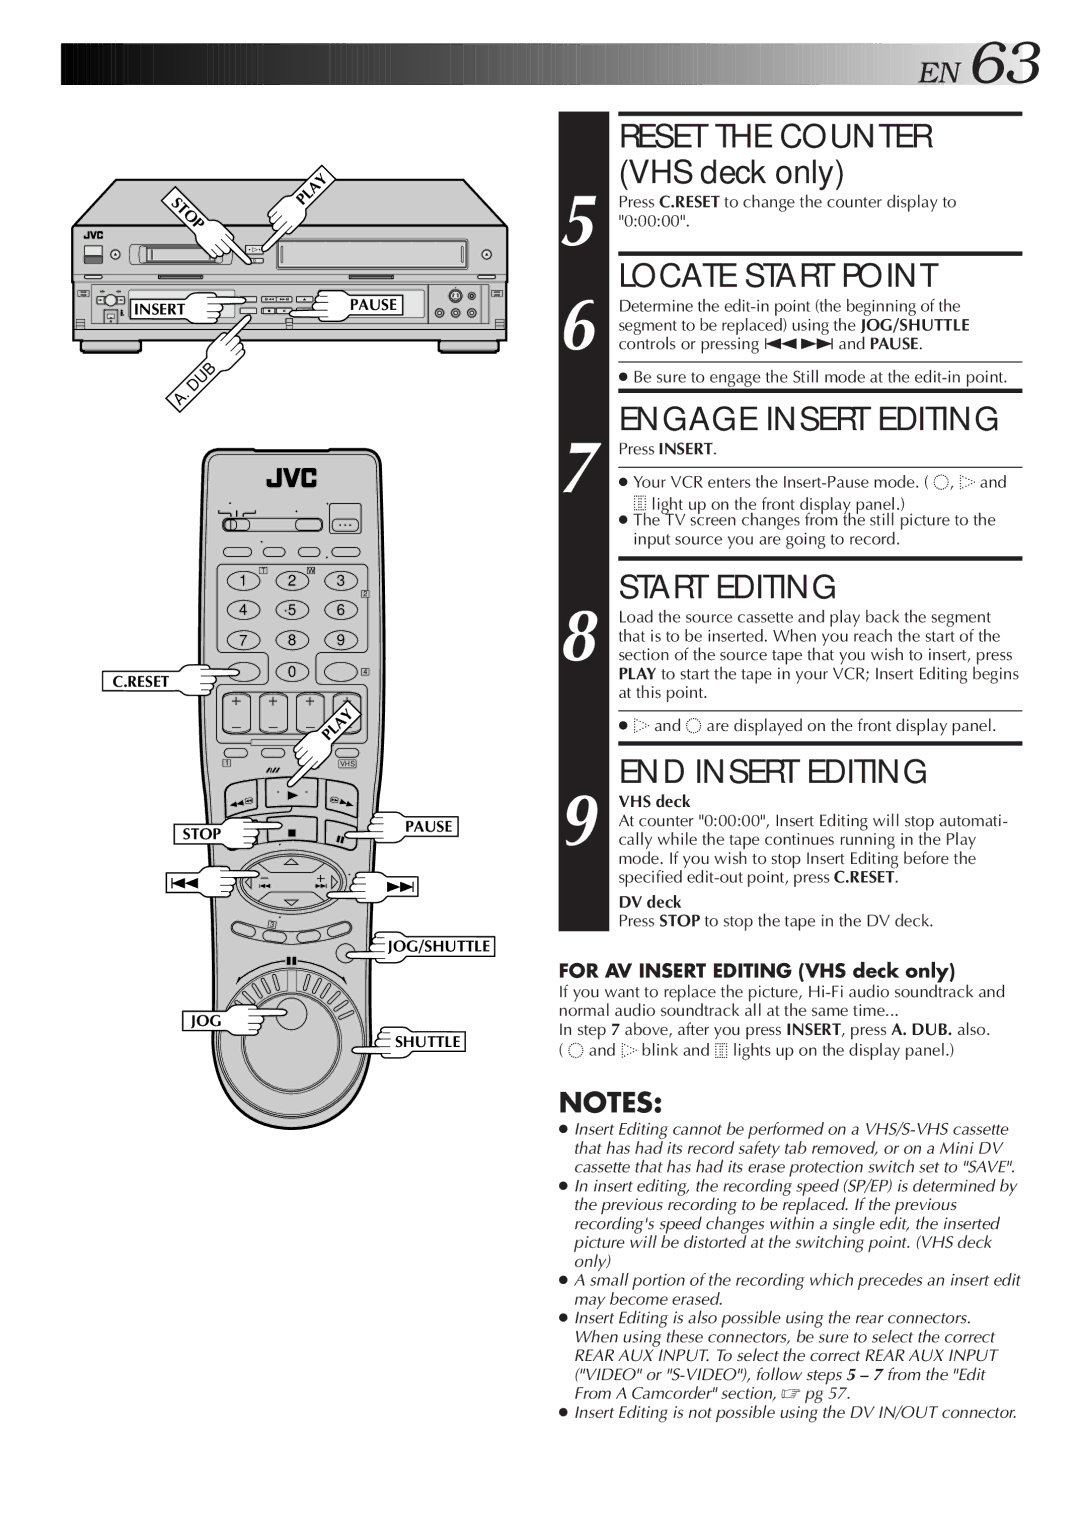
Press C.RESET to change the counter display to

"0:00:00".


LOCATE START POINT


Determine the edit-in point (the beginning of the


segment to be replaced) using the JOG/SHUTTLE

6 controls or pressing ª£and PAUSE.


Be sure to engage the Still mode at the edit-in point.


ENGAGE INSERT EDITING

7

Press INSERT.


Your VCR enters the Insert-Pause mode. ( , and

light up on the front display panel.)


The TV screen changes from the still picture to the


input source you are going to record.


START EDITING


Load the source cassette and play back the segment


that is to be inserted. When you reach the start of the

8 section of the source tape that you wish to insert, press


PLAY to start the tape in your VCR; Insert Editing begins


at this point.

and are displayed on the front display panel.

END INSERT EDITING

9 VHS deck

At counter "0:00:00", Insert Editing will stop automati- cally while the tape continues running in the Play mode. If you wish to stop Insert Editing before the specified edit-out point, press C.RESET.

DV deck

Press STOP to stop the tape in the DV deck.

FOR AV INSERT EDITING (VHS deck only)

If you want to replace the picture, Hi-Fi audio soundtrack and normal audio soundtrack all at the same time...

In step 7 above, after you press INSERT, press A. DUB. also. (andblink andlights up on the display panel.)

NOTES:

Insert Editing cannot be performed on a VHS/S-VHS cassette that has had its record safety tab removed, or on a Mini DV cassette that has had its erase protection switch set to "SAVE".

In insert editing, the recording speed (SP/EP) is determined by the previous recording to be replaced. If the previous recording's speed changes within a single edit, the inserted picture will be distorted at the switching point. (VHS deck only)

A small portion of the recording which precedes an insert edit may become erased.

Insert Editing is also possible using the rear connectors. When using these connectors, be sure to select the correct REAR AUX INPUT. To select the correct REAR AUX INPUT ("VIDEO" or "S-VIDEO"), follow steps 5 – 7 from the "Edit From A Camcorder" section, pg 57.

Insert Editing is not possible using the DV IN/OUT connector.

Page 63
Image 63
JVC SR-VS10U manual Reset the Counter, Engage Insert Editing, Start Editing, END Insert Editing

SR-VS10U specifications

The JVC SR-VS10U is a dual-format video recorder designed for both professional and consumer applications. This versatile device supports various recording formats, making it an appealing choice for filmmakers, educators, and video enthusiasts. One of the standout features of the SR-VS10U is its ability to record and play back in both MiniDV and VHS formats, providing users the flexibility to work with different media types in one convenient unit.

One of the main technologies incorporated into the SR-VS10U is the advanced digital image processing system, which ensures high-quality video output. The recorder utilizes JVC’s proprietary digital video technology to enhance color reproduction, sharpness, and overall image clarity. This makes the SR-VS10U particularly useful for capturing high-quality footage, whether it's for personal projects or professional productions.

The recorder is equipped with a built-in 4-head, multi-functional VHS deck that allows users to play back standard VHS tapes, in addition to recording live video directly to MiniDV. The dual-format capability means that users can easily convert and digitize their existing VHS content, providing a seamless way to preserve and transfer valuable memories. The unit's FireWire (IEEE 1394) connection enables fast and efficient transfer of MiniDV footage to a computer for editing, allowing for an efficient workflow.

In terms of design, the JVC SR-VS10U features a user-friendly interface with intuitive controls that make it easy to operate. It has a clear LCD display that provides real-time information about the status of the recording, playback, and remaining tape or battery life. Additionally, the recorder supports a variety of recording modes, including SP and LP, giving users control over video quality and recording time.

Moreover, the SR-VS10U includes audio and video inputs and outputs, enabling users to connect external devices such as cameras, microphones, or additional storage media. The built-in stereo audio recording ensures high-fidelity sound to complement the visual quality of the captured footage.

In summary, the JVC SR-VS10U stands out with its dual-format recording capability, advanced digital video processing technology, and ease of use. Its combination of features makes it an excellent choice for anyone looking to capture, preserve, and share videos in both MiniDV and VHS formats, maintaining strong performance and reliability in diverse applications.