Other
Removing a Flush Mounted Ceiling Bracket (Optional WB-S575)
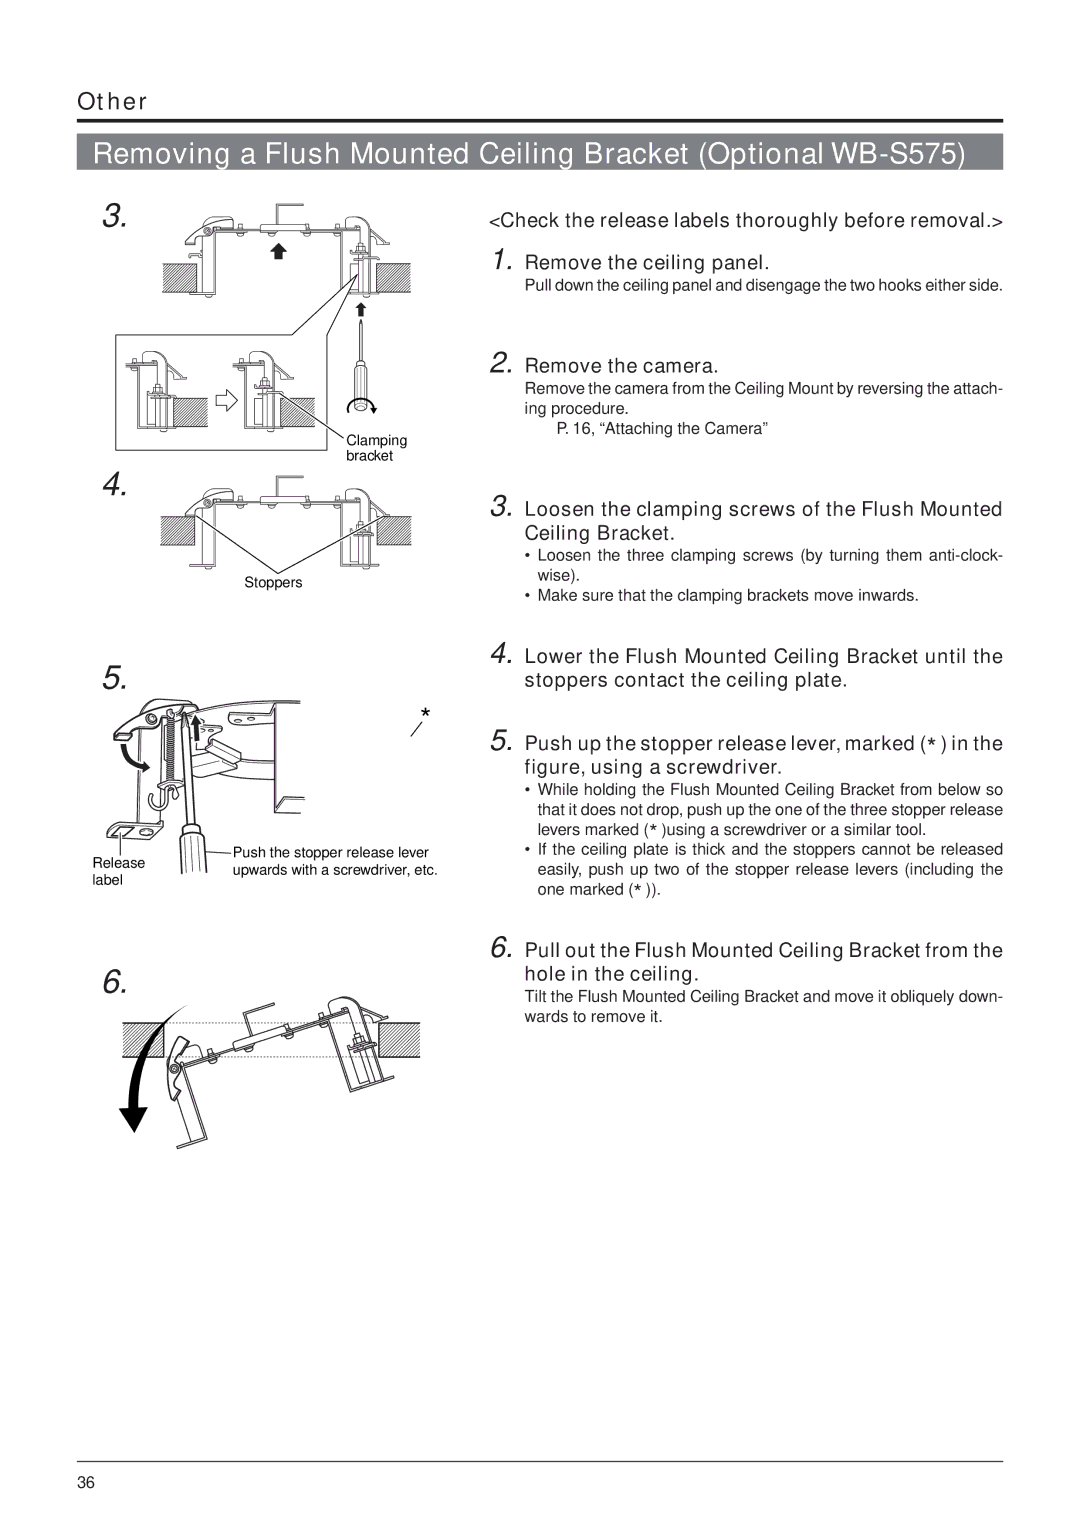
3. | <Check the release labels thoroughly before removal.> |
1. Remove the ceiling panel.
Pull down the ceiling panel and disengage the two hooks either side.
2. Remove the camera.
Clamping bracket
Remove the camera from the Ceiling Mount by reversing the attach- ing procedure.
☞ P. 16, “Attaching the Camera”
4.
Stoppers
3. Loosen the clamping screws of the Flush Mounted Ceiling Bracket.
•Loosen the three clamping screws (by turning them
•Make sure that the clamping brackets move inwards.
5.
Release label
6.
*
Push the stopper release lever upwards with a screwdriver, etc.
4. Lower the Flush Mounted Ceiling Bracket until the stoppers contact the ceiling plate.
5. Push up the stopper release lever, marked (*) in the figure, using a screwdriver.
•While holding the Flush Mounted Ceiling Bracket from below so that it does not drop, push up the one of the three stopper release levers marked (*)using a screwdriver or a similar tool.
•If the ceiling plate is thick and the stoppers cannot be released easily, push up two of the stopper release levers (including the one marked (*)).
6.Pull out the Flush Mounted Ceiling Bracket from the hole in the ceiling.
Tilt the Flush Mounted Ceiling Bracket and move it obliquely down- wards to remove it.
36