Other
Attaching a Flush Mounted Ceiling Bracket (Optional WB-S575)
The Flush Mounted Ceiling Bracket (optional
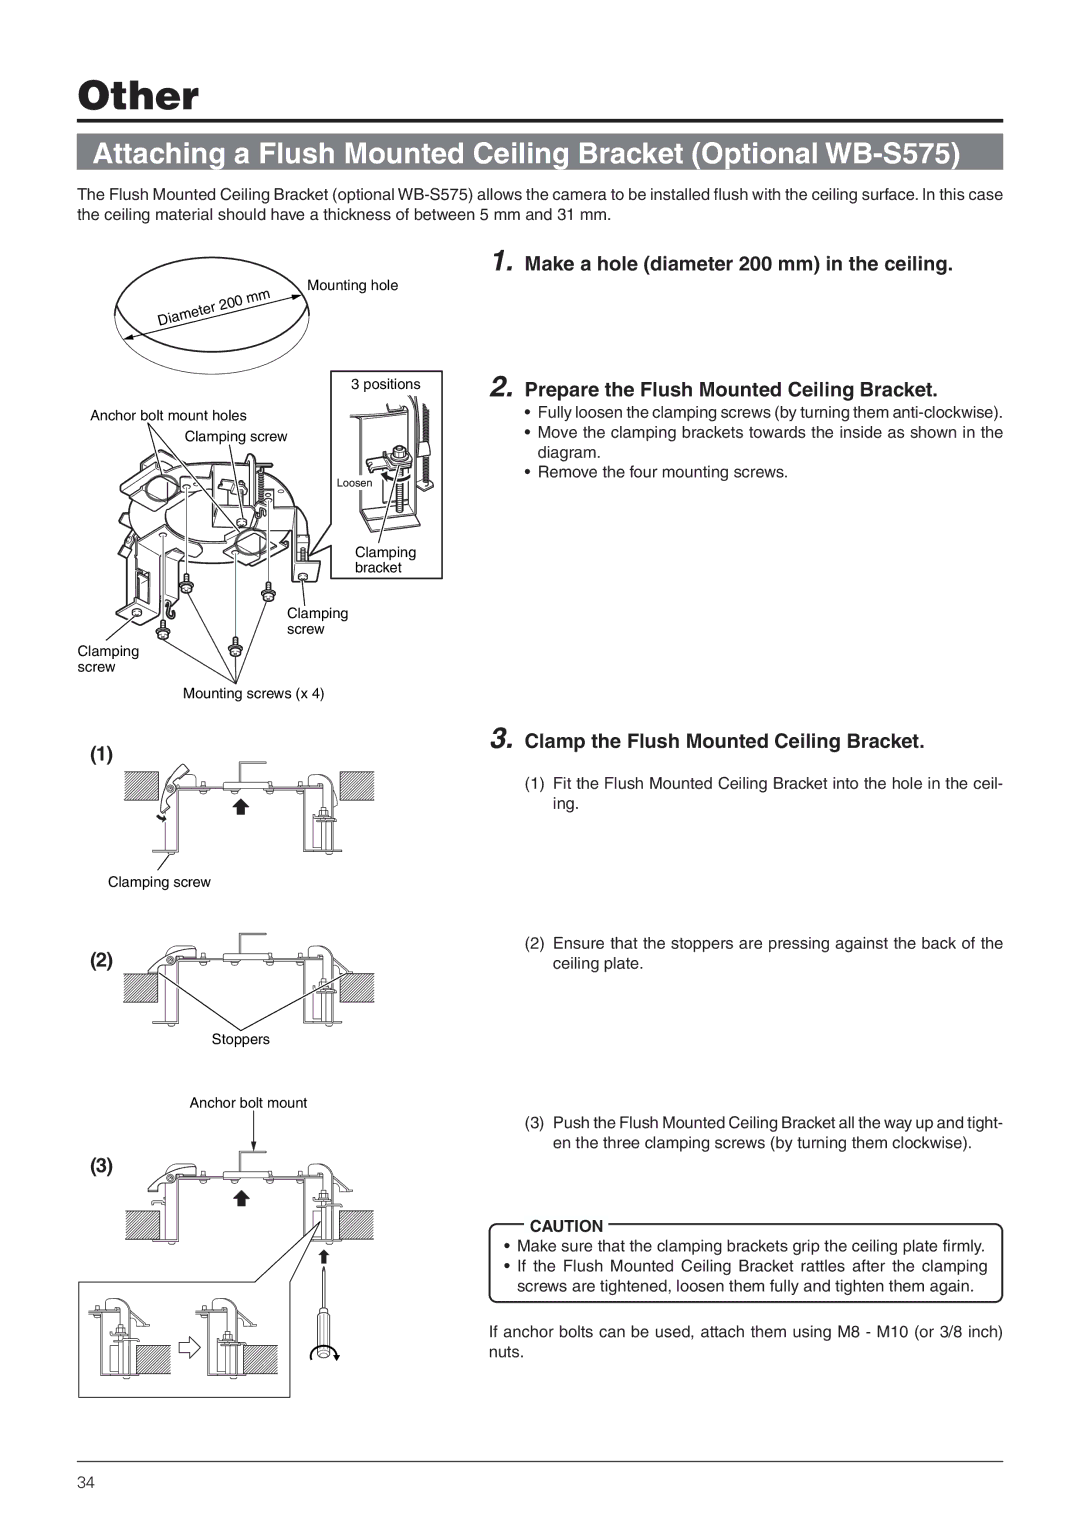
Mounting hole
3 positions
Anchor bolt mount holes
Clamping screw
Loosen![]()
![]()
Clamping bracket
Clamping screw
Clamping screw
Mounting screws (x 4)
(1)
1. Make a hole (diameter 200 mm) in the ceiling.
2. Prepare the Flush Mounted Ceiling Bracket.
•Fully loosen the clamping screws (by turning them
•Move the clamping brackets towards the inside as shown in the diagram.
•Remove the four mounting screws.
3. Clamp the Flush Mounted Ceiling Bracket.
(1) | Fit the Flush Mounted Ceiling Bracket into the hole in the ceil- |
| ing. |
Clamping screw |
|
(2) | Ensure that the stoppers are pressing against the back of the |
(2) | ceiling plate. |
Stoppers
Anchor bolt mount
(3) Push the Flush Mounted Ceiling Bracket all the way up and tight- en the three clamping screws (by turning them clockwise).
(3)
CAUTION
• Make sure that the clamping brackets grip the ceiling plate firmly.
• If the Flush Mounted Ceiling Bracket rattles after the clamping screws are tightened, loosen them fully and tighten them again.
If anchor bolts can be used, attach them using M8 - M10 (or 3/8 inch) nuts.
34