10.1.4 Change the Record & Timer Properties Via the Network
Follow the instructions below to reconfigure the record and schedule recording settings via the network.
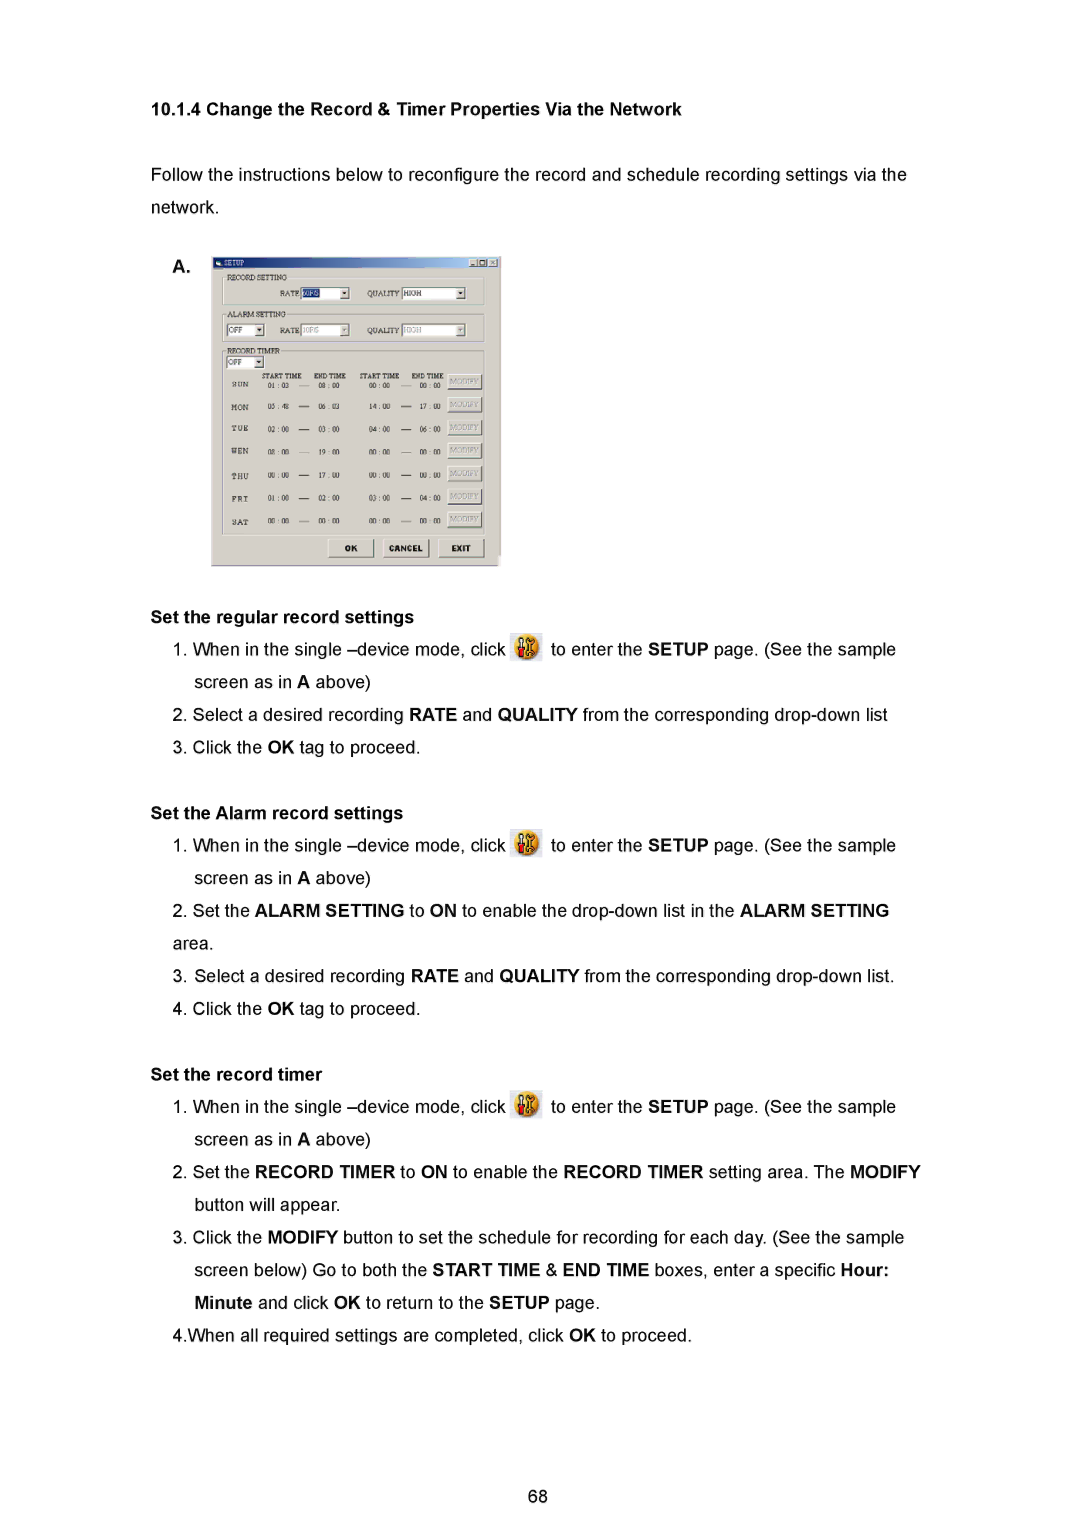
A.
Set the regular record settings
1.When in the single ![]() to enter the SETUP page. (See the sample screen as in A above)
to enter the SETUP page. (See the sample screen as in A above)
2.Select a desired recording RATE and QUALITY from the corresponding
3.Click the OK tag to proceed.
Set the Alarm record settings
1.When in the single ![]() to enter the SETUP page. (See the sample screen as in A above)
to enter the SETUP page. (See the sample screen as in A above)
2.Set the ALARM SETTING to ON to enable the
3.Select a desired recording RATE and QUALITY from the corresponding
4.Click the OK tag to proceed.
Set the record timer
1.When in the single ![]() to enter the SETUP page. (See the sample screen as in A above)
to enter the SETUP page. (See the sample screen as in A above)
2.Set the RECORD TIMER to ON to enable the RECORD TIMER setting area. The MODIFY button will appear.
3.Click the MODIFY button to set the schedule for recording for each day. (See the sample screen below) Go to both the START TIME & END TIME boxes, enter a specific Hour:
Minute and click OK to return to the SETUP page.
4.When all required settings are completed, click OK to proceed.
68