Editing operations using the remote control
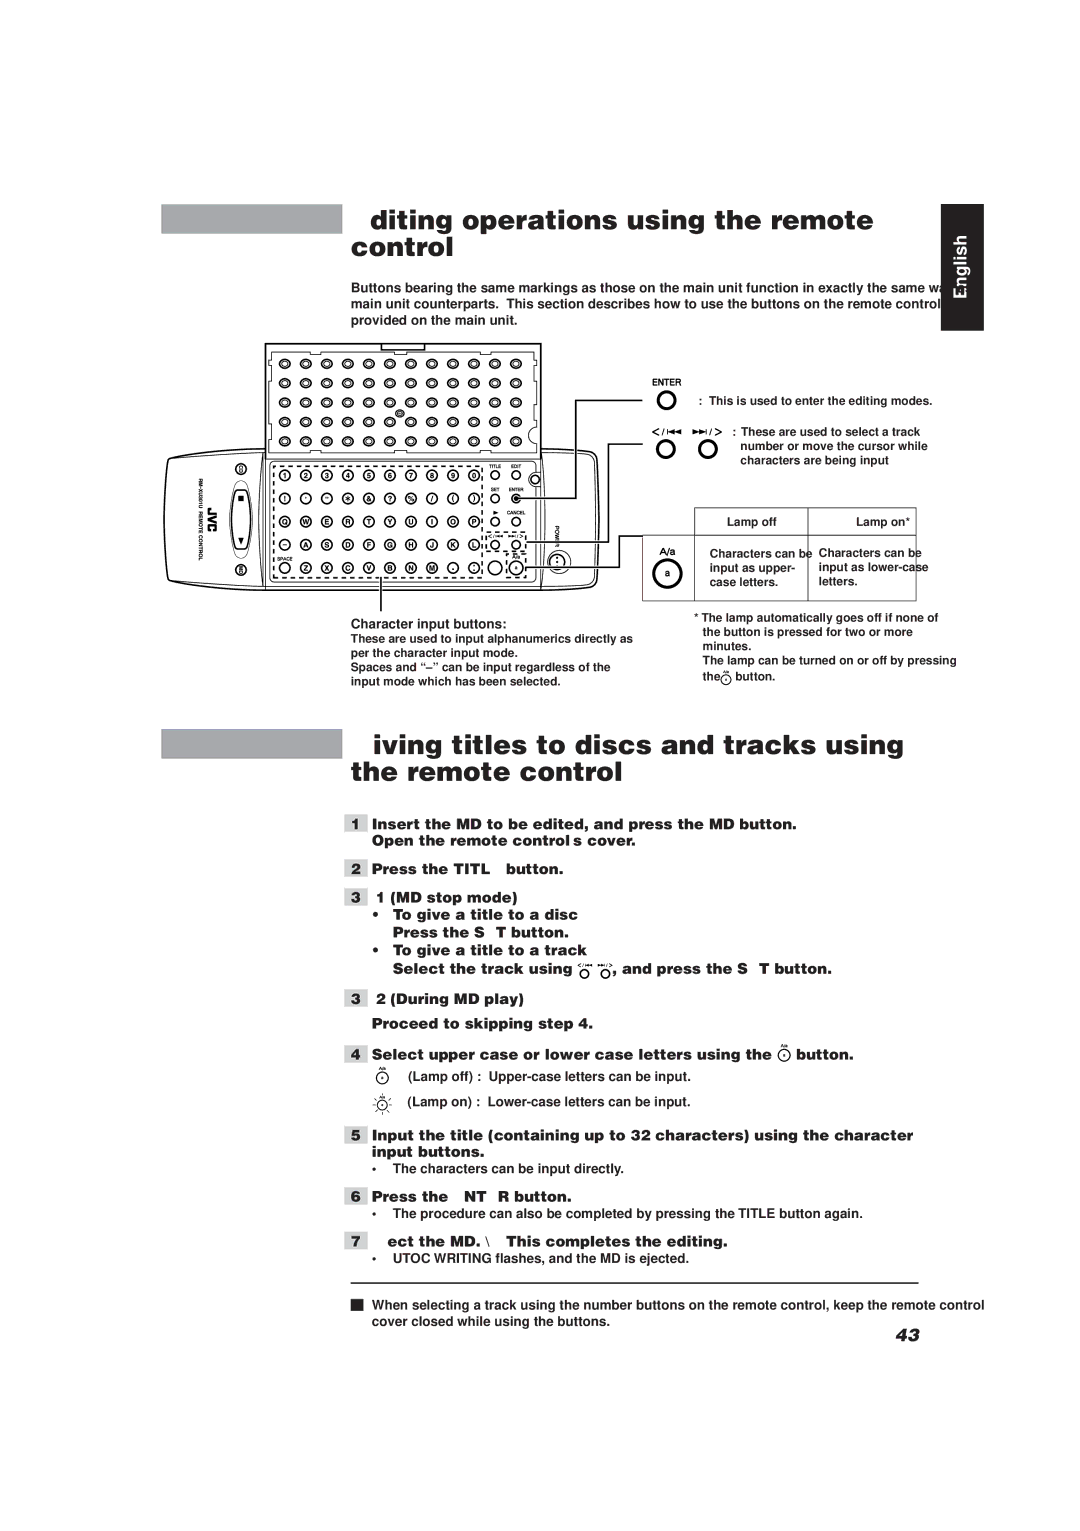
Buttons bearing the same markings as those on the main unit function in exactly the same way as their main unit counterparts. This section describes how to use the buttons on the remote control which are not provided on the main unit.
: This is used to enter the editing modes.
: These are used to select a track number or move the cursor while characters are being input
|
|
| Lamp off | Lamp on* |
|
|
|
|
|
|
|
| Characters can be | Characters can be |
|
|
| input as upper- | input as |
|
|
| ||
|
|
| case letters. | letters. |
|
|
|
|
|
Character input buttons: | * The lamp automatically goes off if none of | ||
the button is pressed for two or more | |||
These are used to input alphanumerics directly as | |||
minutes. | |||
per the character input mode. | |||
The lamp can be turned on or off by pressing | |||
Spaces and | |||
the | button. | ||
input mode which has been selected. | |||
|
| ||
Giving titles to discs and tracks using the remote control
1Insert the MD to be edited, and press the MD button. Open the remote control’s cover.
2Press the TITLE button.
3
•To give a title to a disc: Press the SET button.
•To give a title to a track:
Select the track using ![]()
![]()
![]()
![]()
![]() , and press the SET button.
, and press the SET button.
3
4Select ![]() button.
button.
(Lamp off) :
(Lamp on) :
5Input the title (containing up to 32 characters) using the character input buttons.
•The characters can be input directly.
6Press the ENTER button.
•The procedure can also be completed by pressing the TITLE button again.
7Eject the MD. \ This completes the editing.
•UTOC WRITING flashes, and the MD is ejected.
When selecting a track using the number buttons on the remote control, keep the remote control’s cover closed while using the buttons.
English
43