INSTALLATION AND CONNECTION
Connections and fusing of the unit:
All connection cables for connection to the receiver (including the
On the left hand side of the receiver viewed from the front there is a fuse inserted from the outside. This fuse (for the type, see the section “Important Information” in the receiver operating manual) should be accessible even after the unit has been installed, so that it can easily be exchanged if required.
PREPARATIONS
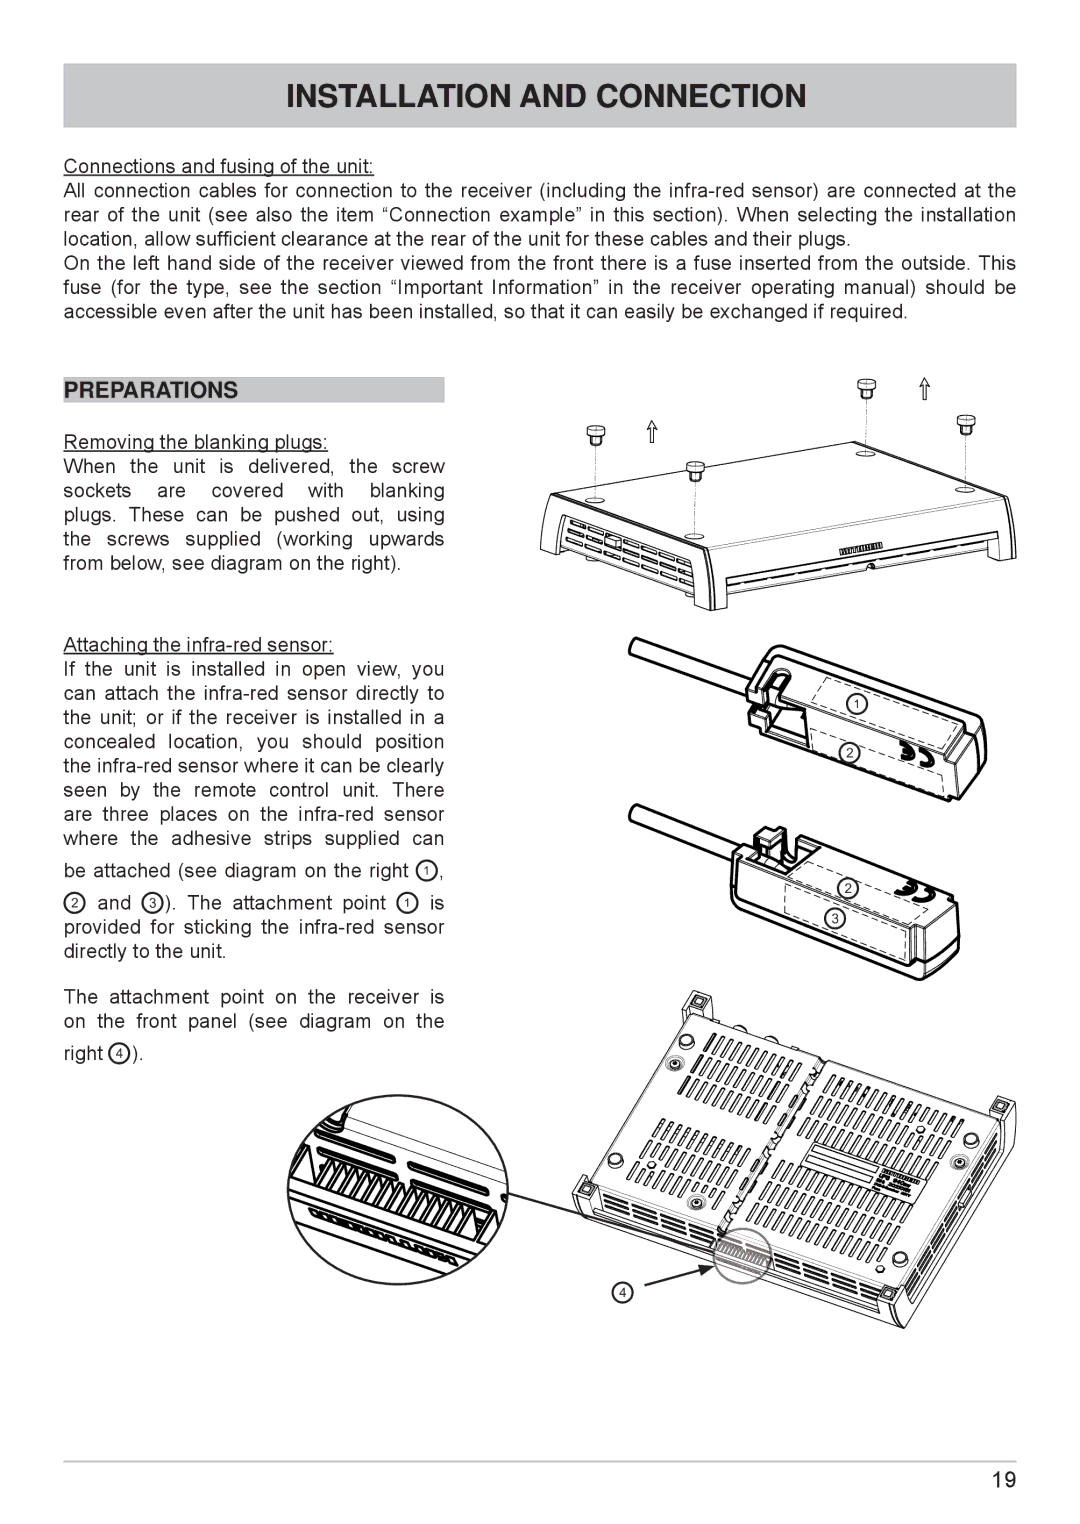
Removing the blanking plugs:
When the unit is delivered, the screw sockets are covered with blanking plugs. These can be pushed out, using the screws supplied (working upwards from below, see diagram on the right).
Attaching the
If the unit is installed in open view, you can attach the
be attached (see diagram on the right ,
and ). The attachment point is provided for sticking the
The attachment point on the receiver is on the front panel (see diagram on the
right ).
![]()
![]()
![]()
![]()
![]()
![]()
![]()
![]()
![]()
![]()
![]()
![]()
![]()
![]()
![]()
![]()
![]()
![]()
![]()
![]()
![]()
![]()
![]()
![]()
![]()
![]()
![]()
![]()
![]()
![]()
![]()
![]()
![]()
![]()
![]()
![]()
![]()
![]()
![]()
![]()
![]()
![]()
![]()
![]()
![]()
![]()
![]()
![]()
![]()
![]()
![]()
![]()
![]()
![]()
![]()
![]()
![]()
![]()
![]()
![]()
![]()
![]()
![]()
![]()
![]()
19