| '. | :" " | . _... |
| , | |
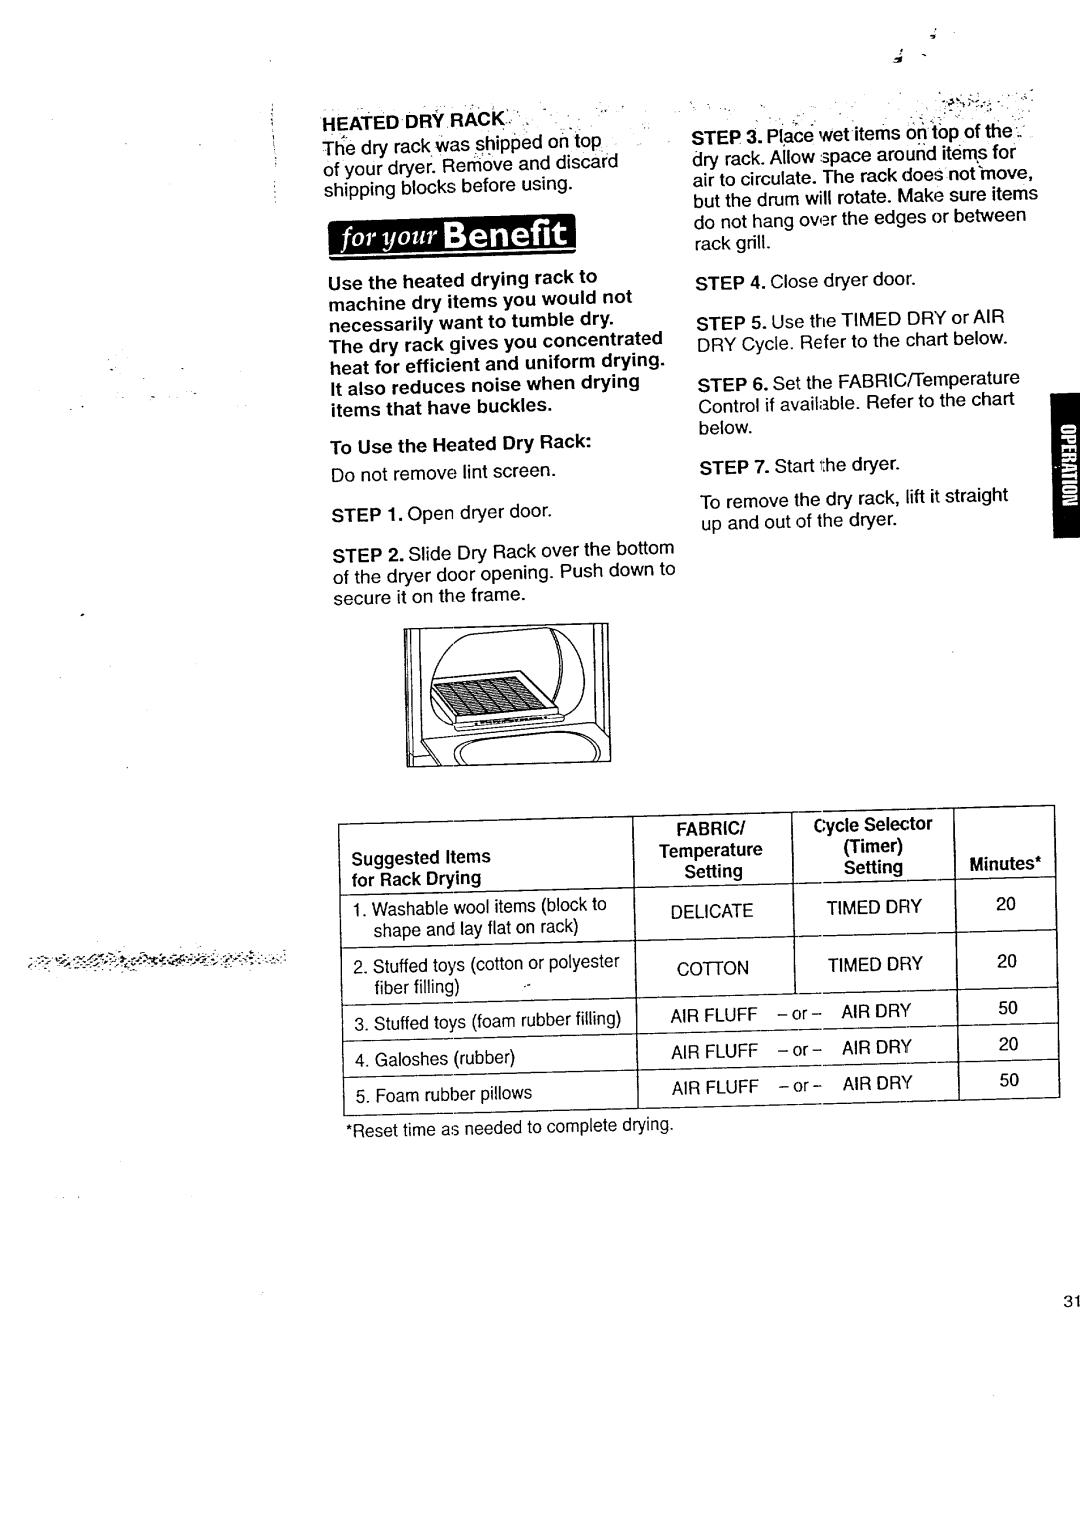
Tl_e dry | rack Was s.hipped ontop: | STEP 3: Placewet:items | ontop of the:::: | |||
of your | dryer. Rerfiove | and discard | dry rack. Allow | :space around items for | ||
shipping | blocks before | using. |
| air to circulate. | The rack | does:not'move, |
but the drum will rotate. Make sure items do not hang over the edges or between rack gdll.
Use the heated drying rack to machine dry items you would not necessarily want to tumble dry.
The dry rack gives you concentrated heat for efficient and uniform drying.
It also reduces noise when drying items that have buckles.
To Use the Heated Dry Rack:
Do not remow; lint screen.
STEP 1. Open dryer door.
STEP 2. Slide Dry Rack over the bottom
of the dryer door opening. Push down to secure it on the frame.
STEP 4. Close dryer door.
STEP 5. Use trle TIMED DRY orAIR DRY Cycle. Refer to the chart below.
STEP 6. Set the FABRIC/Temperature Control if available. Refer to the chart
below.
STEP 7. Start _:hedryer.
To remove the dry rack, lift it straight up and out of the dryer.
Suggested Items
for Rack Drying
1.Washable wool items (block to shape and lay flat on rack)
o | . | . |
FABRIC/ | Cycle Selector |
|
Temperature | (Timer) |
|
Setting | Setting | Minutes* |
DELICATE | TIMED DRY | 20 |
2. | Stuffed toys (cotton or polyester | COTTON |
|
| TIMED DRY | 20 | |
| fiber filling) | ,- |
|
|
|
|
|
3. | Stuffed toys (foam rubber filling) | AIR FLUFF | - | _r- | AIR DRY | 50 | |
4. | Galoshes (rubber) |
| AIR FLUFF | - | _r- | AIR DRY | 20 |
5. | Foam rubber pillows | AIR FLUFF | AIR DRY | 50 | |||
*Reset time a,_needed to complete drying.
