Remove any residual matter inside the water supply line after installing the water filter.
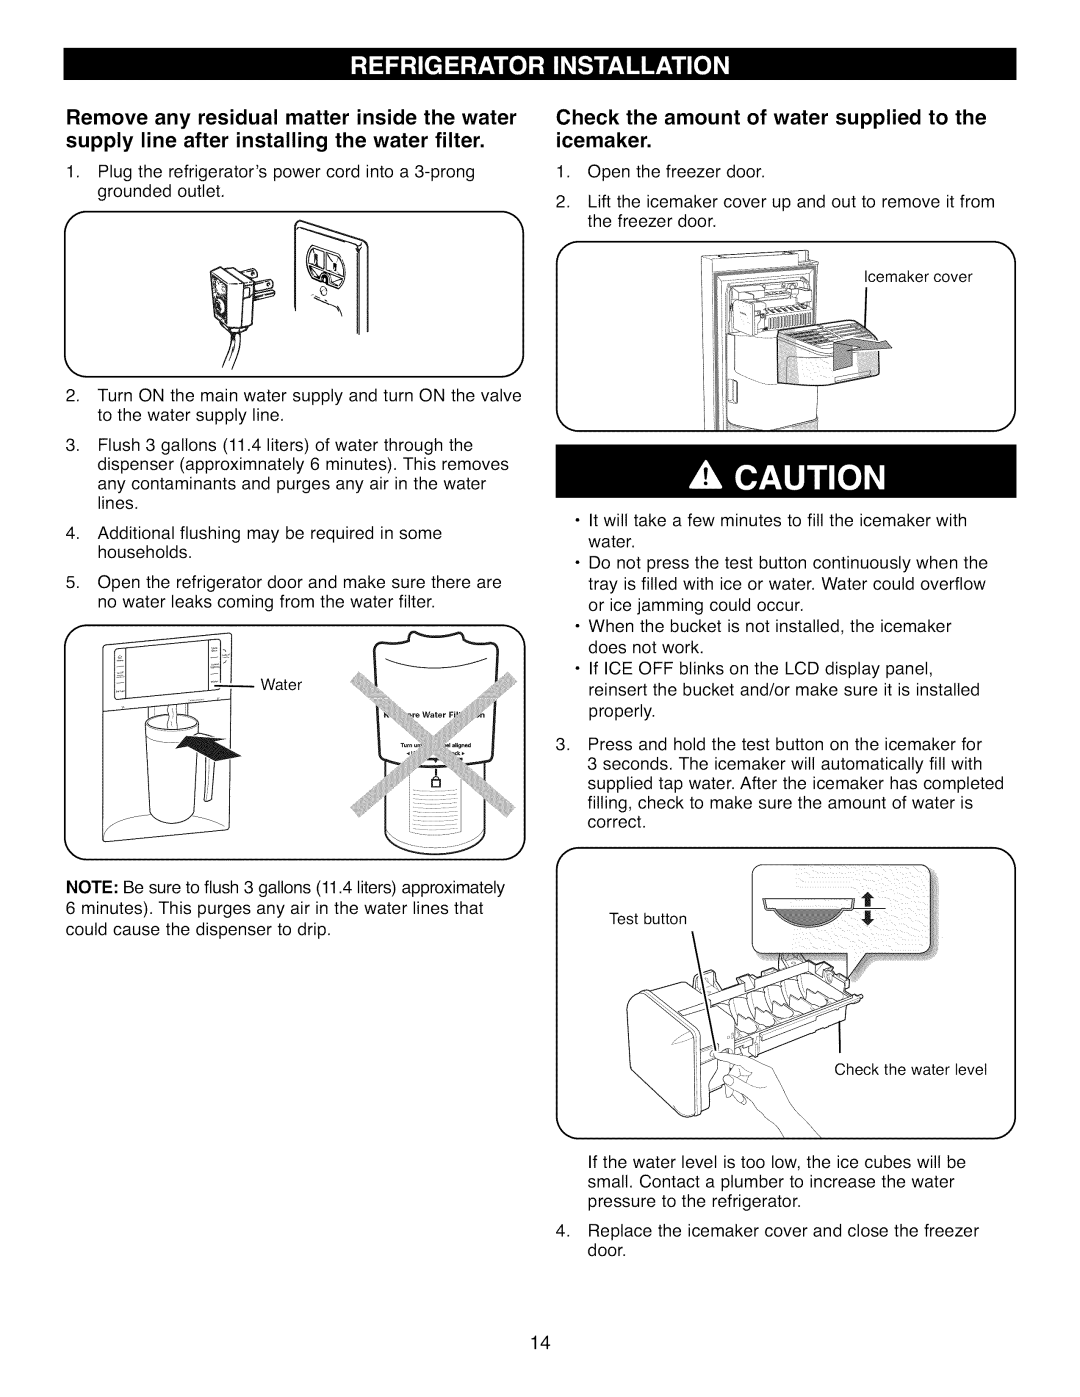
1.Plug the refrigerator's power cord into a
J
2.Turn ON the main water supply and turn ON the valve to the water supply line.
. Flush 3 gallons (11.4 liters) of water through the dispenser (approximnately 6 minutes). This removes any contaminants and purges any air in the water lines.
4.Additional flushing may be required in some households.
. Open the refrigerator door and make sure there are no water leaks coming from the water filter.
Water
NOTE: Be sure to flush 3 gallons (11.4 liters) approximately 6 minutes). This purges any air in the water lines that could cause the dispenser to drip.
Check the amount of water supplied to the
icemaker.
1.Open the freezer door.
2.Lift the icemaker cover up and out to remove it from the freezer door.
Icemaker cover
k,_ | J |
•It will take a few minutes to fill the icemaker with water.
•Do not press the test button continuously when the tray is filled with ice or water. Water could overflow or ice jamming could occur.
•When the bucket is not installed, the icemaker does not work.
•If ICE OFF blinks on the LCD display panel, reinsert the bucket and/or make sure it is installed
properly.
. Press and hold the test button on the icemaker for 3 seconds. The icemaker will automatically fill with supplied tap water. After the icemaker has completed
filling, check to make sure the amount of water is correct.
Test button
If the water level is too low, the ice cubes will be small. Contact a plumber to increase the water pressure to the refrigerator.
. Replace the icemaker cover and close the freezer door.
14
