
790.4672 specifications
The Kenmore 790.4672 is a versatile and efficient gas range designed to meet the culinary demands of modern kitchens. This appliance is part of Kenmore's well-regarded line of ovens, known for combining innovation with reliability. Its stylish stainless steel finish not only enhances its aesthetic appeal but also ensures durability and easy maintenance.One of the standout features of the Kenmore 790.4672 is its robust four-burner gas cooktop. The range includes a variety of burner sizes, featuring a powerful 17,000 BTU burner for rapid boiling and high-heat cooking, along with a 9,500 BTU burner for everyday cooking needs. Additionally, the two 5,000 BTU burners provide gentle heat, perfect for simmering sauces or cooking delicate dishes. This configuration allows for multiple dishes to be prepared simultaneously, catering to the needs of families or entertaining guests.
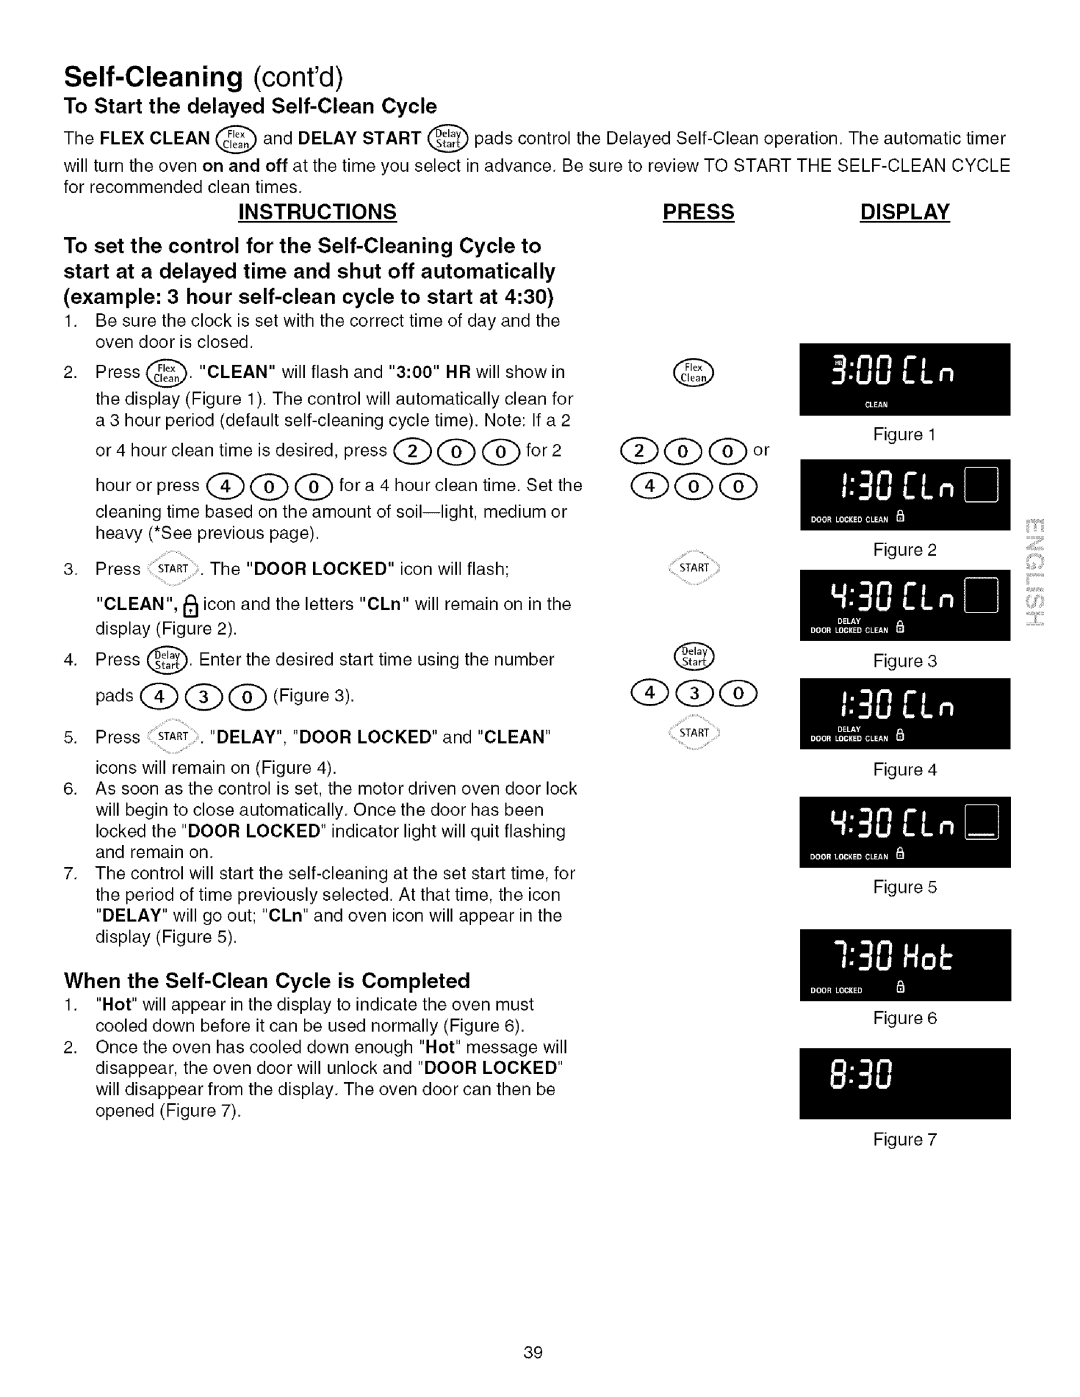
The oven is noteworthy for its impressive capacity, providing ample space to bake large items such as turkeys or multiple trays of cookies. With a user-friendly design, it features a convenient digital display and intuitive control knobs, allowing users to easily set temperatures and time. The oven also boasts a self-cleaning feature, simplifying maintenance and ensuring that the oven remains in pristine condition without the need for harsh scrubbing.
One of the highlighted technologies in the Kenmore 790.4672 is its precision oven temperature management system. This feature helps maintain consistent heat, ensuring evenly baked goods and perfectly roasted meats. This model also includes a reliable and efficient broiler for achieving a delightful golden finish on various dishes.
Safety is a priority with the Kenmore 790.4672, as it includes a robust flame failure safety system. This technology ensures that gas is automatically shut off if the flame extinguishes unexpectedly, enhancing safety in the kitchen.
Overall, the Kenmore 790.4672 combines modern features with user-friendly elements, making it an excellent choice for those who aspire to bring creativity and efficiency to their cooking experience. With its blend of performance, technology, and style, this gas range is poised to become the centerpiece of any kitchen, catering to both novice cooks and seasoned chefs alike. Through its thoughtful design and impressive capabilities, the 790.4672 stands out as a reliable partner in culinary endeavors.